


More on Technology

Nikhil Vemu
3 years ago
7 Mac Apps That Are Exorbitantly Priced But Totally Worth It
Wish you more bang for your buck
By ‘Cost a Bomb’ I didn’t mean to exaggerate. It’s an idiom that means ‘To be very expensive’. In fact, no app on the planet costs a bomb lol.
So, to the point.
Chronicle
(Freemium. For Pro, $24.99 | Available on Setapp)
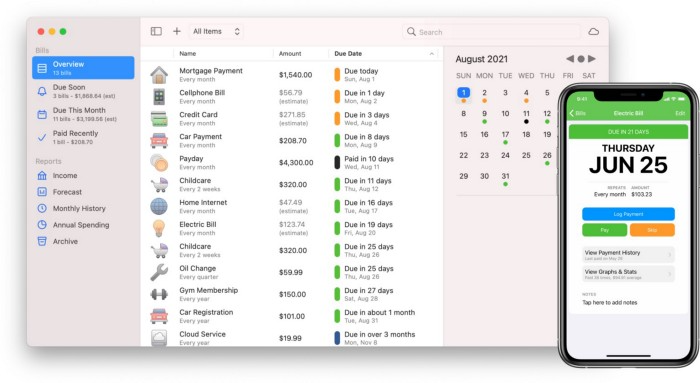
You probably have trouble keeping track of dozens of bills and subscriptions each month.
Try Chronicle.
Easy-to-use app
Add payment due dates and receive reminders,
Save payment documentation,
Analyze your spending by season, year, and month.
Observe expenditure trends and create new budgets.
Best of all, Chronicle features an integrated browser for fast payment and logging.
iOS and macOS sync.
SoundSource
($39 for lifetime)
Background Music, a free macOS program, was featured in #6 of this post last month.
It controls per-app volume, stereo balance, and audio over its max level.
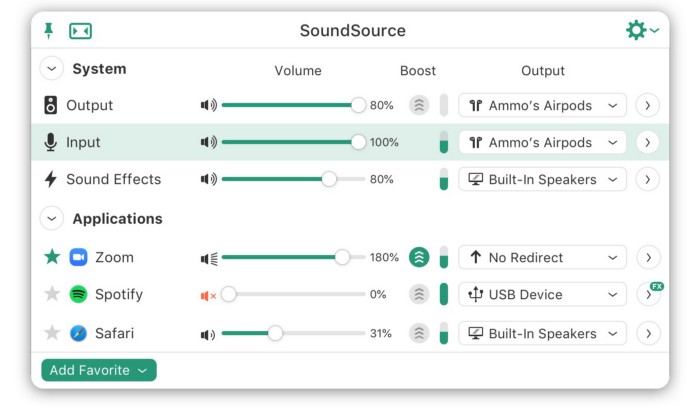
Background Music is fully supported. Additionally,
Connect various speakers to various apps (Wow! ),
change the audio sample rate for each app,
To facilitate access, add a floating SoundSource window.
Use its blocks in Shortcuts app,
On the menu bar, include meters for output/input devices and running programs.
PixelSnap
($39 for lifetime | Available on Setapp)
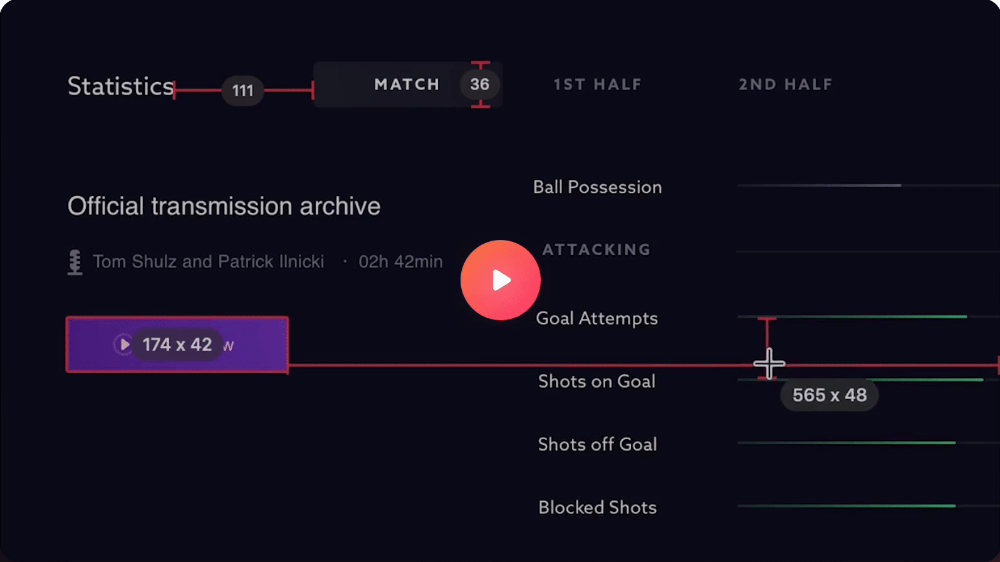
This software is heaven for UI designers.
It aids you.
quickly calculate screen distances (in pixels) ,
Drag an area around an object to determine its borders,
Measure the distances between the additional guides,
screenshots should be pixel-perfect.
What’s more.
You can
Adapt your tolerance for items with poor contrast and shadows.
Use your Touch Bar to perform important tasks, if you have one.
Mate Translation
($3.99 a month / $29.99 a year | Available on Setapp)
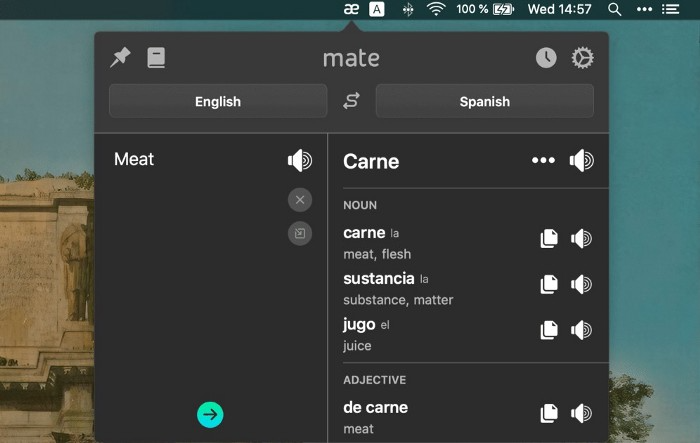
Mate Translate resembles a roided-up version of BarTranslate, which I wrote about in #1 of this piece last month.
If you translate often, utilize Mate Translate on macOS and Safari.
I'm really vocal about it.
It stays on the menu bar, and is accessible with a click or ⌥+shift+T hotkey.
It lets you
Translate in 103 different languages,
To translate text, double-click or right-click on it.
Totally translate websites. Additionally, Netflix subtitles,
Listen to their pronunciation to see how close it is to human.
iPhone and Mac sync Mate-ing history.
Swish
($16 for lifetime | Available on Setapp)
Swish is awesome!
Swipe, squeeze, tap, and hold movements organize chaotic desktop windows. Swish operates with mouse and trackpad.
Some gestures:
• Pinch Once: Close an app
• Pinch Twice: Quit an app
• Swipe down once: Minimise an app
• Pinch Out: Enter fullscreen mode
• Tap, Hold, & Swipe: Arrange apps in grids
 and many more...

After getting acquainted to the movements, your multitasking will improve.
Unite
($24.99 for lifetime | Available on Setapp)
It turns webapps into macOS apps. The end.
Unite's functionality is a million times better.
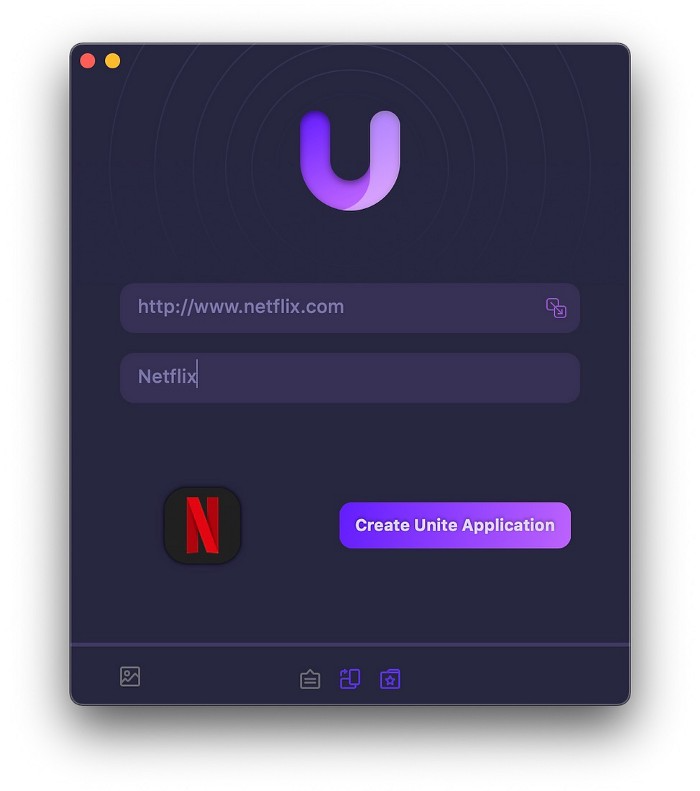
Provide extensive customization (incl. its icon, light and dark modes)
make menu bar applications,
Get badges for web notifications and automatically refresh websites,
Replace any dock icon in the window with it (Wow!) by selecting that portion of the window.

Use PiP (Picture-in-Picture) on video sites that support it.
Delete advertising,
Throughout macOS, use floating windows
and many more…
I feel $24.99 one-off for this tool is a great deal, considering all these features. What do you think?
CleanShot X
(Basic: $29 one-off. Pro: $8/month | Available on Setapp)
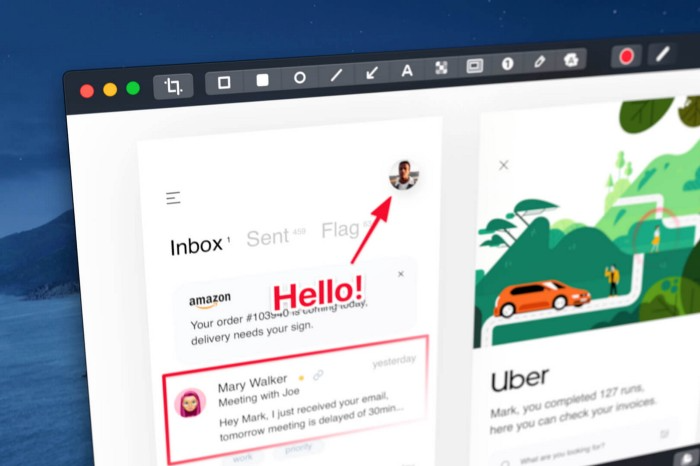
CleanShot X can achieve things the macOS screenshot tool cannot. Complete screenshot toolkit.
CleanShot X, like Pixel Snap 2 (#3), is fantastic.
Allows
Scroll to capture a long page,
screen recording,
With webcam on,
• With mic and system audio,
• Highlighting mouse clicks and hotkeys.
Maintain floating screenshots for reference
While capturing, conceal desktop icons and notifications.
Recognize text in screenshots (OCR),
You may upload and share screenshots using the built-in cloud.
These are just 6 in 50+ features, and you’re already saying Wow!

Gareth Willey
3 years ago
I've had these five apps on my phone for a long time.
TOP APPS
Who survives spring cleaning?
Relax. Notion is off-limits. This topic is popular.
(I wrote about it 2 years ago, before everyone else did.) So).
These apps are probably new to you. I hope you find a new phone app after reading this.
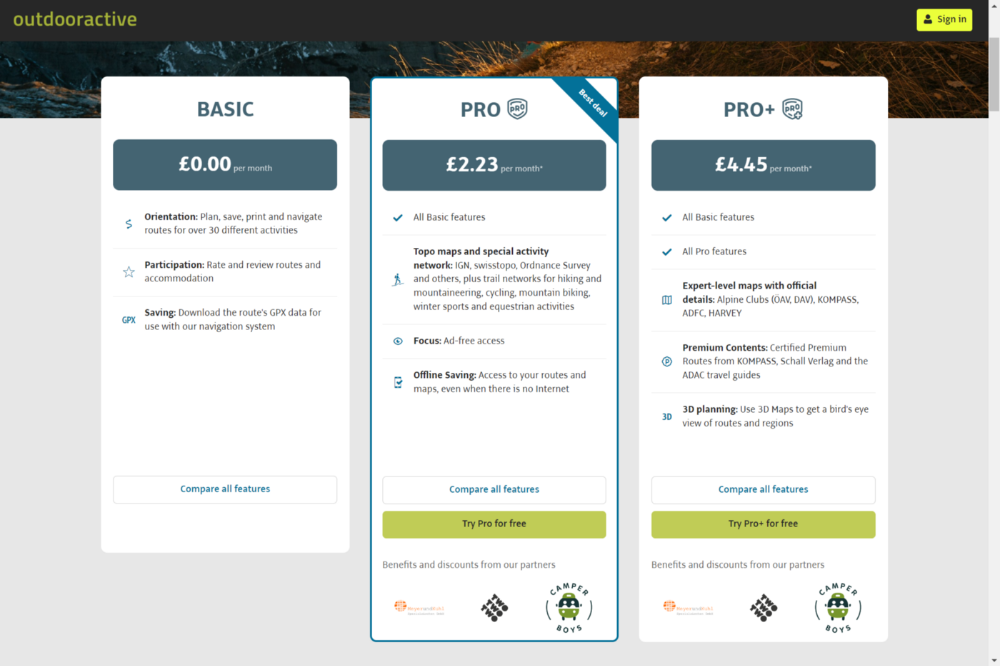
Outdooractive
ViewRanger is Google Maps for outdoor enthusiasts.
This app has been so important to me as a freedom-loving long-distance walker and hiker.
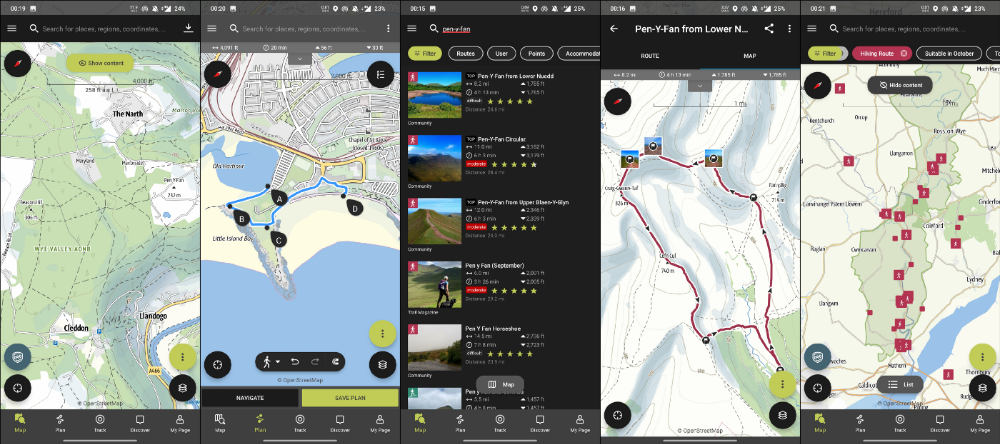
This app shows nearby trails and right-of-ways on top of an Open Street Map.
Helpful detail and data. Any route's distance,
You can download and follow tons of routes planned by app users.
This has helped me find new routes and places a fellow explorer has tried.
Free with non-intrusive ads. Years passed before I subscribed. Pro costs £2.23/month.
This app is for outdoor lovers.
Google Files
New phones come with bloatware. These rushed apps are frustrating.
We must replace these apps. 2017 was Google's year.
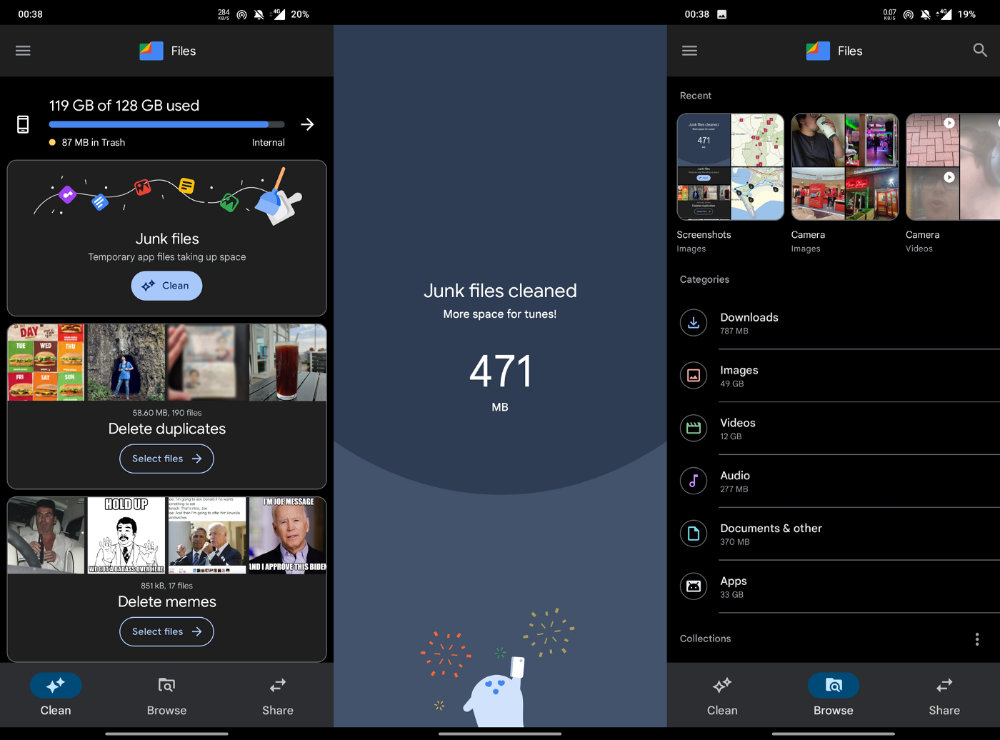
Files is a file manager. It's quick, innovative, and clean. They've given people what they want.
It's easy to organize files, clear space, and clear cache.
I recommend Gallery by Google as a gallery app alternative. It's quick and easy.
Trainline
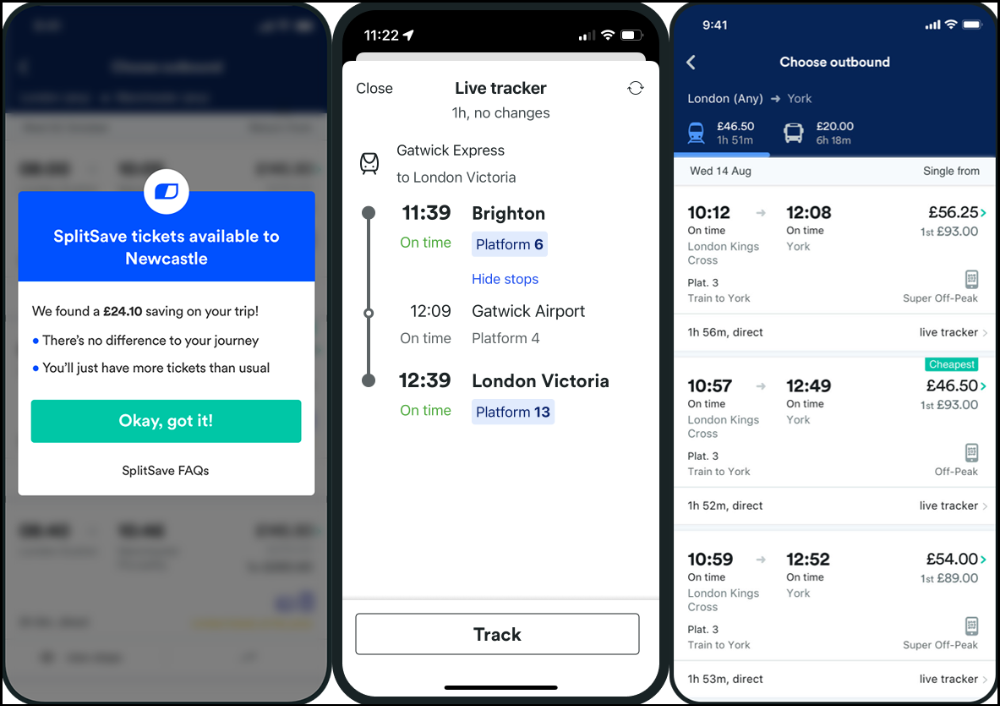
App for trains, buses, and coaches.
I've used this app for years. It did the basics well when I first used it.
Since then, it's improved. It's constantly adding features to make traveling easier and less stressful.
Split-ticketing helps me save hundreds a year on train fares. This app is only available in the UK and Europe.
This service doesn't link to a third-party site. Their app handles everything.
Not all train and coach companies use this app. All the big names are there, though.
Here's more on the app.
Battlefield: Mobile
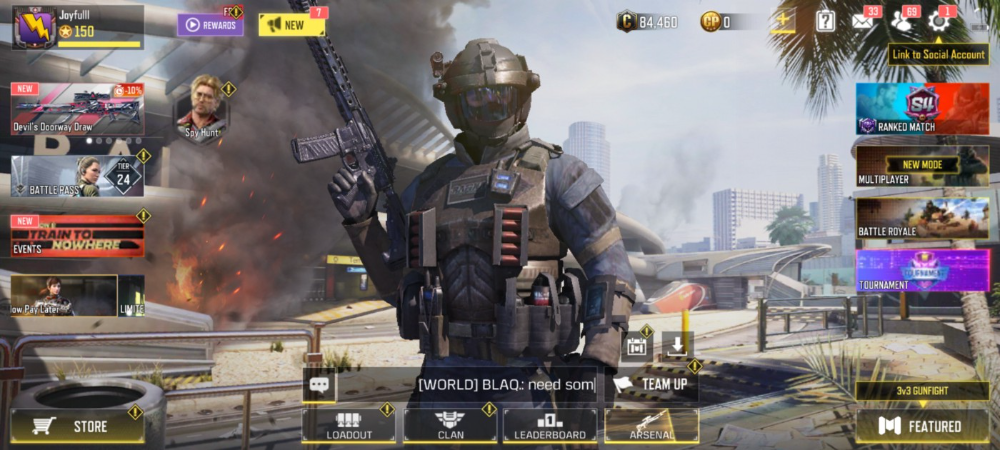
Play Store has 478,000 games. Few can turn my phone into a console.
Call of Duty Mobile and Asphalt 8/9 are examples.
Asphalt's loot boxes and ads make it unplayable. Call of Duty opens with a few ads. Close them to play without hassle.
This game uses all your phone's features to provide a high-quality, seamless experience. If my internet connection is good, I never experience lag or glitches.
The gameplay is energizing and intense, just like on consoles. Sometimes I'm too involved. I've thrown my phone in anger. I'm totally absorbed.
Customizability is my favorite. Since phones have limited screen space, we should only have the buttons we need, placed conveniently.
Size, opacity, and position are modifiable. Adjust audio, graphics, and textures. It's customizable.
This game has been on my phone for three years. It began well and has gotten better. When I think the creators can't do more, they do.
If you play, read my tips for winning a Battle Royale.
Lightroom
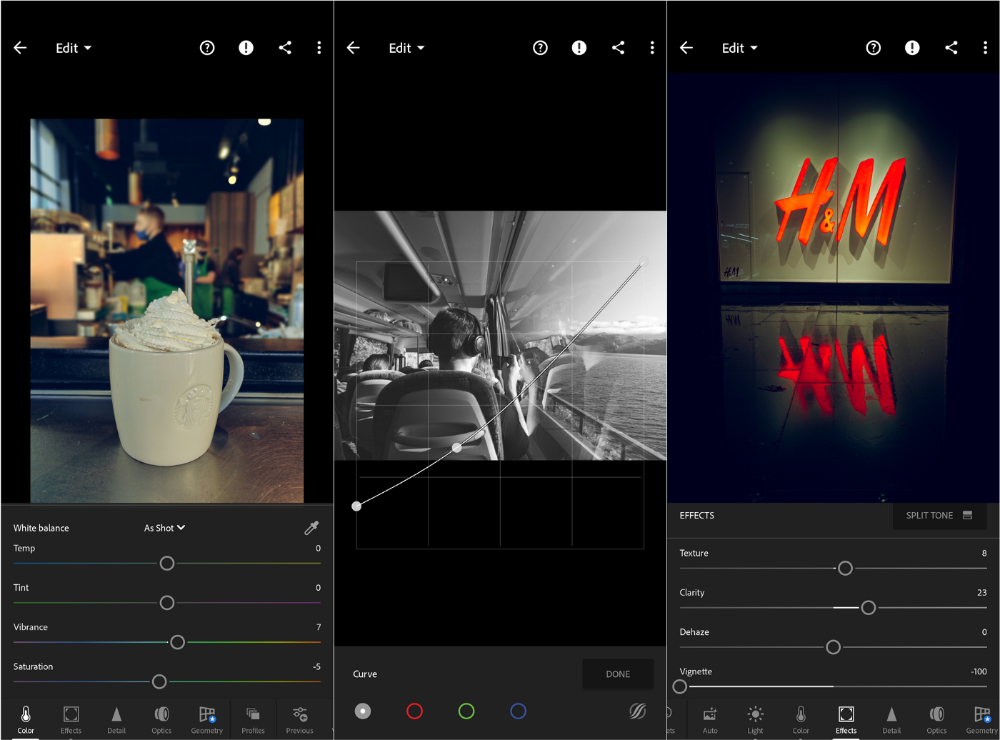
As a photographer, I believe your best camera is on you. The phone.
2017 was a big year for this app. I've tried many photo-editing apps since then. This always wins.
The app is dull. I've never seen better photo editing on a phone.
Adjusting settings and sliders doesn't damage or compress photos. It's detailed.
This is important for phone photos, which are lower quality than professional ones.
Some tools are behind a £4.49/month paywall. Adobe must charge a subscription fee instead of selling licenses. (I'm still bitter about Creative Cloud's price)
Snapseed is my pick. Lightroom is where I do basic editing before moving to Snapseed. Snapseed review:
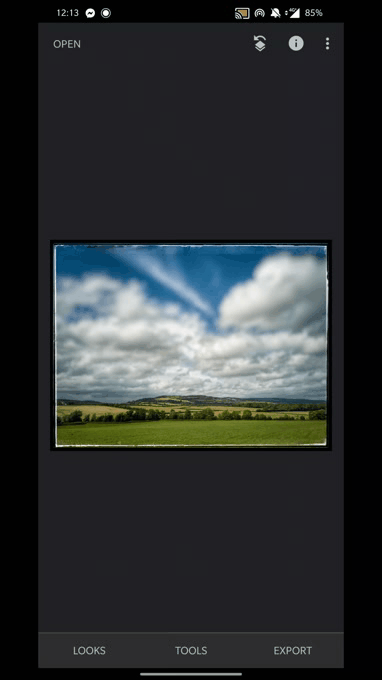
These apps are great. They cover basic and complex editing needs while traveling.
Final Reflections
I hope you downloaded one of these. Share your favorite apps. These apps are scarce.

Will Lockett
3 years ago
The World Will Change With MIT's New Battery

It's cheaper, faster charging, longer lasting, safer, and better for the environment.
Batteries are the future. Next-gen and planet-saving technology, including solar power and EVs, require batteries. As these smart technologies become more popular, we find that our batteries can't keep up. Lithium-ion batteries are expensive, slow to charge, big, fast to decay, flammable, and not environmentally friendly. MIT just created a new battery that eliminates all of these problems. So, is this the battery of the future? Or is there a catch?
When I say entirely new, I mean it. This battery employs no currently available materials. Its electrodes are constructed of aluminium and pure sulfur instead of lithium-complicated ion's metals and graphite. Its electrolyte is formed of molten chloro-aluminate salts, not an organic solution with lithium salts like lithium-ion batteries.
How does this change in materials help?
Aluminum, sulfur, and chloro-aluminate salts are abundant, easy to acquire, and cheap. This battery might be six times cheaper than a lithium-ion battery and use less hazardous mining. The world and our wallets will benefit.
But don’t go thinking this means it lacks performance.
This battery charged in under a minute in tests. At 25 degrees Celsius, the battery will charge 25 times slower than at 110 degrees Celsius. This is because the salt, which has a very low melting point, is in an ideal state at 110 degrees and can carry a charge incredibly quickly. Unlike lithium-ion, this battery self-heats when charging and discharging, therefore no external heating is needed.
Anyone who's seen a lithium-ion battery burst might be surprised. Unlike lithium-ion batteries, none of the components in this new battery can catch fire. Thus, high-temperature charging and discharging speeds pose no concern.
These batteries are long-lasting. Lithium-ion batteries don't last long, as any iPhone owner can attest. During charging, metal forms a dendrite on the electrode. This metal spike will keep growing until it reaches the other end of the battery, short-circuiting it. This is why phone batteries only last a few years and why electric car range decreases over time. This new battery's molten salt slows deposition, extending its life. This helps the environment and our wallets.
These batteries are also energy dense. Some lithium-ion batteries have 270 Wh/kg energy density (volume and mass). Aluminum-sulfur batteries could have 1392 Wh/kg, according to calculations. They'd be 5x more energy dense. Tesla's Model 3 battery would weigh 96 kg instead of 480 kg if this battery were used. This would improve the car's efficiency and handling.
These calculations were for batteries without molten salt electrolyte. Because they don't reflect the exact battery chemistry, they aren't a surefire prediction.
This battery seems great. It will take years, maybe decades, before it reaches the market and makes a difference. Right?
Nope. The project's scientists founded Avanti to develop and market this technology.
So we'll soon be driving cheap, durable, eco-friendly, lightweight, and ultra-safe EVs? Nope.
This battery must be kept hot to keep the salt molten; otherwise, it won't work and will expand and contract, causing damage. This issue could be solved by packs that can rapidly pre-heat, but that project is far off.
Rapid and constant charge-discharge cycles make these batteries ideal for solar farms, homes, and EV charging stations. The battery is constantly being charged or discharged, allowing it to self-heat and maintain an ideal temperature.
These batteries aren't as sexy as those making EVs faster, more efficient, and cheaper. Grid batteries are crucial to our net-zero transition because they allow us to use more low-carbon energy. As we move away from fossil fuels, we'll need millions of these batteries, so the fact that they're cheap, safe, long-lasting, and environmentally friendly will be huge. Who knows, maybe EVs will use this technology one day. MIT has created another world-changing technology.
You might also like

Emma Jade
3 years ago
6 hacks to create content faster
Content gurus' top time-saving hacks.
I'm a content strategist, writer, and graphic designer. Time is more valuable than money.
Money is always available. Even if you're poor. Ways exist.
Time is passing, and one day we'll run out.
Sorry to be morbid.
In today's digital age, you need to optimize how you create content for your organization. Here are six content creation hacks.
1. Use templates
Use templates to streamline your work whether generating video, images, or documents.
Setup can take hours. Using a free resource like Canva, you can create templates for any type of material.
This will save you hours each month.
2. Make a content calendar
You post without a plan? A content calendar solves 50% of these problems.
You can prepare, organize, and plan your material ahead of time so you're not scrambling when you remember, "Shit, it's Mother's Day!"
3. Content Batching
Batching content means creating a lot in one session. This is helpful for video content that requires a lot of setup time.
Batching monthly content saves hours. Time is a valuable resource.
When working on one type of task, it's easy to get into a flow state. This saves time.
4. Write Caption
On social media, we generally choose the image first and then the caption. Writing captions first sometimes work better, though.
Writing the captions first can allow you more creative flexibility and be easier if you're not excellent with language.
Say you want to tell your followers something interesting.
Writing a caption first is easier than choosing an image and then writing a caption to match.
Not everything works. You may have already-created content that needs captioning. When you don't know what to share, think of a concept, write the description, and then produce a video or graphic.
Cats can be skinned in several ways..
5. Repurpose
Reuse content when possible. You don't always require new stuff. In fact, you’re pretty stupid if you do #SorryNotSorry.
Repurpose old content. All those blog entries, videos, and unfinished content on your desk or hard drive.
This blog post can be turned into a social media infographic. Canva's motion graphic function can animate it. I can record a YouTube video regarding this issue for a podcast. I can make a post on each point in this blog post and turn it into an eBook or paid course.
And it doesn’t stop there.
My point is, to think outside the box and really dig deep into ways you can leverage the content you’ve already created.
6. Schedule Them
If you're still manually posting content, get help. When you batch your content, schedule it ahead of time.
Some scheduling apps are free or cheap. No excuses.
Don't publish and ghost.
Scheduling saves time by preventing you from doing it manually. But if you never engage with your audience, the algorithm won't reward your material.
Be online and engage your audience.
Content Machine
Use these six content creation hacks. They help you succeed and save time.

Eitan Levy
3 years ago
The Top 8 Growth Hacking Techniques for Startups
The Top 8 Growth Hacking Techniques for Startups

These startups, and how they used growth-hack marketing to flourish, are some of the more ethical ones, while others are less so.
Before the 1970 World Cup began, Puma paid footballer Pele $120,000 to tie his shoes. The cameras naturally focused on Pele and his Pumas, causing people to realize that Puma was the top football brand in the world.
Early workers of Uber canceled over 5,000 taxi orders made on competing applications in an effort to financially hurt any of their rivals.
PayPal developed a bot that advertised cheap goods on eBay, purchased them, and paid for them with PayPal, fooling eBay into believing that customers preferred this payment option. Naturally, Paypal became eBay's primary method of payment.
Anyone renting a space on Craigslist had their emails collected by AirBnB, who then urged them to use their service instead. A one-click interface was also created to list immediately on AirBnB from Craigslist.
To entice potential single people looking for love, Tinder developed hundreds of bogus accounts of attractive people. Additionally, for at least a year, users were "accidentally" linked.
Reddit initially created a huge number of phony accounts and forced them all to communicate with one another. It eventually attracted actual users—the real meaning of "fake it 'til you make it"! Additionally, this gave Reddit control over the tone of voice they wanted for their site, which is still present today.
To disrupt the conferences of their main rival, Salesforce recruited fictitious protestors. The founder then took over all of the event's taxis and gave a 45-minute pitch for his startup. No place to hide!
When a wholesaler required a minimum purchase of 10, Amazon CEO Jeff Bezos wanted a way to purchase only one book from them. A wholesaler would deliver the one book he ordered along with an apology for the other eight books after he discovered a loophole and bought the one book before ordering nine books about lichens. On Amazon, he increased this across all of the users.
Original post available here

Jim Siwek
3 years ago
In 2022, can a lone developer be able to successfully establish a SaaS product?
In the early 2000s, I began developing SaaS. I helped launch an internet fax service that delivered faxes to email inboxes. Back then, it saved consumers money and made the procedure easier.
Google AdWords was young then. Anyone might establish a new website, spend a few hundred dollars on keywords, and see dozens of new paying clients every day. That's how we launched our new SaaS, and these clients stayed for years. Our early ROI was sky-high.
Changing times
The situation changed dramatically after 15 years. Our paid advertising cost $200-$300 for every new customer. Paid advertising takes three to four years to repay.
Fortunately, we still had tens of thousands of loyal clients. Good organic rankings gave us new business. We needed less sponsored traffic to run a profitable SaaS firm.
Is it still possible?
Since selling our internet fax firm, I've dreamed about starting a SaaS company. One I could construct as a lone developer and progressively grow a dedicated customer base, as I did before in a small team.
It seemed impossible to me. Solo startups couldn't afford paid advertising. SEO was tough. Even the worst SaaS startup ideas attracted VC funding. How could I compete with startups that could hire great talent and didn't need to make money for years (or ever)?
The One and Only Way to Learn
After years of talking myself out of SaaS startup ideas, I decided to develop and launch one. I needed to know if a solitary developer may create a SaaS app in 2022.
Thus, I did. I invented webwriter.ai, an AI-powered writing tool for website content, from hero section headlines to blog posts, this year. I soft-launched an MVP in July.
Considering the Issue
Now that I've developed my own fully capable SaaS app for site builders and developers, I wonder if it's still possible. Can webwriter.ai be successful?
I know webwriter.ai's proposal is viable because Jasper.ai and Grammarly are also AI-powered writing tools. With competition comes validation.
To Win, Differentiate
To compete with well-funded established brands, distinguish to stand out to a portion of the market. So I can speak directly to a target user, unlike larger competition.
I created webwriter.ai to help web builders and designers produce web content rapidly. This may be enough differentiation for now.
Budget-Friendly Promotion
When paid search isn't an option, we get inventive. There are more tools than ever to promote a new website.
Organic Results
on social media (Twitter, Instagram, TikTok, LinkedIn)
Marketing with content that is compelling
Link Creation
Listings in directories
references made in blog articles and on other websites
Forum entries
The Beginning of the Journey
As I've labored to construct my software, I've pondered a new mantra. Not sure where that originated from, but I like it. I'll live by it and teach my kids:
“Do the work.”