


How to make a >800 million dollars in crypto attacking the once 3rd largest stablecoin, Soros style
Everyone is talking about the $UST attack right now, including Janet Yellen. But no one is talking about how much money the attacker made (or how brilliant it was). Lets dig in.
Our story starts in late March, when the Luna Foundation Guard (or LFG) starts buying BTC to help back $UST. LFG started accumulating BTC on 3/22, and by March 26th had a $1bn+ BTC position. This is leg #1 that made this trade (or attack) brilliant.
The second leg comes in the form of the 4pool Frax announcement for $UST on April 1st. This added the second leg needed to help execute the strategy in a capital efficient way (liquidity will be lower and then the attack is on).
We don't know when the attacker borrowed 100k BTC to start the position, other than that it was sold into Kwon's buying (still speculation). LFG bought 15k BTC between March 27th and April 11th, so lets just take the average price between these dates ($42k).
So you have a ~$4.2bn short position built. Over the same time, the attacker builds a $1bn OTC position in $UST. The stage is now set to create a run on the bank and get paid on your BTC short. In anticipation of the 4pool, LFG initially removes $150mm from 3pool liquidity.
The liquidity was pulled on 5/8 and then the attacker uses $350mm of UST to drain curve liquidity (and LFG pulls another $100mm of liquidity).
But this only starts the de-pegging (down to 0.972 at the lows). LFG begins selling $BTC to defend the peg, causing downward pressure on BTC while the run on $UST was just getting started.
With the Curve liquidity drained, the attacker used the remainder of their $1b OTC $UST position ($650mm or so) to start offloading on Binance. As withdrawals from Anchor turned from concern into panic, this caused a real de-peg as people fled for the exits
So LFG is selling $BTC to restore the peg while the attacker is selling $UST on Binance. Eventually the chain gets congested and the CEXs suspend withdrawals of $UST, fueling the bank run panic. $UST de-pegs to 60c at the bottom, while $BTC bleeds out.
The crypto community panics as they wonder how much $BTC will be sold to keep the peg. There are liquidations across the board and LUNA pukes because of its redemption mechanism (the attacker very well could have shorted LUNA as well). BTC fell 25% from $42k on 4/11 to $31.3k
So how much did our attacker make? There aren't details on where they covered obviously, but if they are able to cover (or buy back) the entire position at ~$32k, that means they made $952mm on the short.
On the $350mm of $UST curve dumps I don't think they took much of a loss, lets assume 3% or just $11m. And lets assume that all the Binance dumps were done at 80c, thats another $125mm cost of doing business. For a grand total profit of $815mm (bf borrow cost).
BTC was the perfect playground for the trade, as the liquidity was there to pull it off. While having LFG involved in BTC, and foreseeing they would sell to keep the peg (and prevent LUNA from dying) was the kicker.
Lastly, the liquidity being low on 3pool in advance of 4pool allowed the attacker to drain it with only $350mm, causing the broader panic in both BTC and $UST. Any shorts on LUNA would've added a lot of P&L here as well, with it falling -65% since 5/7.
And for the reply guys, yes I know a lot of this involves some speculation & assumptions. But a lot of money was made here either way, and I thought it would be cool to dive into how they did it.
More on Web3 & Crypto

Koji Mochizuki
4 years ago
How to Launch an NFT Project by Yourself
Creating 10,000 auto-generated artworks, deploying a smart contract to the Ethereum / Polygon blockchain, setting up some tools, etc.
There is so much to do from launching to running an NFT project. Creating parts for artworks, generating 10,000 unique artworks and metadata, creating a smart contract and deploying it to a blockchain network, creating a website, creating a Twitter account, setting up a Discord server, setting up an OpenSea collection. In addition, you need to have MetaMask installed in your browser and have some ETH / MATIC. Did you get tired of doing all this? Don’t worry, once you know what you need to do, all you have to do is do it one by one.
To be honest, it’s best to run an NFT project in a team of three or more, including artists, developers, and marketers. However, depending on your motivation, you can do it by yourself. Some people might come later to offer help with your project. The most important thing is to take a step as soon as possible.
Creating Parts for Artworks
There are lots of free/paid software for drawing, but after all, I think Adobe Illustrator or Photoshop is the best. The images of Skulls In Love are a composite of 48x48 pixel parts created using Photoshop.
The most important thing in creating parts for generative art is to repeatedly test what your artworks will look like after each layer has been combined. The generated artworks should not be too unnatural.
How Many Parts Should You Create?
Are you wondering how many parts you should create to avoid duplication as much as possible when generating your artworks? My friend Stephane, a developer, has created a great tool to help with that.
Generating 10,000 Unique Artworks and Metadata
I highly recommend using the HashLips Art Engine to generate your artworks and metadata. Perhaps there is no better artworks generation tool at the moment.
GitHub: https://github.com/HashLips/hashlips_art_engine
YouTube:
Storing Artworks and Metadata
Ideally, the generated artworks and metadata should be stored on-chain, but if you want to store them off-chain, you should use IPFS. Do not store in centralized storage. This is because data will be lost if the server goes down or if the company goes down. On the other hand, IPFS is a more secure way to find data because it utilizes a distributed, decentralized system.
Storing to IPFS is easy with Pinata, NFT.Storage, and so on. The Skulls In Love uses Pinata. It’s very easy to use, just upload the folder containing your artworks.
Creating and Deploying a Smart Contract
You don’t have to create a smart contract from scratch. There are many great NFT projects, many of which publish their contract source code on Etherscan / PolygonScan. You can choose the contract you like and reuse it. Of course, that requires some knowledge of Solidity, but it depends on your efforts. If you don’t know which contract to choose, use the HashLips smart contract. It’s very simple, but it has almost all the functions you need.
GitHub: https://github.com/HashLips/hashlips_nft_contract
Note: Later on, you may want to change the cost value. You can change it on Remix or Etherscan / PolygonScan. But in this case, enter the Wei value instead of the Ether value. For example, if you want to sell for 1 MATIC, you have to enter “1000000000000000000”. If you set this value to “1”, you will have a nightmare. I recommend using Simple Unit Converter as a tool to calculate the Wei value.
Creating a Website
The website here is not just a static site to showcase your project, it’s a so-called dApp that allows you to access your smart contract and mint NFTs. In fact, this level of dApp is not too difficult for anyone who has ever created a website. Because the ethers.js / web3.js libraries make it easy to interact with your smart contract. There’s also no problem connecting wallets, as MetaMask has great documentation.
The Skulls In Love uses a simple, fast, and modern dApp that I built from scratch using Next.js. It is published on GitHub, so feel free to use it.
Why do people mint NFTs on a website?
Ethereum’s gas fees are high, so if you mint all your NFTs, there will be a huge initial cost. So it makes sense to get the buyers to help with the gas fees for minting.
What about Polygon? Polygon’s gas fees are super cheap, so even if you mint 10,000 NFTs, it’s not a big deal. But we don’t do that. Since NFT projects are a kind of game, it involves the fun of not knowing what will come out after minting.
Creating a Twitter Account
I highly recommend creating a Twitter account. Twitter is an indispensable tool for announcing giveaways and reaching more people. It’s better to announce your project and your artworks little by little, 1–2 weeks before launching your project.
Creating and Setting Up a Discord Server
I highly recommend creating a Discord server as well as a Twitter account. The Discord server is a community and its home. Fans of your NFT project will want to join your community and interact with many other members. So, carefully create each channel on your Discord server to make it a cozy place for your community members.
If you are unfamiliar with Discord, you may be particularly confused by the following:
What bots should I use?
How should I set roles and permissions?
But don’t worry. There are lots of great YouTube videos and blog posts about these.
It’s also a good idea to join the Discord servers of some NFT projects and see how they’re made. Our Discord server is so simple that even beginners will find it easy to understand. Please join us and see it!
Note: First, create a test account and a test server to make sure your bots and permissions work properly. It is better to verify the behavior on the test server before setting up your production server.
UPDATED: As your Discord server grows, you cannot manage it on your own. In this case, you will be hiring several moderators, but choose carefully before hiring. And don’t give them important role permissions right after hiring. Initially, the same permissions as other members are sufficient. After a while, you can add permissions as needed, such as kicking/banning, using the “@every” tag, and adding roles. Again, don’t immediately give significant permissions to your Mod role. Your server can be messed up by fake moderators.
Setting Up Your OpenSea Collection
Before you start selling your NFTs, you need to reserve some for airdrops, giveaways, staff, and more. It’s up to you whether it’s 100, 500, or how many.
After minting some of your NFTs, your account and collection should have been created in OpenSea. Go to OpenSea, connect to your wallet, and set up your collection. Just set your logo, banner image, description, links, royalties, and more. It’s not that difficult.
Promoting Your Project
After all, promotion is the most important thing. In fact, almost every successful NFT project spends a lot of time and effort on it.
In addition to Twitter and Discord, it’s even better to use Instagram, Reddit, and Medium. Also, register your project in NFTCalendar and DISBOARD
DISBOARD is the public Discord server listing community.
About Promoters
You’ll probably get lots of contacts from promoters on your Discord, Twitter, Instagram, and more. But most of them are scams, so don’t pay right away. If you have a promoter that looks attractive to you, be sure to check the promoter’s social media accounts or website to see who he/she is. They basically charge in dollars. The amount they charge isn’t cheap, but promoters with lots of followers may have some temporary effect on your project. Some promoters accept 50% prepaid and 50% postpaid. If you can afford it, it might be worth a try. I never ask them, though.
When Should the Promotion Activities Start?
You may be worried that if you promote your project before it starts, someone will copy your project (artworks). It is true that some projects have actually suffered such damage. I don’t have a clear answer to this question right now, but:
- Do not publish all the information about your project too early
- The information should be released little by little
- Creating artworks that no one can easily copy
I think these are important.
If anyone has a good idea, please share it!
About Giveaways
When hosting giveaways, you’ll probably use multiple social media platforms. You may want to grow your Discord server faster. But if joining the Discord server is included in the giveaway requirements, some people hate it. I recommend holding giveaways for each platform. On Twitter and Reddit, you should just add the words “Discord members-only giveaway is being held now! Please join us if you like!”.
If you want to easily pick a giveaway winner in your browser, I recommend Twitter Picker.
Precautions for Distributing Free NFTs
If you want to increase your Twitter followers and Discord members, you can actually get a lot of people by holding events such as giveaways and invite contests. However, distributing many free NFTs at once can be dangerous. Some people who want free NFTs, as soon as they get a free one, sell it at a very low price on marketplaces such as OpenSea. They don’t care about your project and are only thinking about replacing their own “free” NFTs with Ethereum. The lower the floor price of your NFTs, the lower the value of your NFTs (project). Try to think of ways to get people to “buy” your NFTs as much as possible.
Ethereum vs. Polygon
Even though Ethereum has high gas fees, NFT projects on the Ethereum network are still mainstream and popular. On the other hand, Polygon has very low gas fees and fast transaction processing, but NFT projects on the Polygon network are not very popular.
Why? There are several reasons, but the biggest one is that it’s a lot of work to get MATIC (on Polygon blockchain, use MATIC instead of ETH) ready to use. Simply put, you need to bridge your tokens to the Polygon chain. So people need to do this first before minting your NFTs on your website. It may not be a big deal for those who are familiar with crypto and blockchain, but it may be complicated for those who are not. I hope that the tedious work will be simplified in the near future.
If you are confident that your NFTs will be purchased even if they are expensive, or if the total supply of your NFTs is low, you may choose Ethereum. If you just want to save money, you should choose Polygon. Keep in mind that gas fees are incurred not only when minting, but also when performing some of your smart contract functions and when transferring your NFTs.
If I were to launch a new NFT project, I would probably choose Ethereum or Solana.
Conclusion
Some people may want to start an NFT project to make money, but don’t forget to enjoy your own project. Several months ago, I was playing with creating generative art by imitating the CryptoPunks. I found out that auto-generated artworks would be more interesting than I had imagined, and since then I’ve been completely absorbed in generative art.
This is one of the Skulls In Love artworks:
This character wears a cowboy hat, black slim sunglasses, and a kimono. If anyone looks like this, I can’t help laughing!
The Skulls In Love NFTs can be minted for a small amount of MATIC on the official website. Please give it a try to see what kind of unique characters will appear 💀💖
Thank you for reading to the end. I hope this article will be helpful to those who want to launch an NFT project in the future ✨

Ashraful Islam
4 years ago
Clean API Call With React Hooks
| Photo by Juanjo Jaramillo on Unsplash |
Calling APIs is the most common thing to do in any modern web application. When it comes to talking with an API then most of the time we need to do a lot of repetitive things like getting data from an API call, handling the success or error case, and so on.
When calling tens of hundreds of API calls we always have to do those tedious tasks. We can handle those things efficiently by putting a higher level of abstraction over those barebone API calls, whereas in some small applications, sometimes we don’t even care.
The problem comes when we start adding new features on top of the existing features without handling the API calls in an efficient and reusable manner. In that case for all of those API calls related repetitions, we end up with a lot of repetitive code across the whole application.
In React, we have different approaches for calling an API. Nowadays mostly we use React hooks. With React hooks, it’s possible to handle API calls in a very clean and consistent way throughout the application in spite of whatever the application size is. So let’s see how we can make a clean and reusable API calling layer using React hooks for a simple web application.
I’m using a code sandbox for this blog which you can get here.
import "./styles.css";
import React, { useEffect, useState } from "react";
import axios from "axios";
export default function App() {
const [posts, setPosts] = useState(null);
const [error, setError] = useState("");
const [loading, setLoading] = useState(false);
useEffect(() => {
handlePosts();
}, []);
const handlePosts = async () => {
setLoading(true);
try {
const result = await axios.get(
"https://jsonplaceholder.typicode.com/posts"
);
setPosts(result.data);
} catch (err) {
setError(err.message || "Unexpected Error!");
} finally {
setLoading(false);
}
};
return (
<div className="App">
<div>
<h1>Posts</h1>
{loading && <p>Posts are loading!</p>}
{error && <p>{error}</p>}
<ul>
{posts?.map((post) => (
<li key={post.id}>{post.title}</li>
))}
</ul>
</div>
</div>
);
}
I know the example above isn’t the best code but at least it’s working and it’s valid code. I will try to improve that later. For now, we can just focus on the bare minimum things for calling an API.
Here, you can try to get posts data from JsonPlaceholer. Those are the most common steps we follow for calling an API like requesting data, handling loading, success, and error cases.
If we try to call another API from the same component then how that would gonna look? Let’s see.
500: Internal Server Error
Now it’s going insane! For calling two simple APIs we’ve done a lot of duplication. On a top-level view, the component is doing nothing but just making two GET requests and handling the success and error cases. For each request, it’s maintaining three states which will periodically increase later if we’ve more calls.
Let’s refactor to make the code more reusable with fewer repetitions.
Step 1: Create a Hook for the Redundant API Request Codes
Most of the repetitions we have done so far are about requesting data, handing the async things, handling errors, success, and loading states. How about encapsulating those things inside a hook?
The only unique things we are doing inside handleComments and handlePosts are calling different endpoints. The rest of the things are pretty much the same. So we can create a hook that will handle the redundant works for us and from outside we’ll let it know which API to call.
500: Internal Server Error
Here, this request function is identical to what we were doing on the handlePosts and handleComments. The only difference is, it’s calling an async function apiFunc which we will provide as a parameter with this hook. This apiFunc is the only independent thing among any of the API calls we need.
With hooks in action, let’s change our old codes in App component, like this:
500: Internal Server Error
How about the current code? Isn’t it beautiful without any repetitions and duplicate API call handling things?
Let’s continue our journey from the current code. We can make App component more elegant. Now it knows a lot of details about the underlying library for the API call. It shouldn’t know that. So, here’s the next step…
Step 2: One Component Should Take Just One Responsibility
Our App component knows too much about the API calling mechanism. Its responsibility should just request the data. How the data will be requested under the hood, it shouldn’t care about that.
We will extract the API client-related codes from the App component. Also, we will group all the API request-related codes based on the API resource. Now, this is our API client:
import axios from "axios";

const apiClient = axios.create({
  // Later read this URL from an environment variable
  baseURL: "https://jsonplaceholder.typicode.com"
});

export default apiClient;
All API calls for comments resource will be in the following file:
import client from "./client";

const getComments = () => client.get("/comments");

export default {
  getComments
};
All API calls for posts resource are placed in the following file:
import client from "./client";

const getPosts = () => client.get("/posts");

export default {
  getPosts
};
Finally, the App component looks like the following:
import "./styles.css";
import React, { useEffect } from "react";
import commentsApi from "./api/comments";
import postsApi from "./api/posts";
import useApi from "./hooks/useApi";

export default function App() {
  const getPostsApi = useApi(postsApi.getPosts);
  const getCommentsApi = useApi(commentsApi.getComments);

  useEffect(() => {
    getPostsApi.request();
    getCommentsApi.request();
  }, []);

  return (
    <div className="App">
      {/* Post List */}
      <div>
        <h1>Posts</h1>
        {getPostsApi.loading && <p>Posts are loading!</p>}
        {getPostsApi.error && <p>{getPostsApi.error}</p>}
        <ul>
          {getPostsApi.data?.map((post) => (
            <li key={post.id}>{post.title}</li>
          ))}
        </ul>
      </div>
      {/* Comment List */}
      <div>
        <h1>Comments</h1>
        {getCommentsApi.loading && <p>Comments are loading!</p>}
        {getCommentsApi.error && <p>{getCommentsApi.error}</p>}
        <ul>
          {getCommentsApi.data?.map((comment) => (
            <li key={comment.id}>{comment.name}</li>
          ))}
        </ul>
      </div>
    </div>
  );
}
Now it doesn’t know anything about how the APIs get called. Tomorrow if we want to change the API calling library from axios to fetch or anything else, our App component code will not get affected. We can just change the codes form client.js This is the beauty of abstraction.
Apart from the abstraction of API calls, Appcomponent isn’t right the place to show the list of the posts and comments. It’s a high-level component. It shouldn’t handle such low-level data interpolation things.
So we should move this data display-related things to another low-level component. Here I placed those directly in the App component just for the demonstration purpose and not to distract with component composition-related things.
Final Thoughts
The React library gives the flexibility for using any kind of third-party library based on the application’s needs. As it doesn’t have any predefined architecture so different teams/developers adopted different approaches to developing applications with React. There’s nothing good or bad. We choose the development practice based on our needs/choices. One thing that is there beyond any choices is writing clean and maintainable codes.

Juxtathinka
3 years ago
Why Is Blockchain So Popular?
What is Bitcoin?
The blockchain is a shared, immutable ledger that helps businesses record transactions and track assets. The blockchain can track tangible assets like cars, houses, and land. Tangible assets like intellectual property can also be tracked on the blockchain.
Imagine a blockchain as a distributed database split among computer nodes. A blockchain stores data in blocks. When a block is full, it is closed and linked to the next. As a result, all subsequent information is compiled into a new block that will be added to the chain once it is filled.
The blockchain is designed so that adding a transaction requires consensus. That means a majority of network nodes must approve a transaction. No single authority can control transactions on the blockchain. The network nodes use cryptographic keys and passwords to validate each other's transactions.
Blockchain History
The blockchain was not as popular in 1991 when Stuart Haber and W. Scott Stornetta worked on it. The blocks were designed to prevent tampering with document timestamps. Stuart Haber and W. Scott Stornetta improved their work in 1992 by using Merkle trees to increase efficiency and collect more documents on a single block.
In 2004, he developed Reusable Proof of Work. This system allows users to verify token transfers in real time. Satoshi Nakamoto invented distributed blockchains in 2008. He improved the blockchain design so that new blocks could be added to the chain without being signed by trusted parties.
Satoshi Nakomoto mined the first Bitcoin block in 2009, earning 50 Bitcoins. Then, in 2013, Vitalik Buterin stated that Bitcoin needed a scripting language for building decentralized applications. He then created Ethereum, a new blockchain-based platform for decentralized apps. Since the Ethereum launch in 2015, different blockchain platforms have been launched: from Hyperledger by Linux Foundation, EOS.IO by block.one, IOTA, NEO and Monero dash blockchain. The block chain industry is still growing, and so are the businesses built on them.
Blockchain Components
The Blockchain is made up of many parts:
1. Node: The node is split into two parts: full and partial. The full node has the authority to validate, accept, or reject any transaction. Partial nodes or lightweight nodes only keep the transaction's hash value. It doesn't keep a full copy of the blockchain, so it has limited storage and processing power.
2. Ledger: A public database of information. A ledger can be public, decentralized, or distributed. Anyone on the blockchain can access the public ledger and add data to it. It allows each node to participate in every transaction. The distributed ledger copies the database to all nodes. A group of nodes can verify transactions or add data blocks to the blockchain.
3. Wallet: A blockchain wallet allows users to send, receive, store, and exchange digital assets, as well as monitor and manage their value. Wallets come in two flavors: hardware and software. Online or offline wallets exist. Online or hot wallets are used when online. Without an internet connection, offline wallets like paper and hardware wallets can store private keys and sign transactions. Wallets generally secure transactions with a private key and wallet address.
4. Nonce: A nonce is a short term for a "number used once''. It describes a unique random number. Nonces are frequently generated to modify cryptographic results. A nonce is a number that changes over time and is used to prevent value reuse. To prevent document reproduction, it can be a timestamp. A cryptographic hash function can also use it to vary input. Nonces can be used for authentication, hashing, or even electronic signatures.
5. Hash: A hash is a mathematical function that converts inputs of arbitrary length to outputs of fixed length. That is, regardless of file size, the hash will remain unique. A hash cannot generate input from hashed output, but it can identify a file. Hashes can be used to verify message integrity and authenticate data. Cryptographic hash functions add security to standard hash functions, making it difficult to decipher message contents or track senders.
Blockchain: Pros and Cons
The blockchain provides a trustworthy, secure, and trackable platform for business transactions quickly and affordably. The blockchain reduces paperwork, documentation errors, and the need for third parties to verify transactions.
Blockchain security relies on a system of unaltered transaction records with end-to-end encryption, reducing fraud and unauthorized activity. The blockchain also helps verify the authenticity of items like farm food, medicines, and even employee certification. The ability to control data gives users a level of privacy that no other platform can match.
In the case of Bitcoin, the blockchain can only handle seven transactions per second. Unlike Hyperledger and Visa, which can handle ten thousand transactions per second. Also, each participant node must verify and approve transactions, slowing down exchanges and limiting scalability.
The blockchain requires a lot of energy to run. In addition, the blockchain is not a hugely distributable system and it is destructible. The security of the block chain can be compromised by hackers; it is not completely foolproof. Also, since blockchain entries are immutable, data cannot be removed. The blockchain's high energy consumption and limited scalability reduce its efficiency.
Why Is Blockchain So Popular?
The blockchain is a technology giant. In 2018, 90% of US and European banks began exploring blockchain's potential. In 2021, 24% of companies are expected to invest $5 million to $10 million in blockchain. By the end of 2024, it is expected that corporations will spend $20 billion annually on blockchain technical services.
Blockchain is used in cryptocurrency, medical records storage, identity verification, election voting, security, agriculture, business, and many other fields. The blockchain offers a more secure, decentralized, and less corrupt system of making global payments, which cryptocurrency enthusiasts love. Users who want to save time and energy prefer it because it is faster and less bureaucratic than banking and healthcare systems.
Most organizations have jumped on the blockchain bandwagon, and for good reason: the blockchain industry has never had more potential. The launch of IBM's Blockchain Wire, Paystack, Aza Finance and Bloom are visible proof of the wonders that the blockchain has done. The blockchain's cryptocurrency segment may not be as popular in the future as the blockchain's other segments, as evidenced by the various industries where it is used. The blockchain is here to stay, and it will be discussed for a long time, not just in tech, but in many industries.
Read original post here
You might also like

Thomas Huault
3 years ago
A Mean Reversion Trading Indicator Inspired by Classical Mechanics Is The Kinetic Detrender
DATA MINING WITH SUPERALGORES
Old pots produce the best soup.

Science has always inspired indicator design. From physics to signal processing, many indicators use concepts from mechanical engineering, electronics, and probability. In Superalgos' Data Mining section, we've explored using thermodynamics and information theory to construct indicators and using statistical and probabilistic techniques like reduced normal law to take advantage of low probability events.
An asset's price is like a mechanical object revolving around its moving average. Using this approach, we could design an indicator using the oscillator's Total Energy. An oscillator's energy is finite and constant. Since we don't expect the price to follow the harmonic oscillator, this energy should deviate from the perfect situation, and the maximum of divergence may provide us valuable information on the price's moving average.
Definition of the Harmonic Oscillator in Few Words
Sinusoidal function describes a harmonic oscillator. The time-constant energy equation for a harmonic oscillator is:
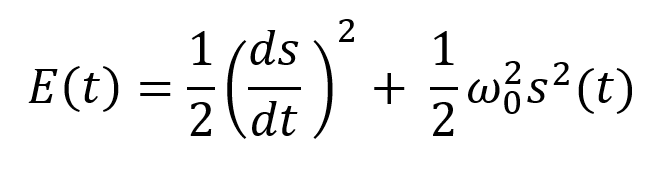
With
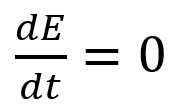
Time saves energy.
In a mechanical harmonic oscillator, total energy equals kinetic energy plus potential energy. The formula for energy is the same for every kind of harmonic oscillator; only the terms of total energy must be adapted to fit the relevant units. Each oscillator has a velocity component (kinetic energy) and a position to equilibrium component (potential energy).
The Price Oscillator and the Energy Formula
Considering the harmonic oscillator definition, we must specify kinetic and potential components for our price oscillator. We define oscillator velocity as the rate of change and equilibrium position as the price's distance from its moving average.
Price kinetic energy:

It's like:
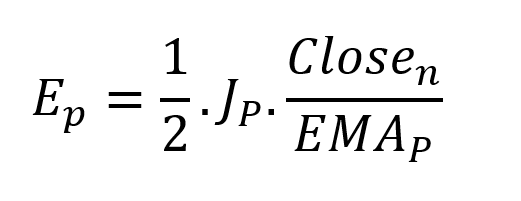
With
and
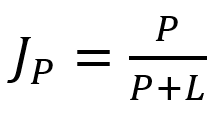
L is the number of periods for the rate of change calculation and P for the close price EMA calculation.
Total price oscillator energy =

Given that an asset's price can theoretically vary at a limitless speed and be endlessly far from its moving average, we don't expect this formula's outcome to be constrained. We'll normalize it using Z-Score for convenience of usage and readability, which also allows probabilistic interpretation.
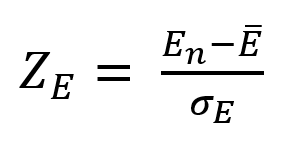
Over 20 periods, we'll calculate E's moving average and standard deviation.
We calculated Z on BTC/USDT with L = 10 and P = 21 using Knime Analytics.
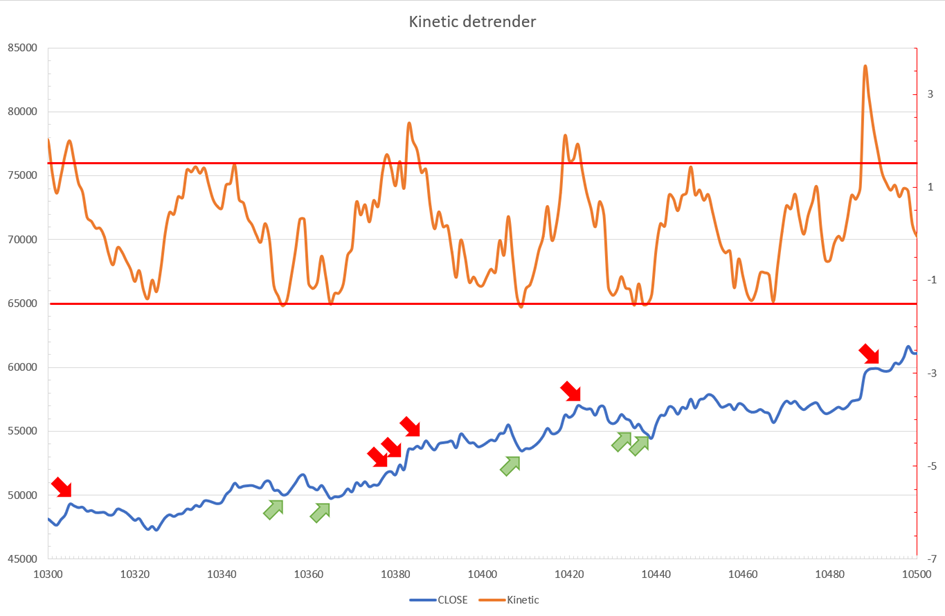
The graph is detrended. We added two horizontal lines at +/- 1.6 to construct a 94.5% probability zone based on reduced normal law tables. Price cycles to its moving average oscillate clearly. Red and green arrows illustrate where the oscillator crosses the top and lower limits, corresponding to the maximum/minimum price oscillation. Since the results seem noisy, we may apply a non-lagging low-pass or multipole filter like Butterworth or Laguerre filters and employ dynamic bands at a multiple of Z's standard deviation instead of fixed levels.
Kinetic Detrender Implementation in Superalgos
The Superalgos Kinetic detrender features fixed upper and lower levels and dynamic volatility bands.
The code is pretty basic and does not require a huge amount of code lines.
It starts with the standard definitions of the candle pointer and the constant declaration :
let candle = record.current
let len = 10
let P = 21
let T = 20
let up = 1.6
let low = 1.6
Upper and lower dynamic volatility band constants are up and low.
We proceed to the initialization of the previous value for EMA :
if (variable.prevEMA === undefined) {
    variable.prevEMA = candle.close
}
And the calculation of EMA with a function (it is worth noticing the function is declared at the end of the code snippet in Superalgos) :
variable.ema = calculateEMA(P, candle.close, variable.prevEMA)
//EMA calculation
function calculateEMA(periods, price, previousEMA) {
    let k = 2 / (periods + 1)
    return price * k + previousEMA * (1 - k)
}
The rate of change is calculated by first storing the right amount of close price values and proceeding to the calculation by dividing the current close price by the first member of the close price array:
variable.allClose.push(candle.close)
if (variable.allClose.length > len) {
    variable.allClose.splice(0, 1)
}
if (variable.allClose.length === len) {
    variable.roc = candle.close / variable.allClose[0]
} else {
    variable.roc = 1
}
Finally, we get energy with a single line:
variable.E = 1 / 2 * len * variable.roc + 1 / 2 * P * candle.close / variable.emaThe Z calculation reuses code from Z-Normalization-based indicators:
variable.allE.push(variable.E)
if (variable.allE.length > T) {
    variable.allE.splice(0, 1)
}
variable.sum = 0
variable.SQ = 0
if (variable.allE.length === T) {
    for (var i = 0; i < T; i++) {
        variable.sum += variable.allE[i]
    }
    variable.MA = variable.sum / T
for (var i = 0; i < T; i++) {
        variable.SQ += Math.pow(variable.allE[i] - variable.MA, 2)
    }
    variable.sigma = Math.sqrt(variable.SQ / T)
variable.Z = (variable.E - variable.MA) / variable.sigma
} else {
    variable.Z = 0
}
variable.allZ.push(variable.Z)
if (variable.allZ.length > T) {
    variable.allZ.splice(0, 1)
}
variable.sum = 0
variable.SQ = 0
if (variable.allZ.length === T) {
    for (var i = 0; i < T; i++) {
        variable.sum += variable.allZ[i]
    }
    variable.MAZ = variable.sum / T
for (var i = 0; i < T; i++) {
        variable.SQ += Math.pow(variable.allZ[i] - variable.MAZ, 2)
    }
    variable.sigZ = Math.sqrt(variable.SQ / T)
} else {
    variable.MAZ = variable.Z
    variable.sigZ = variable.MAZ * 0.02
}
variable.upper = variable.MAZ + up * variable.sigZ
variable.lower = variable.MAZ - low * variable.sigZ
We also update the EMA value.
variable.prevEMA = variable.EMA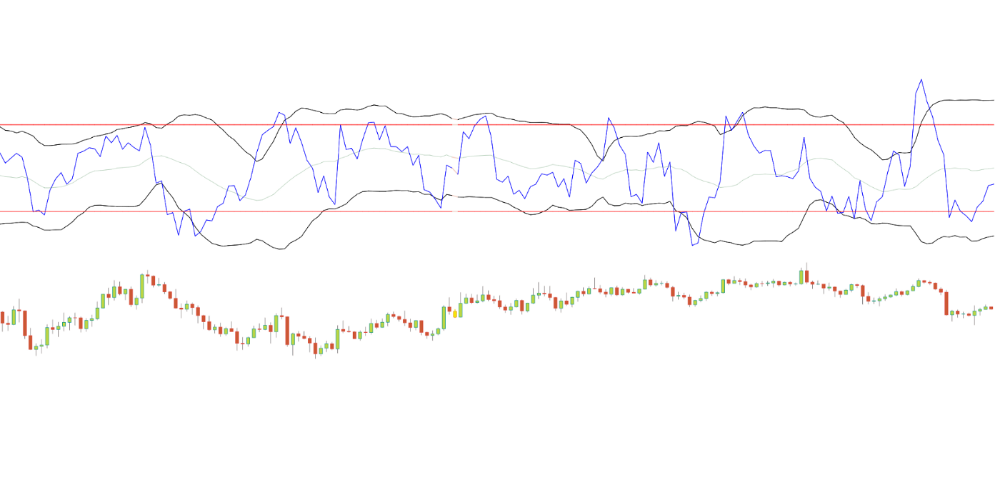
Conclusion
We showed how to build a detrended oscillator using simple harmonic oscillator theory. Kinetic detrender's main line oscillates between 2 fixed levels framing 95% of the values and 2 dynamic levels, leading to auto-adaptive mean reversion zones.
Superalgos' Normalized Momentum data mine has the Kinetic detrender indication.
All the material here can be reused and integrated freely by linking to this article and Superalgos.
This post is informative and not financial advice. Seek expert counsel before trading. Risk using this material.

Leonardo Castorina
3 years ago
How to Use Obsidian to Boost Research Productivity
Tools for managing your PhD projects, reading lists, notes, and inspiration.
As a researcher, you have to know everything. But knowledge is useless if it cannot be accessed quickly. An easy-to-use method of archiving information makes taking notes effortless and enjoyable.
As a PhD student in Artificial Intelligence, I use Obsidian (https://obsidian.md) to manage my knowledge.
The article has three parts:
- What is a note, how to organize notes, tags, folders, and links? This section is tool-agnostic, so you can use most of these ideas with any note-taking app.
- Instructions for using Obsidian, managing notes, reading lists, and useful plugins. This section demonstrates how I use Obsidian, my preferred knowledge management tool.
- Workflows: How to use Zotero to take notes from papers, manage multiple projects' notes, create MOCs with Dataview, and more. This section explains how to use Obsidian to solve common scientific problems and manage/maintain your knowledge effectively.
This list is not perfect or complete, but it is my current solution to problems I've encountered during my PhD. Please leave additional comments or contact me if you have any feedback. I'll try to update this article.
Throughout the article, I'll refer to your digital library as your "Obsidian Vault" or "Zettelkasten".
Other useful resources are listed at the end of the article.
1. Philosophy: Taking and organizing notes
Carl Sagan: “To make an apple pie from scratch, you must first create the universe.”
Before diving into Obsidian, let's establish a Personal Knowledge Management System and a Zettelkasten. You can skip to Section 2 if you already know these terms.
Niklas Luhmann, a prolific sociologist who wrote 400 papers and 70 books, inspired this section and much of Zettelkasten. Zettelkasten means “slip box” (or library in this article). His Zettlekasten had around 90000 physical notes, which can be found here.
There are now many tools available to help with this process. Obsidian's website has a good introduction section: https://publish.obsidian.md/hub/
Notes
We'll start with "What is a note?" Although it may seem trivial, the answer depends on the topic or your note-taking style. The idea is that a note is as “atomic” (i.e. You should read the note and get the idea right away.
The resolution of your notes depends on their detail. Deep Learning, for example, could be a general description of Neural Networks, with a few notes on the various architectures (eg. Recurrent Neural Networks, Convolutional Neural Networks etc..).
Limiting length and detail is a good rule of thumb. If you need more detail in a specific section of this note, break it up into smaller notes. Deep Learning now has three notes:
- Deep Learning
- Recurrent Neural Networks
- Convolutional Neural Networks
Repeat this step as needed until you achieve the desired granularity. You might want to put these notes in a “Neural Networks” folder because they are all about the same thing. But there's a better way:
#Tags and [[Links]] over /Folders/
The main issue with folders is that they are not flexible and assume that all notes in the folder belong to a single category. This makes it difficult to make connections between topics.
Deep Learning has been used to predict protein structure (AlphaFold) and classify images (ImageNet). Imagine a folder structure like this:
- /Proteins/
     - Protein Folding
- /Deep Learning/
     - /Proteins/
Your notes about Protein Folding and Convolutional Neural Networks will be separate, and you won't be able to find them in the same folder.
This can be solved in several ways. The most common one is to use tags rather than folders. A note can be grouped with multiple topics this way. Obsidian tags can also be nested (have subtags).
You can also link two notes together. You can build your “Knowledge Graph” in Obsidian and other note-taking apps like Obsidian.
My Knowledge Graph. Green: Biology, Red: Machine Learning, Yellow: Autoencoders, Blue: Graphs, Brown: Tags.
My Knowledge Graph and the note “Backrpropagation” and its links.
Backpropagation note and all its links
Why use Folders?
Folders help organize your vault as it grows. The main suggestion is to have few folders that "weakly" collect groups of notes or better yet, notes from different sources.
Among my Zettelkasten folders are:
My Zettelkasten's 5 folders
They usually gather data from various sources:
MOC: Map of Contents for the Zettelkasten.
Projects: Contains one note for each side-project of my PhD where I log my progress and ideas. Notes are linked to these.
Bio and ML: These two are the main content of my Zettelkasten and could theoretically be combined.
Papers: All my scientific paper notes go here. A bibliography links the notes. Zotero .bib file
Books: I make a note for each book I read, which I then split into multiple notes.
Keeping images separate from other files can help keep your main folders clean.
I will elaborate on these in the Workflow Section.
My general recommendation is to use tags and links instead of folders.
Maps of Content (MOC)
Making Tables of Contents is a good solution (MOCs).
These are notes that "signposts" your Zettelkasten library, directing you to the right type of notes. It can link to other notes based on common tags. This is usually done with a title, then your notes related to that title. As an example:
An example of a Machine Learning MOC generated with Dataview.
As shown above, my Machine Learning MOC begins with the basics. Then it's on to Variational Auto-Encoders. Not only does this save time, but it also saves scrolling through the tag search section.
So I keep MOCs at the top of my library so I can quickly find information and see my library. These MOCs are generated automatically using an Obsidian Plugin called Dataview (https://github.com/blacksmithgu/obsidian-dataview).
Ideally, MOCs could be expanded to include more information about the notes, their status, and what's left to do. In the absence of this, Dataview does a fantastic job at creating a good structure for your notes.
In the absence of this, Dataview does a fantastic job at creating a good structure for your notes.
2. Tools: Knowing Obsidian
Obsidian is my preferred tool because it is free, all notes are stored in Markdown format, and each panel can be dragged and dropped. You can get it here: https://obsidian.md/
Obsidian interface.
Obsidian is highly customizable, so here is my preferred interface:
The theme is customized from https://github.com/colineckert/obsidian-things
Alternatively, each panel can be collapsed, moved, or removed as desired. To open a panel later, click on the vertical "..." (bottom left of the note panel).
My interface is organized as follows:
How my Obsidian Interface is organized.
Folders/Search:
This is where I keep all relevant folders. I usually use the MOC note to navigate, but sometimes I use the search button to find a note.
Tags:
I use nested tags and look into each one to find specific notes to link.
cMenu:
Easy-to-use menu plugin cMenu (https://github.com/chetachiezikeuzor/cMenu-Plugin)
Global Graph:
The global graph shows all your notes (linked and unlinked). Linked notes will appear closer together. Zoom in to read each note's title. It's a bit overwhelming at first, but as your library grows, you get used to the positions and start thinking of new connections between notes.
Local Graph:
Your current note will be shown in relation to other linked notes in your library. When needed, you can quickly jump to another link and back to the current note.
Links:
Finally, an outline panel and the plugin Obsidian Power Search (https://github.com/aviral-batra/obsidian-power-search) allow me to search my vault by highlighting text.
Start using the tool and worry about panel positioning later. I encourage you to find the best use-case for your library.
Plugins
An additional benefit of using Obsidian is the large plugin library. I use several (Calendar, Citations, Dataview, Templater, Admonition):
Obsidian Calendar Plugin: https://github.com/liamcain
It organizes your notes on a calendar. This is ideal for meeting notes or keeping a journal.
Calendar addon from hans/obsidian-citation-plugin
Obsidian Citation Plugin: https://github.com/hans/
Allows you to cite papers from a.bib file. You can also customize your notes (eg. Title, Authors, Abstract etc..)
Plugin citation from hans/obsidian-citation-plugin
Obsidian Dataview: https://github.com/blacksmithgu/
A powerful plugin that allows you to query your library as a database and generate content automatically. See the MOC section for an example.
Allows you to create notes with specific templates like dates, tags, and headings.
Templater. Obsidian Admonition: https://github.com/valentine195/obsidian-admonition
Blocks allow you to organize your notes.
Plugin warning. Obsidian Admonition (valentine195)
There are many more, but this list should get you started.
3. Workflows: Cool stuff
Here are a few of my workflows for using obsidian for scientific research. This is a list of resources I've found useful for my use-cases. I'll outline and describe them briefly so you can skim them quickly.
3.1 Using Templates to Structure Notes
3.2 Free Note Syncing (Laptop, Phone, Tablet)
3.3 Zotero/Mendeley/JabRef -> Obsidian — Managing Reading Lists
3.4 Projects and Lab Books
3.5 Private Encrypted Diary
3.1 Using Templates to Structure Notes
Plugins: Templater and Dataview (optional).
To take effective notes, you must first make adding new notes as easy as possible. Templates can save you time and give your notes a consistent structure. As an example:
An example of a note using a template.
### [[YOUR MOC]]
# Note Title of your note
**Tags**::
**Links**::
The top line links to your knowledge base's Map of Content (MOC) (see previous sections). After the title, I add tags (and a link between the note and the tag) and links to related notes.
To quickly identify all notes that need to be expanded, I add the tag “#todo”. In the “TODO:” section, I list the tasks within the note.
The rest are notes on the topic.
Templater can help you create these templates. For new books, I use the following template:
### [[Books MOC]]
# Title
**Author**::
**Date::
**Tags::
**Links::
A book template example.
Using a simple query, I can hook Dataview to it.
dataview
table author as Author, date as “Date Finished”, tags as “Tags”, grade as “Grade”
from “4. Books”
SORT grade DESCENDING
using Dataview to query templates.
3.2 Free Note Syncing (Laptop, Phone, Tablet)
No plugins used.
One of my favorite features of Obsidian is the library's self-contained and portable format. Your folder contains everything (plugins included).
Ordinary folders and documents are available as well. There is also a “.obsidian” folder. This contains all your plugins and settings, so you can use it on other devices.
So you can use Google Drive, iCloud, or Dropbox for free as long as you sync your folder (note: your folder should be in your Cloud Folder).
For my iOS and macOS work, I prefer iCloud. You can also use the paid service Obsidian Sync.
3.3 Obsidian — Managing Reading Lists and Notes in Zotero/Mendeley/JabRef
Plugins: Quotes (required).
3.3 Zotero/Mendeley/JabRef -> Obsidian — Taking Notes and Managing Reading Lists of Scientific Papers
My preferred reference manager is Zotero, but this workflow should work with any reference manager that produces a .bib file. This file is exported to my cloud folder so I can access it from any platform.
My Zotero library is tagged as follows:
My reference manager's tags
For readings, I usually search for the tags “!!!” and “To-Read” and select a paper. Annotate the paper next (either on PDF using GoodNotes or on physical paper).
Then I make a paper page using a template in the Citations plugin settings:
An example of my citations template.
Create a new note, open the command list with CMD/CTRL + P, and find the Citations “Insert literature note content in the current pane” to see this lovely view.
Citation generated by the article https://doi.org/10.1101/2022.01.24.22269144
You can then convert your notes to digital. I found that transcribing helped me retain information better.
3.4 Projects and Lab Books
Plugins: Tweaker (required).
PhD students offering advice on thesis writing are common (read as regret). I started asking them what they would have done differently or earlier.
“Deep stuff Leo,” one person said. So my main issue is basic organization, losing track of my tasks and the reasons for them.
As a result, I'd go on other experiments that didn't make sense, and have to reverse engineer my logic for thesis writing. - PhD student now wise Postdoc
Time management requires planning. Keeping track of multiple projects and lab books is difficult during a PhD. How I deal with it:
- One folder for all my projects
- One file for each project
I use a template to create each project
### [[Projects MOC]]
# <% tp.file.title %>
**Tags**::
**Links**::
**URL**::
**Project Description**::## Notes:
### <% tp.file.last_modified_date(“dddd Do MMMM YYYY”) %>
#### Done:
#### TODO:
#### Notes
You can insert a template into a new note with CMD + P and looking for the Templater option.
I then keep adding new days with another template:
### <% tp.file.last_modified_date("dddd Do MMMM YYYY") %>
#### Done:
#### TODO:
#### Notes:
This way you can keep adding days to your project and update with reasonings and things you still have to do and have done. An example below:
Example of project note with timestamped notes.
3.5 Private Encrypted Diary
This is one of my favorite Obsidian uses.
Mini Diary's interface has long frustrated me. After the author archived the project, I looked for a replacement. I had two demands:
- It had to be private, and nobody had to be able to read the entries.
- Cloud syncing was required for editing on multiple devices.
Then I learned about encrypting the Obsidian folder. Then decrypt and open the folder with Obsidian. Sync the folder as usual.
Use CryptoMator (https://cryptomator.org/). Create an encrypted folder in Cryptomator for your Obsidian vault, set a password, and let it do the rest.
If you need a step-by-step video guide, here it is:
Conclusion
So, I hope this was helpful!
In the first section of the article, we discussed notes and note-taking techniques. We discussed when to use tags and links over folders and when to break up larger notes.
Then we learned about Obsidian, its interface, and some useful plugins like Citations for citing papers and Templater for creating note templates.
Finally, we discussed workflows and how to use Zotero to take notes from scientific papers, as well as managing Lab Books and Private Encrypted Diaries.
Thanks for reading and commenting :)
Read original post here

middlemarch.eth
3 years ago
ERC721R: A new ERC721 contract for random minting so people don’t snipe all the rares!
That is, how to snipe all the rares without using ERC721R!
Introduction: Blessed and Lucky
Mphers was the first mfers derivative, and as a Phunks derivative, I wanted one.
I wanted an alien. And there are only 8 in the 6,969 collection. I got one!
In case it wasn't clear from the tweet, I meant that I was lucky to have figured out how to 100% guarantee I'd get an alien without any extra luck.
Read on to find out how I did it, how you can too, and how developers can avoid it!
How to make rare NFTs without luck.
# How to mint rare NFTs without needing luck
The key to minting a rare NFT is knowing the token's id ahead of time.
For example, once I knew my alien was #4002, I simply refreshed the mint page until #3992 was minted, and then mint 10 mphers.
How did I know #4002 was extraterrestrial? Let's go back.
First, go to the mpher contract's Etherscan page and look up the tokenURI of a previously issued token, token #1:
As you can see, mphers creates metadata URIs by combining the token id and an IPFS hash.
This method gives you the collection's provenance in every URI, and while that URI can be changed, it affects everyone and is public.
Consider a token URI without a provenance hash, like https://mphers.art/api?tokenId=1.
As a collector, you couldn't be sure the devs weren't changing #1's metadata at will.
The API allows you to specify “if #4002 has not been minted, do not show any information about it”, whereas IPFS does not allow this.
It's possible to look up the metadata of any token, whether or not it's been minted.
Simply replace the trailing “1” with your desired id.
Mpher #4002
These files contain all the information about the mpher with the specified id. For my alien, we simply search all metadata files for the string “alien mpher.”
Take a look at the 6,969 meta-data files I'm using OpenSea's IPFS gateway, but you could use ipfs.io or something else.
Use curl to download ten files at once. Downloading thousands of files quickly can lead to duplicates or errors. But with a little tweaking, you should be able to get everything (and dupes are fine for our purposes).
Now that you have everything in one place, grep for aliens:
The numbers are the file names that contain “alien mpher” and thus the aliens' ids.
The entire process takes under ten minutes. This technique works on many NFTs currently minting.
In practice, manually minting at the right time to get the alien is difficult, especially when tokens mint quickly. Then write a bot to poll totalSupply() every second and submit the mint transaction at the exact right time.
You could even look for the token you need in the mempool before it is minted, and get your mint into the same block!
However, in my experience, the “big” approach wins 95% of the time—but not 100%.
“Am I being set up all along?”
Is a question you might ask yourself if you're new to this.
It's disheartening to think you had no chance of minting anything that someone else wanted.
But, did you have no opportunity? You had an equal chance as everyone else!
Take me, for instance: I figured this out using open-source tools and free public information. Anyone can do this, and not understanding how a contract works before minting will lead to much worse issues.
The mpher mint was fair.
While a fair game, “snipe the alien” may not have been everyone's cup of tea.
People may have had more fun playing the “mint lottery” where tokens were distributed at random and no one could gain an advantage over someone simply clicking the “mint” button.
How might we proceed?
Minting For Fashion Hats Punks, I wanted to create a random minting experience without sacrificing fairness. In my opinion, a predictable mint beats an unfair one. Above all, participants must be equal.
Sadly, the most common method of creating a random experience—the post-mint “reveal”—is deeply unfair. It works as follows:
- During the mint, token metadata is unavailable. Instead, tokenURI() returns a blank JSON file for each id.
- An IPFS hash is updated once all tokens are minted.
- You can't tell how the contract owner chose which token ids got which metadata, so it appears random.
Because they alone decide who gets what, the person setting the metadata clearly has a huge unfair advantage over the people minting. Unlike the mpher mint, you have no chance of winning here.
But what if it's a well-known, trusted, doxxed dev team? Are reveals okay here?
No! No one should be trusted with such power. Even if someone isn't consciously trying to cheat, they have unconscious biases. They might also make a mistake and not realize it until it's too late, for example.
You should also not trust yourself. Imagine doing a reveal, thinking you did it correctly (nothing is 100%! ), and getting the rarest NFT. Isn't that a tad odd Do you think you deserve it? An NFT developer like myself would hate to be in this situation.
Reveals are bad*
UNLESS they are done without trust, meaning everyone can verify their fairness without relying on the developers (which you should never do).
An on-chain reveal powered by randomness that is verifiably outside of anyone's control is the most common way to achieve a trustless reveal (e.g., through Chainlink).
Tubby Cats did an excellent job on this reveal, and I highly recommend their contract and launch reflections. Their reveal was also cool because it was progressive—you didn't have to wait until the end of the mint to find out.
In his post-launch reflections, @DefiLlama stated that he made the contract as trustless as possible, removing as much trust as possible from the team.
In my opinion, everyone should know the rules of the game and trust that they will not be changed mid-stream, while trust minimization is critical because smart contracts were designed to reduce trust (and it makes it impossible to hack even if the team is compromised). This was a huge mistake because it limited our flexibility and our ability to correct mistakes.
And @DefiLlama is a superstar developer. Imagine how much stress maximizing trustlessness will cause you!
That leaves me with a bad solution that works in 99 percent of cases and is much easier to implement: random token assignments.
Introducing ERC721R: A fully compliant IERC721 implementation that picks token ids at random.
ERC721R implements the opposite of a reveal: we mint token ids randomly and assign metadata deterministically.
This allows us to reveal all metadata prior to minting while reducing snipe chances.
Then import the contract and use this code:
What is ERC721R and how does it work
First, a disclaimer: ERC721R isn't truly random. In this sense, it creates the same “game” as the mpher situation, where minters compete to exploit the mint. However, ERC721R is a much more difficult game.
To game ERC721R, you need to be able to predict a hash value using these inputs:
This is impossible for a normal person because it requires knowledge of the block timestamp of your mint, which you do not have.
To do this, a miner must set the timestamp to a value in the future, and whatever they do is dependent on the previous block's hash, which expires in about ten seconds when the next block is mined.
This pseudo-randomness is “good enough,” but if big money is involved, it will be gamed. Of course, the system it replaces—predictable minting—can be manipulated.
The token id is chosen in a clever implementation of the Fisher–Yates shuffle algorithm that I copied from CryptoPhunksV2.
Consider first the naive solution: (a 10,000 item collection is assumed):
- Make an array with 0–9999.
- To create a token, pick a random item from the array and use that as the token's id.
- Remove that value from the array and shorten it by one so that every index corresponds to an available token id.
This works, but it uses too much gas because changing an array's length and storing a large array of non-zero values is expensive.
How do we avoid them both? What if we started with a cheap 10,000-zero array? Let's assign an id to each index in that array.
Assume we pick index #6500 at random—#6500 is our token id, and we replace the 0 with a 1.
But what if we chose #6500 again? A 1 would indicate #6500 was taken, but then what? We can't just "roll again" because gas will be unpredictable and high, especially later mints.
This allows us to pick a token id 100% of the time without having to keep a separate list. Here's how it works:
- Make a 10,000 0 array.
- Create a 10,000 uint numAvailableTokens.
- Pick a number between 0 and numAvailableTokens. -1
- Think of #6500—look at index #6500. If it's 0, the next token id is #6500. If not, the value at index #6500 is your next token id (weird!)
- Examine the array's last value, numAvailableTokens — 1. If it's 0, move the value at #6500 to the end of the array (#9999 if it's the first token). If the array's last value is not zero, update index #6500 to store it.
- numAvailableTokens is decreased by 1.
- Repeat 3–6 for the next token id.
So there you go! The array stays the same size, but we can choose an available id reliably. The Solidity code is as follows:
Unfortunately, this algorithm uses more gas than the leading sequential mint solution, ERC721A.
This is most noticeable when minting multiple tokens in one transaction—a 10 token mint on ERC721R costs 5x more than on ERC721A. That said, ERC721A has been optimized much further than ERC721R so there is probably room for improvement.
Conclusion
Listed below are your options:
- ERC721A: Minters pay lower gas but must spend time and energy devising and executing a competitive minting strategy or be comfortable with worse minting results.
- ERC721R: Higher gas, but the easy minting strategy of just clicking the button is optimal in all but the most extreme cases. If miners game ERC721R it’s the worst of both worlds: higher gas and a ton of work to compete.
- ERC721A + standard reveal: Low gas, but not verifiably fair. Please do not do this!
- ERC721A + trustless reveal: The best solution if done correctly, highly-challenging for dev, potential for difficult-to-correct errors.
Did I miss something? Comment or tweet me @dumbnamenumbers.
Check out the code on GitHub to learn more! Pull requests are welcome—I'm sure I've missed many gas-saving opportunities.
Thanks!
Read the original post here