


More on Technology

Frank Andrade
3 years ago
I discovered a bug that allowed me to use ChatGPT to successfully web scrape. Here's how it operates.
This method scrapes websites with ChatGPT (demo with Amazon and Twitter)

In a recent article, I demonstrated how to scrape websites using ChatGPT prompts like scrape website X using Python.
But that doesn’t always work.
After scraping dozens of websites with ChatGPT, I realized that simple prompts rarely work for web scraping.
Using ChatGPT and basic HTML, we can scrape any website.
First things first, use ChatGPT's advanced version (Playground)
ChatGPT Playground's enhanced version is needed to scrape websites quickly. It generates code faster and has less constraints.
Here’s how it looks.
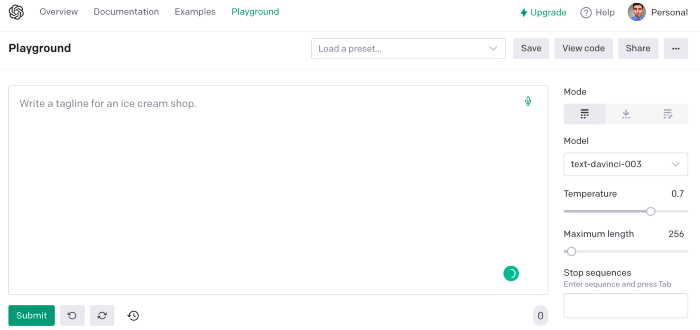
The classic ChatGPT display just allows you to type a prompt. Playground is more customizable and generates code faster than the basic version.
No more delays or restrictions.
In this tutorial, we'll write prompts underneath Playground.
How to Use ChatGPT to Scrape Any Website
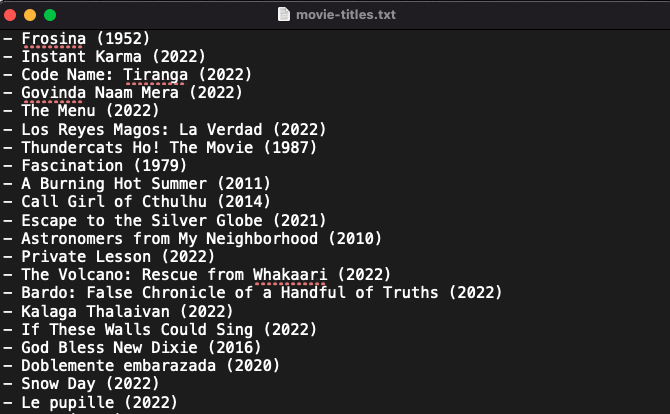
To show you how to utilize ChatGPT to scrape any website, we'll use subslikescript, which lists movies.
Later in this post, I'll show you how to scrape Amazon and Twitter, but let's start easy.
If we try a basic prompt like “scrape the movie titles on this website: https://subslikescript.com/movies” it won’t scrape anything. Here’s when we need some HTML knowledge to build the right prompt for ChatGPT.Let's scrape the above movie titles. First, check the webpage. Right-click any element and choose Inspect.
Then see below.
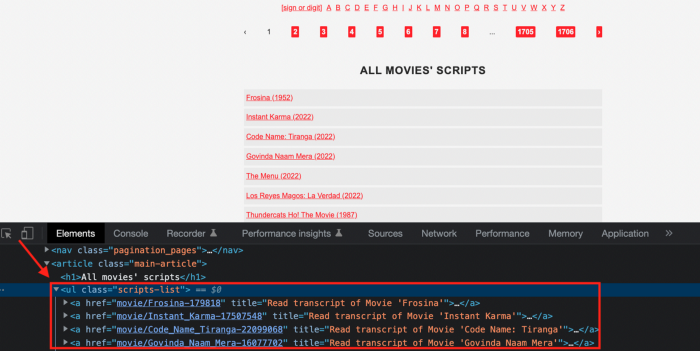
We identify the element to scrape (those in the red box). The data elements are ul, a, and scripts-list.
Here's the prompt for movie titles.
Scrape this website: https://subslikescript.com/movies with Python and Beautiful Soup. Locate the element with tag “ul” and class “scripts-list”. Scrape all the “a” elements inside. Get the text attribute and print it.
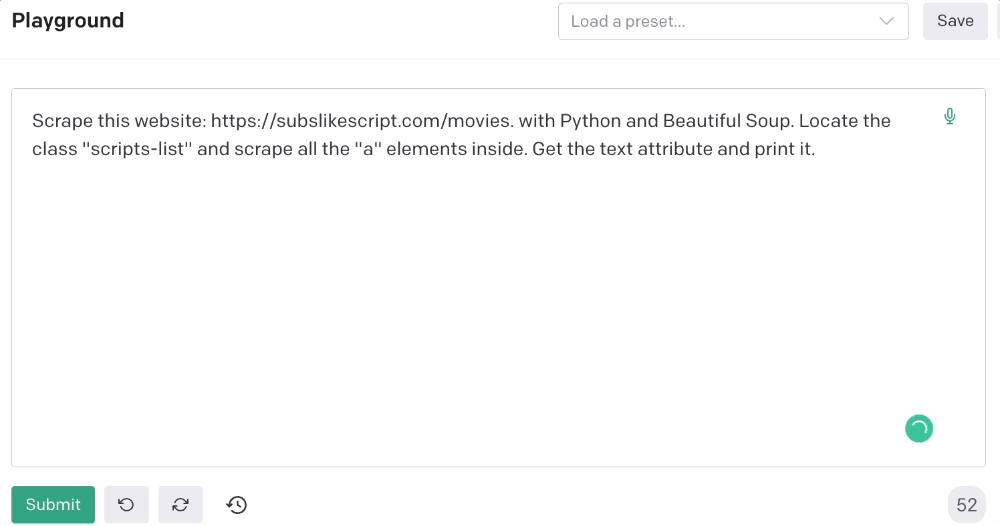
Code generated:
import requests
from bs4 import BeautifulSoup

page = requests.get('https://subslikescript.com/movies/')

soup = BeautifulSoup(page.content, 'html.parser')

scripts_list = soup.find(class_="scripts-list")

all_a_elements = scripts_list.find_all('a')

for element in all_a_elements:
    print(element.get_text())
It extracts movie titles successfully.
Let's scrape Amazon and Twitter.
ChatGPT's Amazon scraping
Consider scraping Amazon for self-help books. First, copy the Amazon link for self-help books.
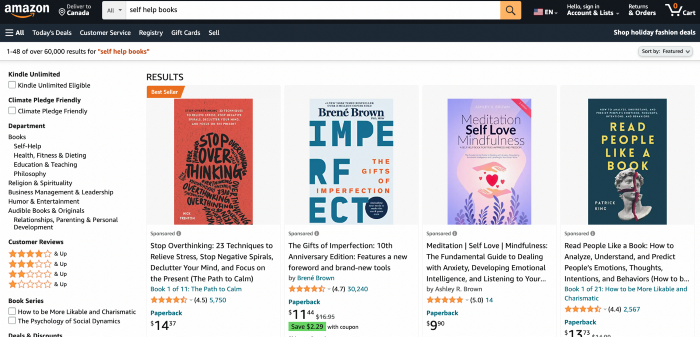
Here’s the link I got. Location-dependent connection. Use my link to replicate my results.
Now we'll check book titles. Here's our element.
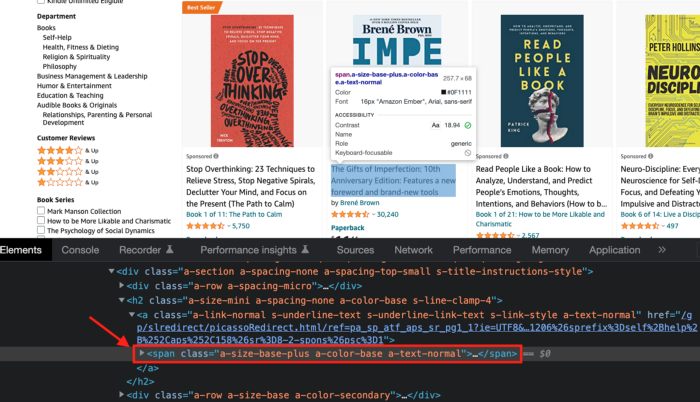
If we want to extract the book titles, we need to use the tag name span, class attribute name and a-size-base-plus a-color-base a-text-normalattribute value.
This time I'll use Selenium. I'll add Selenium-specific commands like wait 5 seconds and generate an XPath.
Scrape this website https://www.amazon.com/s?k=self+help+books&sprefix=self+help+%2Caps%2C158&ref=nb_sb_ss_ts-doa-p_2_10 with Python and Selenium.
Wait 5 seconds and locate all the elements with the following xpath: “span” tag, “class” attribute name, and “a-size-base-plus a-color-base a-text-normal” attribute value. Get the text attribute and print them.

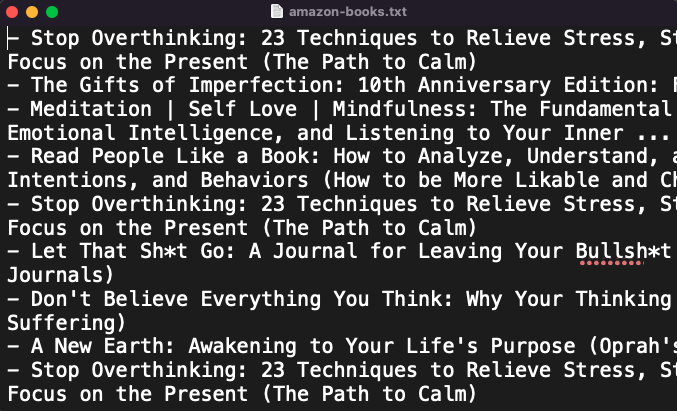
Code generated: (I only had to manually add the path where my chromedriver is located).
from selenium import webdriver
from selenium.webdriver.common.by import By
from time import sleep

#initialize webdriver
driver = webdriver.Chrome('<add path of your chromedriver>')

#navigate to the website
driver.get("https://www.amazon.com/s?k=self+help+books&sprefix=self+help+%2Caps%2C158&ref=nb_sb_ss_ts-doa-p_2_10")

#wait 5 seconds to let the page load
sleep(5)

#locate all the elements with the following xpath
elements = driver.find_elements(By.XPATH, '//span[@class="a-size-base-plus a-color-base a-text-normal"]')

#get the text attribute of each element and print it
for element in elements:
    print(element.text)

#close the webdriver
driver.close()
It pulls Amazon book titles.
Utilizing ChatGPT to scrape Twitter
Say you wish to scrape ChatGPT tweets. Search Twitter for ChatGPT and copy the URL.
Here’s the link I got. We must check every tweet. Here's our element.
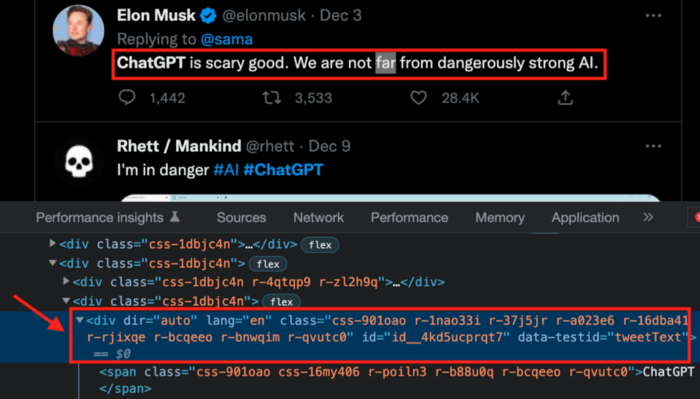
To extract a tweet, use the div tag and lang attribute.
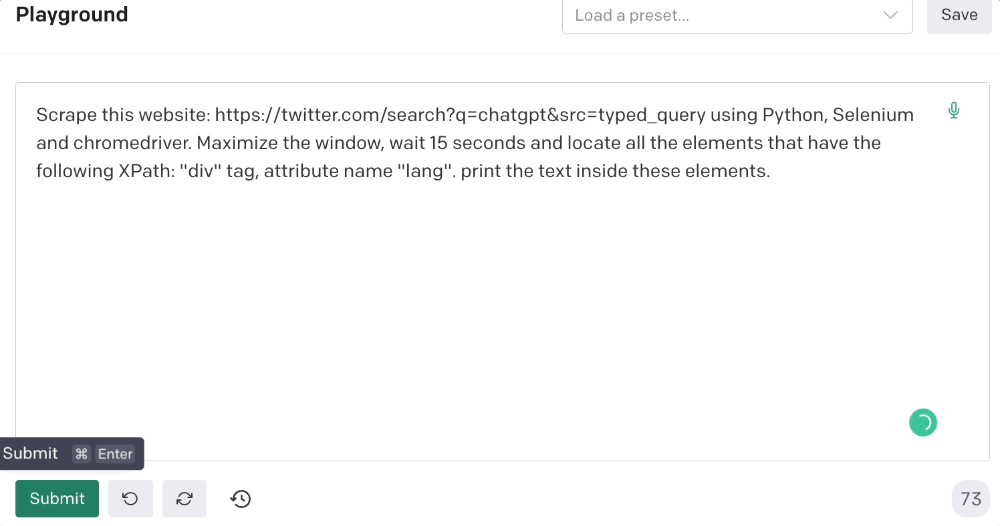
Again, Selenium.
Scrape this website: https://twitter.com/search?q=chatgpt&src=typed_query using Python, Selenium and chromedriver.
Maximize the window, wait 15 seconds and locate all the elements that have the following XPath: “div” tag, attribute name “lang”. Print the text inside these elements.
Code generated: (again, I had to add the path where my chromedriver is located)
from selenium import webdriver
import time

driver = webdriver.Chrome("/Users/frankandrade/Downloads/chromedriver")
driver.maximize_window()
driver.get("https://twitter.com/search?q=chatgpt&src=typed_query")
time.sleep(15)

elements = driver.find_elements_by_xpath("//div[@lang]")
for element in elements:
    print(element.text)

driver.quit()
You'll get the first 2 or 3 tweets from a search. To scrape additional tweets, click X times.
Congratulations! You scraped websites without coding by using ChatGPT.

Will Lockett
3 years ago
The World Will Change With MIT's New Battery

It's cheaper, faster charging, longer lasting, safer, and better for the environment.
Batteries are the future. Next-gen and planet-saving technology, including solar power and EVs, require batteries. As these smart technologies become more popular, we find that our batteries can't keep up. Lithium-ion batteries are expensive, slow to charge, big, fast to decay, flammable, and not environmentally friendly. MIT just created a new battery that eliminates all of these problems. So, is this the battery of the future? Or is there a catch?
When I say entirely new, I mean it. This battery employs no currently available materials. Its electrodes are constructed of aluminium and pure sulfur instead of lithium-complicated ion's metals and graphite. Its electrolyte is formed of molten chloro-aluminate salts, not an organic solution with lithium salts like lithium-ion batteries.
How does this change in materials help?
Aluminum, sulfur, and chloro-aluminate salts are abundant, easy to acquire, and cheap. This battery might be six times cheaper than a lithium-ion battery and use less hazardous mining. The world and our wallets will benefit.
But don’t go thinking this means it lacks performance.
This battery charged in under a minute in tests. At 25 degrees Celsius, the battery will charge 25 times slower than at 110 degrees Celsius. This is because the salt, which has a very low melting point, is in an ideal state at 110 degrees and can carry a charge incredibly quickly. Unlike lithium-ion, this battery self-heats when charging and discharging, therefore no external heating is needed.
Anyone who's seen a lithium-ion battery burst might be surprised. Unlike lithium-ion batteries, none of the components in this new battery can catch fire. Thus, high-temperature charging and discharging speeds pose no concern.
These batteries are long-lasting. Lithium-ion batteries don't last long, as any iPhone owner can attest. During charging, metal forms a dendrite on the electrode. This metal spike will keep growing until it reaches the other end of the battery, short-circuiting it. This is why phone batteries only last a few years and why electric car range decreases over time. This new battery's molten salt slows deposition, extending its life. This helps the environment and our wallets.
These batteries are also energy dense. Some lithium-ion batteries have 270 Wh/kg energy density (volume and mass). Aluminum-sulfur batteries could have 1392 Wh/kg, according to calculations. They'd be 5x more energy dense. Tesla's Model 3 battery would weigh 96 kg instead of 480 kg if this battery were used. This would improve the car's efficiency and handling.
These calculations were for batteries without molten salt electrolyte. Because they don't reflect the exact battery chemistry, they aren't a surefire prediction.
This battery seems great. It will take years, maybe decades, before it reaches the market and makes a difference. Right?
Nope. The project's scientists founded Avanti to develop and market this technology.
So we'll soon be driving cheap, durable, eco-friendly, lightweight, and ultra-safe EVs? Nope.
This battery must be kept hot to keep the salt molten; otherwise, it won't work and will expand and contract, causing damage. This issue could be solved by packs that can rapidly pre-heat, but that project is far off.
Rapid and constant charge-discharge cycles make these batteries ideal for solar farms, homes, and EV charging stations. The battery is constantly being charged or discharged, allowing it to self-heat and maintain an ideal temperature.
These batteries aren't as sexy as those making EVs faster, more efficient, and cheaper. Grid batteries are crucial to our net-zero transition because they allow us to use more low-carbon energy. As we move away from fossil fuels, we'll need millions of these batteries, so the fact that they're cheap, safe, long-lasting, and environmentally friendly will be huge. Who knows, maybe EVs will use this technology one day. MIT has created another world-changing technology.

Paul DelSignore
3 years ago
The stunning new free AI image tool is called Leonardo AI.
Leonardo—The New Midjourney?

Users are comparing the new cowboy to Midjourney.
Leonardo.AI creates great photographs and has several unique capabilities I haven't seen in other AI image systems.
Midjourney's quality photographs are evident in the community feed.
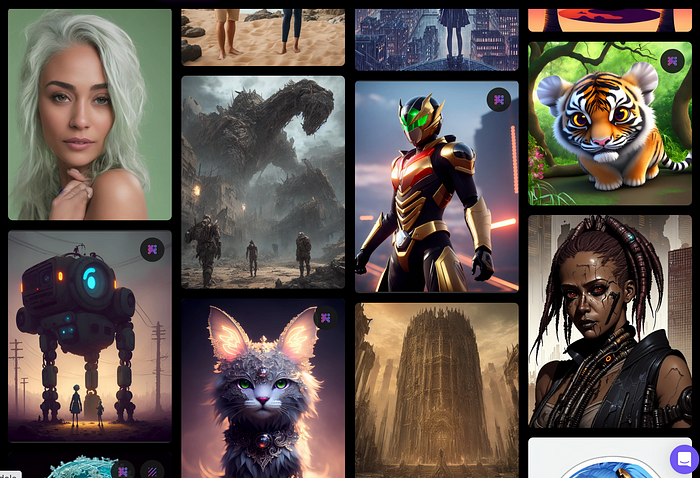
Create Pictures Using Models
You can make graphics using platform models when you first enter the app (website):
Luma, Leonardo creative, Deliberate 1.1.

Clicking a model displays its description and samples:
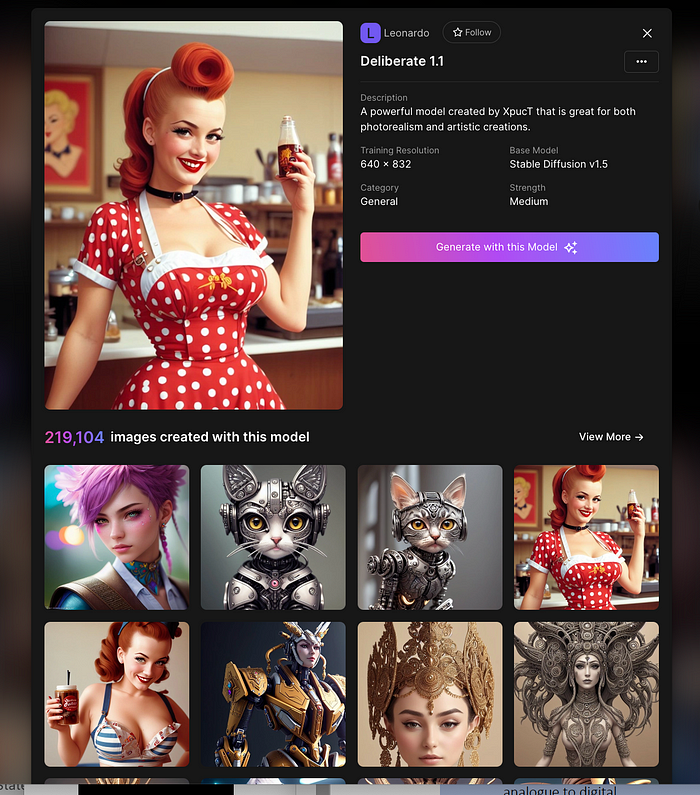
Click Generate With This Model.
Then you can add your prompt, alter models, photos, sizes, and guide scale in a sleek UI.

Changing Pictures
Leonardo's Canvas editor lets you change created images by hovering over them:

The editor opens with masking, erasing, and picture download.

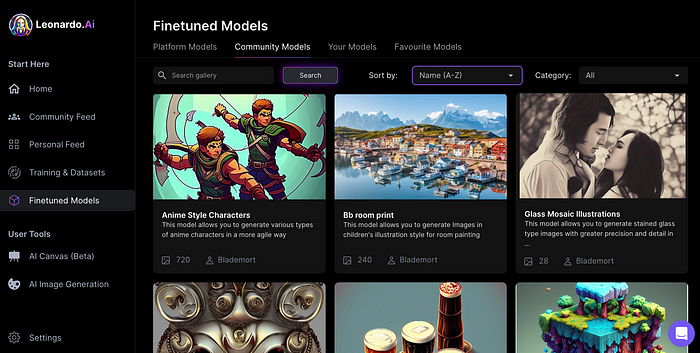
Develop Your Own Models
I've never seen anything like Leonardo's model training feature.
Upload a handful of similar photographs and save them as a model for future images. Share your model with the community.

You can make photos using your own model and a community-shared set of fine-tuned models:
Obtain Leonardo access
Leonardo is currently free.
Visit Leonardo.ai and click "Get Early Access" to receive access.
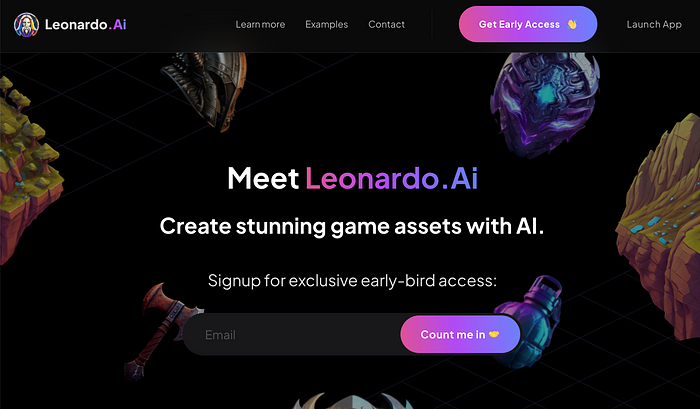
Add your email to receive a link to join the discord channel. Simply describe yourself and fill out a form to join the discord channel.
Please go to 👑│introductions to make an introduction and ✨│priority-early-access will be unlocked, you must fill out a form and in 24 hours or a little more (due to demand), the invitation will be sent to you by email.
I got access in two hours, so hopefully you can too.
Last Words
I know there are many AI generative platforms, some free and some expensive, but Midjourney produces the most artistically stunning images and art.
Leonardo is the closest I've seen to Midjourney, but Midjourney is still the leader.
It's free now.
Leonardo's fine-tuned model selections, model creation, image manipulation, and output speed and quality make it a great AI image toolbox addition.
You might also like

Ann
3 years ago
These new DeFi protocols are just amazing.
I've never seen this before.
Focus on native crypto development, not price activity or turmoil.
CT is boring now. Either folks are still angry about FTX or they're distracted by AI. Plus, it's year-end, and people rest for the holidays. 2022 was rough.
So DeFi fans can get inspired by something fresh. Who's building? As I read the Defillama daily roundup, many updates are still on FTX and its contagion.
I've used the same method on their Raises page. Not much happened :(. Maybe my high standards are to fault, but the business may be resting. OK.
The handful I locate might last us till the end of the year. (If another big blowup occurs.)
Hashflow
An on-chain monitor account I follow reported a huge transfer of $HFT from Binance to Jump Tradings.
I was intrigued. Stacking? So I checked and discovered out the project was launched through Binance Launchpad, which has introduced many 100x tokens (although momentarily) in the past, such as GALA and STEPN.
Hashflow appears to be pumpable. Binance launchpad, VC backers, CEX listing immediately. What's the protocol?
Hasflow is intriguing and timely, I discovered. After the FTX collapse, people looked more at DEXs.
Hashflow is a decentralized exchange that connects traders with professional market makers, according to its Binance launchpad description. Post-FTX, market makers lost their MM-ing chance with the collapse of the world's third-largest exchange. Jump and Wintermute back them?
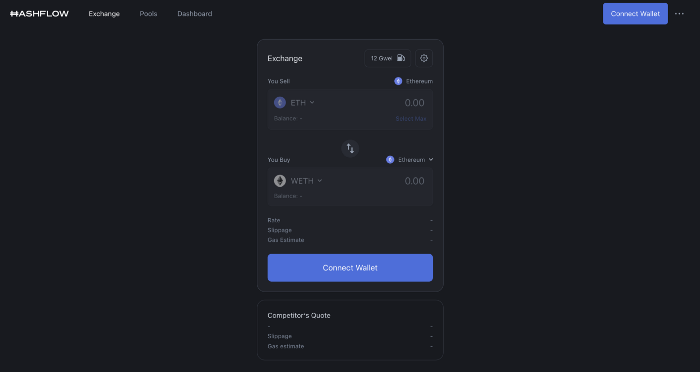
Why is that the case? Hashflow doesn't use bonding curves like standard AMM. On AMMs, you pay more for the following trade because the prior trade reduces liquidity (supply and demand). With market maker quotations, you get a CEX-like experience (fewer coins in the pool, higher price). Stable prices, no MEV frontrunning.
Hashflow is innovative because...
DEXs gained from the FTX crash, but let's be honest: DEXs aren't as good as CEXs. Hashflow will change this.
Hashflow offers MEV protection, which major dealers seek in DEXs. You can trade large amounts without front running and sandwich assaults.
Hasflow offers a user-friendly swapping platform besides MEV. Any chain can be traded smoothly. This is a benefit because DEXs lag CEXs in UX.
Status, timeline:
Wintermute wrote in August that prominent market makers will work on Hashflow. Binance launched a month-long farming session in December. Jump probably participated in this initial sell, therefore we witnessed a significant transfer after the introduction.
Binance began trading HFT token on November 11 (the day FTX imploded). coincidence?)
Tokens are used for community rewards. Perhaps they'd copy dYdX. (Airdrop?). Read their documents about their future plans. Tokenomics doesn't impress me. Governance, rewards, and NFT.
Their stat page details their activity. First came Ethereum, then Arbitrum. For a new protocol in a bear market, they handled a lot of unique users daily.
It’s interesting to see their future. Will they be thriving? Not only against DEXs, but also among the CEXs too.
STFX
I forget how I found STFX. Possibly a Twitter thread concerning Arbitrum applications. STFX was the only new protocol I found interesting.
STFX is a new concept and trader problem-solver. I've never seen this protocol.
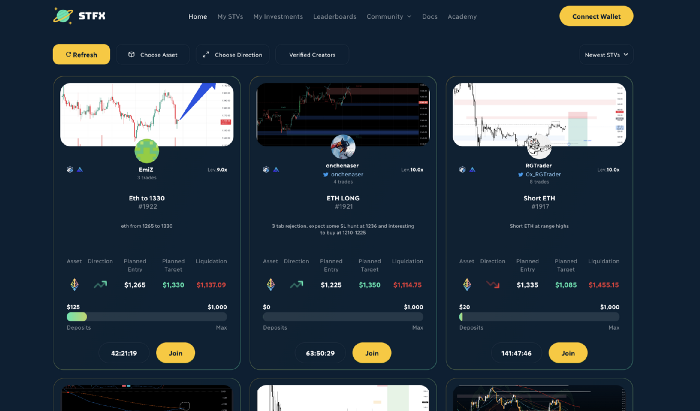
STFX allows you copy trades. You give someone your money to trade for you.
It's a marketplace. Traders are everywhere. You put your entry, exit, liquidation point, and trading theory. Twitter has a verification system for socials. Leaderboards display your trading skill.
This service could be popular. Staying disciplined is the hardest part of trading. Sometimes you take-profit too early or too late, or sell at a loss when an asset dumps, then it soon recovers (often happens in crypto.) It's hard to stick to entry-exit and liquidation plans.
What if you could hire someone to run your trade for a little commission? Set-and-forget.
Trading money isn't easy. Trust how? How do you know they won't steal your money?
Smart contracts.
STFX's trader is a vault maker/manager. One trade=one vault. User sets long/short, entrance, exit, and liquidation point. Anyone who agrees can exchange instantly. The smart contract will keep the fund during the trade and limit the manager's actions.
Here's STFX's transaction flow.
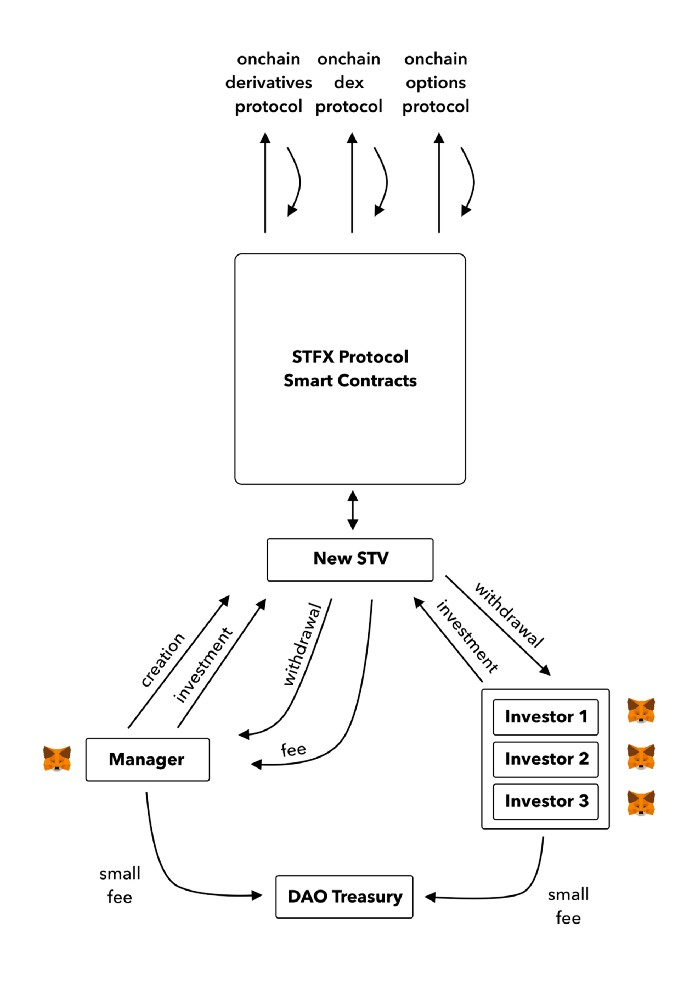
Managers and the treasury receive fees. It's a sustainable business strategy that benefits everyone.
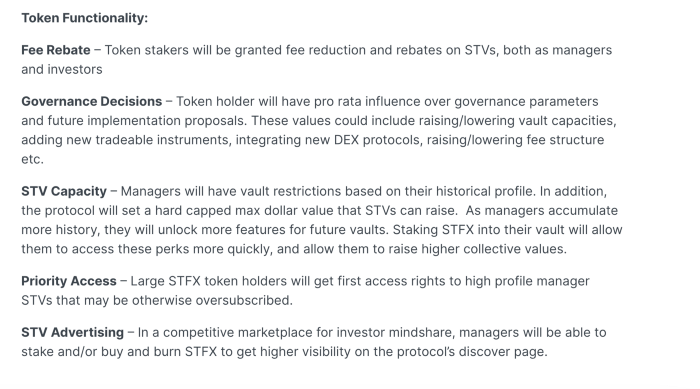
I'm impressed by $STFX's planned use. Brilliant priority access. A crypto dealer opens a vault here. Many would join. STFX tokens offer VIP access over those without tokens.
STFX provides short-term trading, which is mind-blowing to me. I agree with their platform's purpose. Crypto market pricing actions foster short-termism. When you trade, the turnover could be larger than long-term holding or trading. 2017 BTC buyers waited 5 years to complete their holdings.
STFX teams simply adapted. Volatility aids trading.
All things about STFX scream Degen. The protocol fully embraces the degen nature of some, if not most, crypto natives.

An enjoyable dApp. Leaderboards are fun for reputation-building. FLEXING COMPETITIONS. You can join for as low as $10. STFX uses Arbitrum, therefore gas costs are low. Alpha procedure completes the degen feeling.
Despite looking like they don't take themselves seriously, I sense a strong business plan below. There is a real demand for the solution STFX offers.

Katrine Tjoelsen
3 years ago
8 Communication Hacks I Use as a Young Employee
Learn these subtle cues to gain influence.

Hate being ignored?
As a 24-year-old, I struggled at work. Attention-getting tips How to avoid being judged by my size, gender, and lack of wrinkles or gray hair?
I've learned seniority hacks. Influence. Within two years as a product manager, I led a team. I'm a Stanford MBA student.
These communication hacks can make you look senior and influential.
1. Slowly speak
We speak quickly because we're afraid of being interrupted.
When I doubt my ideas, I speak quickly. How can we slow down? Jamie Chapman says speaking slowly saps our energy.
Chapman suggests emphasizing certain words and pausing.
2. Interrupted? Stop the stopper
Someone interrupt your speech?
Don't wait. "May I finish?" No pause needed. Stop interrupting. I first tried this in Leadership Laboratory at Stanford. How quickly I gained influence amazed me.
Next time, try “May I finish?” If that’s not enough, try these other tips from Wendy R.S. O’Connor.
3. Context
Others don't always see what's obvious to you.
Through explanation, you help others see the big picture. If a senior knows it, you help them see where your work fits.
4. Don't ask questions in statements
“Your statement lost its effect when you ended it on a high pitch,” a group member told me. Upspeak, it’s called. I do it when I feel uncertain.
Upspeak loses influence and credibility. Unneeded. When unsure, we can say "I think." We can even ask a proper question.
Someone else's boasting is no reason to be dismissive. As leaders and colleagues, we should listen to our colleagues even if they use this speech pattern.
Give your words impact.
5. Signpost structure
Signposts improve clarity by providing structure and transitions.
Communication coach Alexander Lyon explains how to use "first," "second," and "third" He explains classic and summary transitions to help the listener switch topics.
Signs clarify. Clarity matters.

6. Eliminate email fluff
“Fine. When will the report be ready? — Jeff.”
Notice how senior leaders write short, direct emails? I often use formalities like "dear," "hope you're well," and "kind regards"
Formality is (usually) unnecessary.
7. Replace exclamation marks with periods
See how junior an exclamation-filled email looks:
Hi, all!
Hope you’re as excited as I am for tomorrow! We’re celebrating our accomplishments with cake! Join us tomorrow at 2 pm!
See you soon!
Why the exclamation points? Why not just one?
Hi, all.
Hope you’re as excited as I am for tomorrow. We’re celebrating our accomplishments with cake. Join us tomorrow at 2 pm!
See you soon.
8. Take space
"Playing high" means having an open, relaxed body, says Stanford professor and author Deborah Gruenfield.
Crossed legs or looking small? Relax. Get bigger.


rekt
4 years ago
LCX is the latest CEX to have suffered a private key exploit.
The attack began around 10:30 PM +UTC on January 8th.
Peckshield spotted it first, then an official announcement came shortly after.
We’ve said it before; if established companies holding millions of dollars of users’ funds can’t manage their own hot wallet security, what purpose do they serve?
The Unique Selling Proposition (USP) of centralised finance grows smaller by the day.
The official incident report states that 7.94M USD were stolen in total, and that deposits and withdrawals to the platform have been paused.
LCX hot wallet: 0x4631018f63d5e31680fb53c11c9e1b11f1503e6f
Hacker’s wallet: 0x165402279f2c081c54b00f0e08812f3fd4560a05
Stolen funds:
- 162.68 ETH (502,671 USD)
- 3,437,783.23 USDC (3,437,783 USD)
- 761,236.94 EURe (864,840 USD)
- 101,249.71 SAND Token (485,995 USD)
- 1,847.65 LINK (48,557 USD)
- 17,251,192.30 LCX Token (2,466,558 USD)
- 669.00 QNT (115,609 USD)
- 4,819.74 ENJ (10,890 USD)
- 4.76 MKR (9,885 USD)
**~$1M worth of $LCX remains in the address, along with 611k EURe which has been frozen by Monerium.
The rest, a total of 1891 ETH (~$6M) was sent to Tornado Cash.**
Why can’t they keep private keys private?
Is it really that difficult for a traditional corporate structure to maintain good practice?
CeFi hacks leave us with little to say - we can only go on what the team chooses to tell us.
Next time, they can write this article themselves.
See below for a template.