


More on Technology

Nikhil Vemu
3 years ago
7 Mac Apps That Are Exorbitantly Priced But Totally Worth It
Wish you more bang for your buck
By ‘Cost a Bomb’ I didn’t mean to exaggerate. It’s an idiom that means ‘To be very expensive’. In fact, no app on the planet costs a bomb lol.
So, to the point.
Chronicle
(Freemium. For Pro, $24.99 | Available on Setapp)
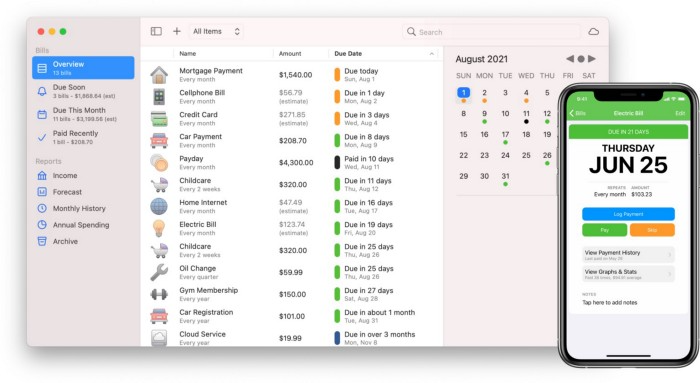
You probably have trouble keeping track of dozens of bills and subscriptions each month.
Try Chronicle.
Easy-to-use app
Add payment due dates and receive reminders,
Save payment documentation,
Analyze your spending by season, year, and month.
Observe expenditure trends and create new budgets.
Best of all, Chronicle features an integrated browser for fast payment and logging.
iOS and macOS sync.
SoundSource
($39 for lifetime)
Background Music, a free macOS program, was featured in #6 of this post last month.
It controls per-app volume, stereo balance, and audio over its max level.
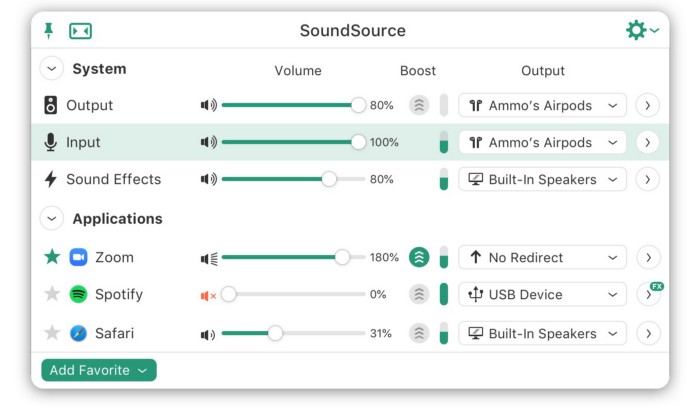
Background Music is fully supported. Additionally,
Connect various speakers to various apps (Wow! ),
change the audio sample rate for each app,
To facilitate access, add a floating SoundSource window.
Use its blocks in Shortcuts app,
On the menu bar, include meters for output/input devices and running programs.
PixelSnap
($39 for lifetime | Available on Setapp)
This software is heaven for UI designers.
It aids you.
quickly calculate screen distances (in pixels) ,
Drag an area around an object to determine its borders,
Measure the distances between the additional guides,
screenshots should be pixel-perfect.
What’s more.
You can
Adapt your tolerance for items with poor contrast and shadows.
Use your Touch Bar to perform important tasks, if you have one.
Mate Translation
($3.99 a month / $29.99 a year | Available on Setapp)
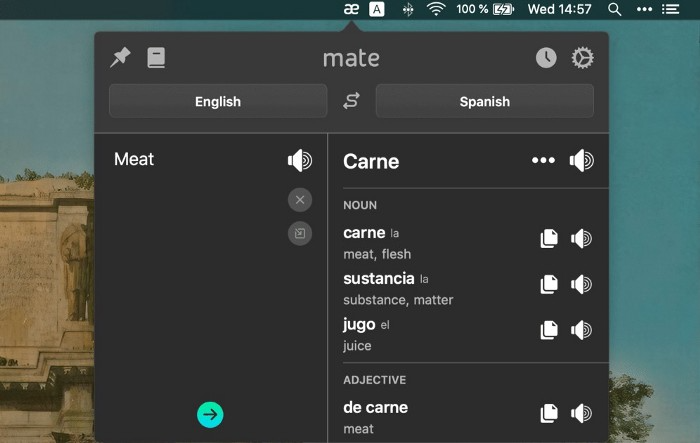
Mate Translate resembles a roided-up version of BarTranslate, which I wrote about in #1 of this piece last month.
If you translate often, utilize Mate Translate on macOS and Safari.
I'm really vocal about it.
It stays on the menu bar, and is accessible with a click or ⌥+shift+T hotkey.
It lets you
Translate in 103 different languages,
To translate text, double-click or right-click on it.
Totally translate websites. Additionally, Netflix subtitles,
Listen to their pronunciation to see how close it is to human.
iPhone and Mac sync Mate-ing history.
Swish
($16 for lifetime | Available on Setapp)
Swish is awesome!
Swipe, squeeze, tap, and hold movements organize chaotic desktop windows. Swish operates with mouse and trackpad.
Some gestures:
• Pinch Once: Close an app
• Pinch Twice: Quit an app
• Swipe down once: Minimise an app
• Pinch Out: Enter fullscreen mode
• Tap, Hold, & Swipe: Arrange apps in grids
 and many more...

After getting acquainted to the movements, your multitasking will improve.
Unite
($24.99 for lifetime | Available on Setapp)
It turns webapps into macOS apps. The end.
Unite's functionality is a million times better.
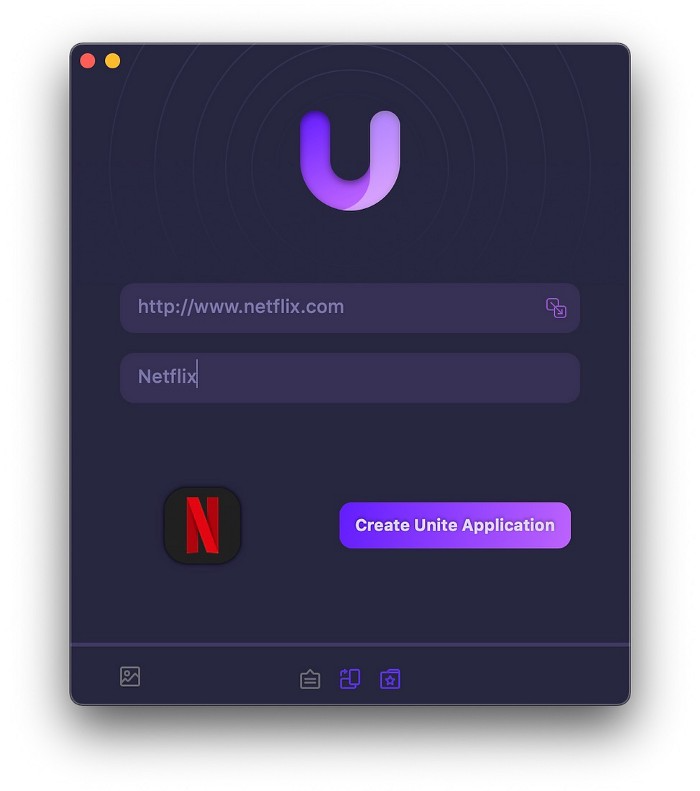
Provide extensive customization (incl. its icon, light and dark modes)
make menu bar applications,
Get badges for web notifications and automatically refresh websites,
Replace any dock icon in the window with it (Wow!) by selecting that portion of the window.

Use PiP (Picture-in-Picture) on video sites that support it.
Delete advertising,
Throughout macOS, use floating windows
and many more…
I feel $24.99 one-off for this tool is a great deal, considering all these features. What do you think?
CleanShot X
(Basic: $29 one-off. Pro: $8/month | Available on Setapp)
CleanShot X can achieve things the macOS screenshot tool cannot. Complete screenshot toolkit.
CleanShot X, like Pixel Snap 2 (#3), is fantastic.
Allows
Scroll to capture a long page,
screen recording,
With webcam on,
• With mic and system audio,
• Highlighting mouse clicks and hotkeys.
Maintain floating screenshots for reference
While capturing, conceal desktop icons and notifications.
Recognize text in screenshots (OCR),
You may upload and share screenshots using the built-in cloud.
These are just 6 in 50+ features, and you’re already saying Wow!

M.G. Siegler
3 years ago
G3nerative
Generative AI hype: some thoughts

The sudden surge in "generative AI" startups and projects feels like the inverse of the recent "web3" boom. Both came from hyped-up pots. But while web3 hyped idealistic tech and an easy way to make money, generative AI hypes unsettling tech and questions whether it can be used to make money.
Web3 is technology looking for problems to solve, while generative AI is technology creating almost too many solutions. Web3 has been evangelists trying to solve old problems with new technology. As Generative AI evolves, users are resolving old problems in stunning new ways.
It's a jab at web3, but it's true. Web3's hype, including crypto, was unhealthy. Always expected a tech crash and shakeout. Tech that won't look like "web3" but will enhance "web2"
But that doesn't mean AI hype is healthy. There'll be plenty of bullshit here, too. As moths to a flame, hype attracts charlatans. Again, the difference is the different starting point. People want to use it. Try it.
With the beta launch of Dall-E 2 earlier this year, a new class of consumer product took off. Midjourney followed suit (despite having to jump through the Discord server hoops). Twelve more generative art projects. Lensa, Prisma Labs' generative AI self-portrait project, may have topped the hype (a startup which has actually been going after this general space for quite a while). This week, ChatGPT went off-topic.
This has a "fake-it-till-you-make-it" vibe. We give these projects too much credit because they create easy illusions. This also unlocks new forms of creativity. And faith in new possibilities.
As a user, it's thrilling. We're just getting started. These projects are not only fun to play with, but each week brings a new breakthrough. As an investor, it's all happening so fast, with so much hype (and ethical and societal questions), that no one knows how it will turn out. Web3's demand won't be the issue. Too much demand may cause servers to melt down, sending costs soaring. Companies will try to mix rapidly evolving tech to meet user demand and create businesses. Frustratingly difficult.
Anyway, I wanted an excuse to post some Lensa selfies.

These are really weird. I recognize them as me or a version of me, but I have no memory of them being taken. It's surreal, out-of-body. Uncanny Valley.

Jay Peters
4 years ago
Apple AR/VR heaset
Apple is said to have opted for a standalone AR/VR headset over a more powerful tethered model.
It has had a tumultuous history.
Apple's alleged mixed reality headset appears to be the worst-kept secret in tech, and a fresh story from The Information is jam-packed with details regarding the device's rocky development.
Apple's decision to use a separate headgear is one of the most notable aspects of the story. Apple had yet to determine whether to pursue a more powerful VR headset that would be linked with a base station or a standalone headset. According to The Information, Apple officials chose the standalone product over the version with the base station, which had a processor that later arrived as the M1 Ultra. In 2020, Bloomberg published similar information.
That decision appears to have had a long-term impact on the headset's development. "The device's many processors had already been in development for several years by the time the choice was taken, making it impossible to go back to the drawing board and construct, say, a single chip to handle all the headset's responsibilities," The Information stated. "Other difficulties, such as putting 14 cameras on the headset, have given hardware and algorithm engineers stress."
Jony Ive remained to consult on the project's design even after his official departure from Apple, according to the story. Ive "prefers" a wearable battery, such as that offered by Magic Leap. Other prototypes, according to The Information, placed the battery in the headset's headband, and it's unknown which will be used in the final design.
The headset was purportedly shown to Apple's board of directors last week, indicating that a public unveiling is imminent. However, it is possible that it will not be introduced until later this year, and it may not hit shop shelves until 2023, so we may have to wait a bit to try it.
For further down the line, Apple is working on a pair of AR spectacles that appear like Ray-Ban wayfarer sunglasses, but according to The Information, they're "still several years away from release." (I'm interested to see how they compare to Meta and Ray-Bans' true wayfarer-style glasses.)
You might also like

Jared A. Brock
4 years ago
Here is the actual reason why Russia invaded Ukraine
Democracy's demise
Our Ukrainian brothers and sisters are being attacked by a far superior force.
It's the biggest invasion since WWII.
43.3 million peaceful Ukrainians awoke this morning to tanks, mortars, and missiles. Russia is already 15 miles away.
America and the West will not deploy troops.
They're sanctioning. Except railways. And luxuries. And energy. Diamonds. Their dependence on Russian energy exports means they won't even cut Russia off from SWIFT.
Ukraine is desperate enough to hand out guns on the street.
France, Austria, Turkey, and the EU are considering military aid, but Ukraine will fall without America or NATO.
The Russian goal is likely to encircle Kyiv and topple Zelenskyy's government. A proxy power will be reinstated once Russia has total control.
“Western security services believe Putin intends to overthrow the government and install a puppet regime,” says Financial Times foreign affairs commentator Gideon Rachman. This “decapitation” strategy includes municipalities. Ukrainian officials are being targeted for arrest or death.”
Also, Putin has never lost a war.
Why is Russia attacking Ukraine?
Putin, like a snowflake college student, “feels unsafe.”
Why?
Because Ukraine is full of “Nazi ideas.”
Putin claims he has felt threatened by Ukraine since the country's pro-Putin leader was ousted and replaced by a popular Jewish comedian.
Hee hee
He fears a full-scale enemy on his doorstep if Ukraine joins NATO. But he refuses to see it both ways. NATO has never invaded Russia, but Russia has always stolen land from its neighbors. Can you blame them for joining a mutual defense alliance when a real threat exists?
Nations that feel threatened can join NATO. That doesn't justify an attack by Russia. It allows them to defend themselves. But NATO isn't attacking Moscow. They aren't.
Russian President Putin's "special operation" aims to de-Nazify the Jewish-led nation.
To keep Crimea and the other two regions he has already stolen, he wants Ukraine undefended by NATO.
(Warlords have fought for control of the strategically important Crimea for over 2,000 years.)
Putin wants to own all of Ukraine.
Why?
The Black Sea is his goal.
Ports bring money and power, and Ukraine pipelines transport Russian energy products.
Putin wants their wheat, too — with 70% crop coverage, Ukraine would be their southern breadbasket, and Russia has no qualms about starving millions of Ukrainians to death to feed its people.
In the end, it's all about greed and power.
Putin wants to own everything Russia has ever owned. This year he turns 70, and he wants to be remembered like his hero Peter the Great.
In order to get it, he's willing to kill thousands of Ukrainians
Art imitates life
This story began when a Jewish TV comedian portrayed a teacher elected President after ranting about corruption.
Servant of the People, the hit sitcom, is now the leading centrist political party.
Right, President Zelenskyy won the hearts and minds of Ukrainians by imagining a fairer world.
A fair fight is something dictators, corporatists, monopolists, and warlords despise.
Now Zelenskyy and his people will die, allowing one of history's most corrupt leaders to amass even more power.
The poor always lose
Meanwhile, the West will impose economic sanctions on Russia.
China is likely to step in to help Russia — or at least the wealthy.
The poor and working class in Russia will suffer greatly if there is a hard crash or long-term depression.
Putin's friends will continue to drink champagne and eat caviar.
Russia cutting off oil, gas, and fertilizer could cause more inflation and possibly a recession if it cuts off supplies to the West. This causes more suffering and hardship for the Western poor and working class.
Why? a billionaire sociopath gets his dirt.
Yes, Russia is simply copying America. Some of us think all war is morally wrong, regardless of who does it.
But let's not kid ourselves right now.
The markets rallied after the biggest invasion in Europe since WWII.
Investors hope Ukraine collapses and Russian oil flows.
Unbridled capitalists value lifeless.
What we can do about Ukraine
When the Russian army invaded eastern Finland, my wife's grandmother fled as a child. 80 years later, Russia still has Karelia.
Russia invaded Ukraine today to retake two eastern provinces.
History has taught us nothing.
Past mistakes won't fix the future.
Instead, we should try:
- Pray and/or meditate on our actions with our families.
- Stop buying Russian products (vodka, obviously, but also pay more for hydro/solar/geothermal/etc.)
- Stop wasting money on frivolous items and donate it to Ukrainian charities.
Here are 35+ places to donate.
- To protest, gather a few friends, contact the media, and shake signs in front of the Russian embassy.
- Prepare to welcome refugees.
More war won't save the planet or change hearts.
Only love can work.
Owolabi Judah
3 years ago
How much did YouTube pay for 10 million views?
Ali's $1,054,053.74 YouTube Adsense haul.
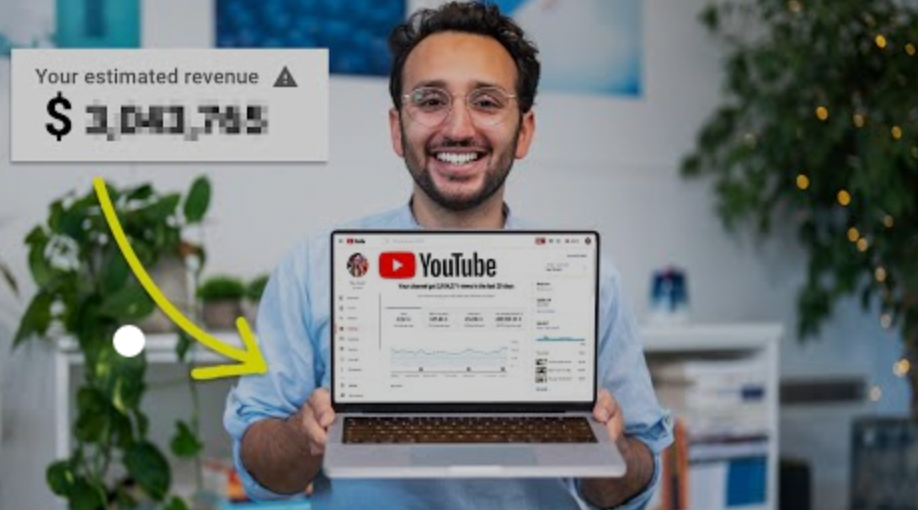
YouTuber, entrepreneur, and former doctor Ali Abdaal. He began filming productivity and financial videos in 2017. Ali Abdaal has 3 million YouTube subscribers and has crossed $1 million in AdSense revenue. Crazy, no?
Ali will share the revenue of his top 5 youtube videos, things he's learned that you can apply to your side hustle, and how many views it takes to make a livelihood off youtube.
First, "The Long Game."
All good things take time to bear fruit. Compounding improves everything. Long-term work yields better returns. Ali made his first dollar after nine months and 85 videos.
Second, "One piece of content can transform your life, but you never know which one."
Had he abandoned YouTube at 84 videos without making any money, he wouldn't have filmed the 85th video that altered everything.
Third Lesson: Your Industry Choice Can Multiply.
The industry or niche you target as a business owner or side hustler can have a major impact on how much money you make.
Here are the top 5 videos.
1) 9.8m views: $191,258.16 for 9 passive income ideas
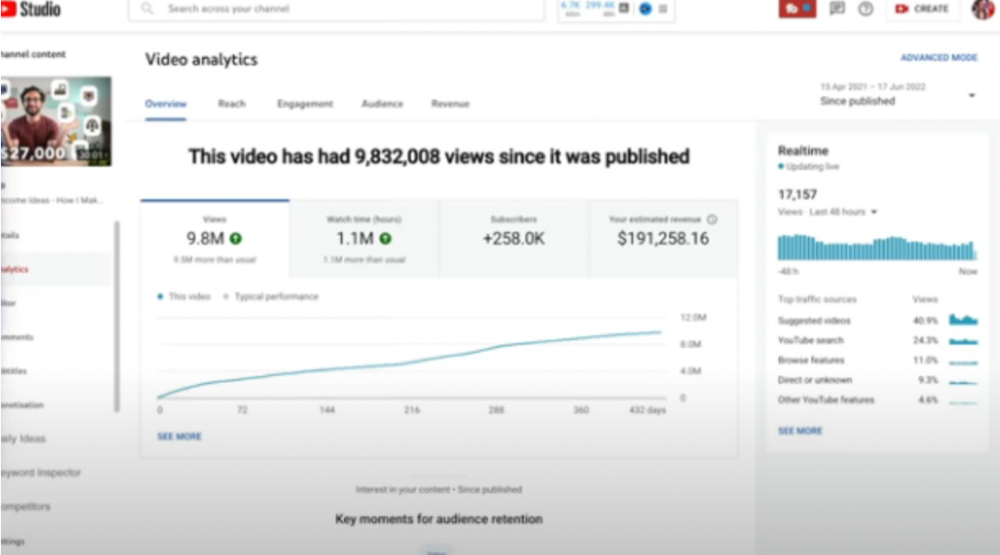
Ali made 2 points.
We should consider YouTube videos digital assets. They're investments, which make us money. His investments are yielding passive income.
Investing extra time and effort in your films can pay off.
2) How to Invest for Beginners — 5.2m Views: $87,200.08.
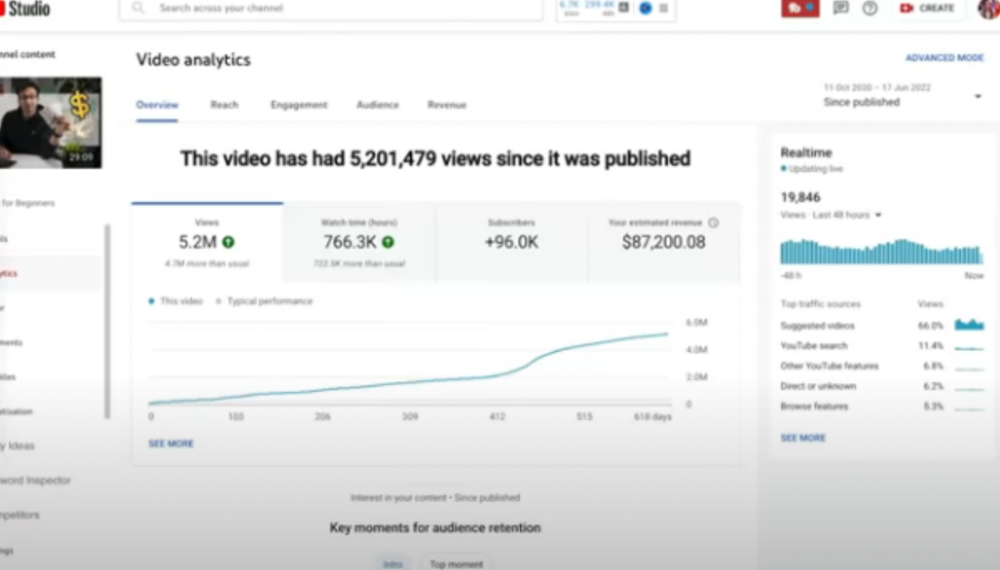
This video did poorly in the first several weeks after it was published; it was his tenth poorest performer. Don't worry about things you can't control. This applies to life, not just YouTube videos.
He stated we constantly have anxieties, fears, and concerns about things outside our control, but if we can find that line, life is easier and more pleasurable.
3) How to Build a Website in 2022— 866.3k views: $42,132.72.
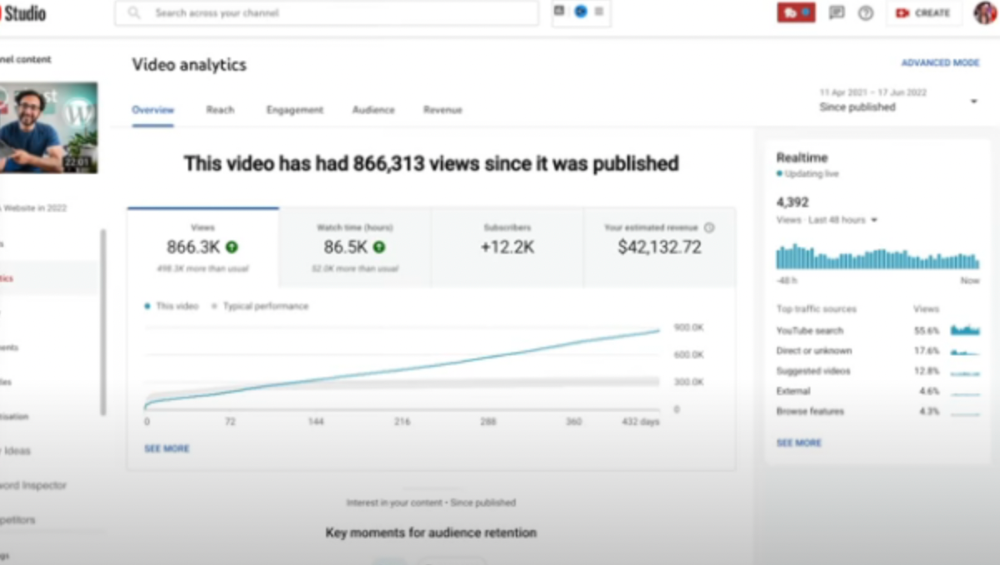
The RPM was $48.86 per thousand views, making it his highest-earning video. Squarespace, Wix, and other website builders are trying to put ads on it and competing against one other, so ad rates go up.
Because it was beyond his niche, Ali almost didn't make the video. He made the video because he wanted to help at least one person.
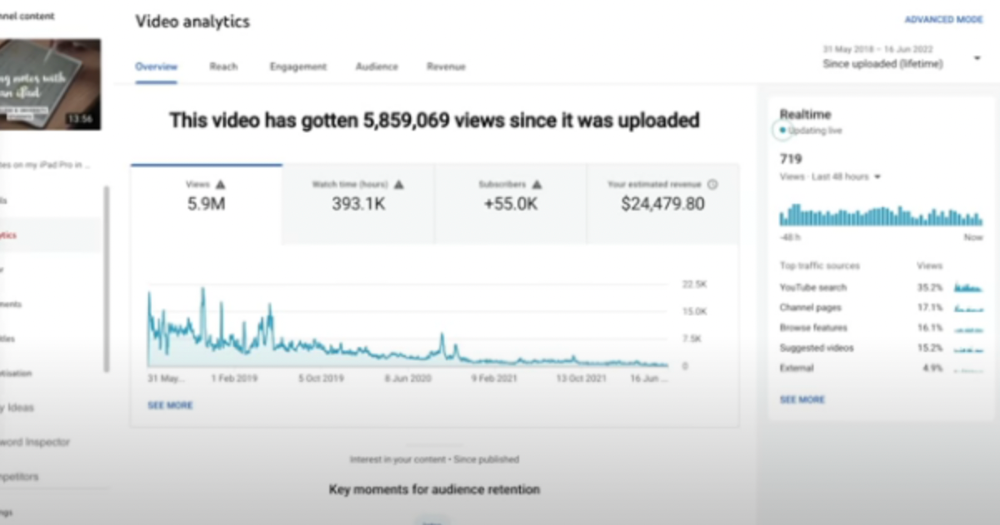
4) How I take notes on my iPad in medical school — 5.9m views: $24,479.80
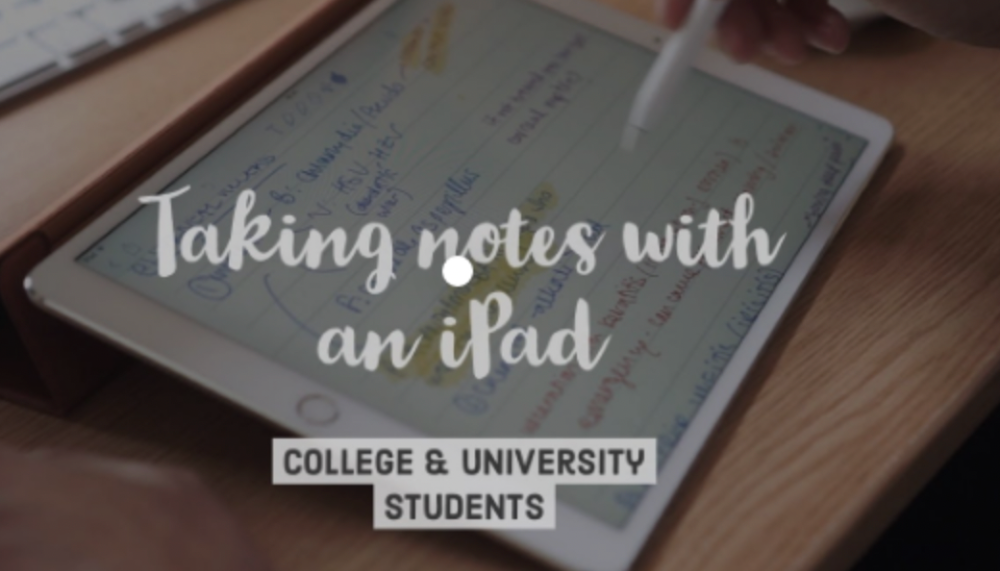
85th video. It's the video that affected Ali's YouTube channel and his life the most. The video's success wasn't certain.
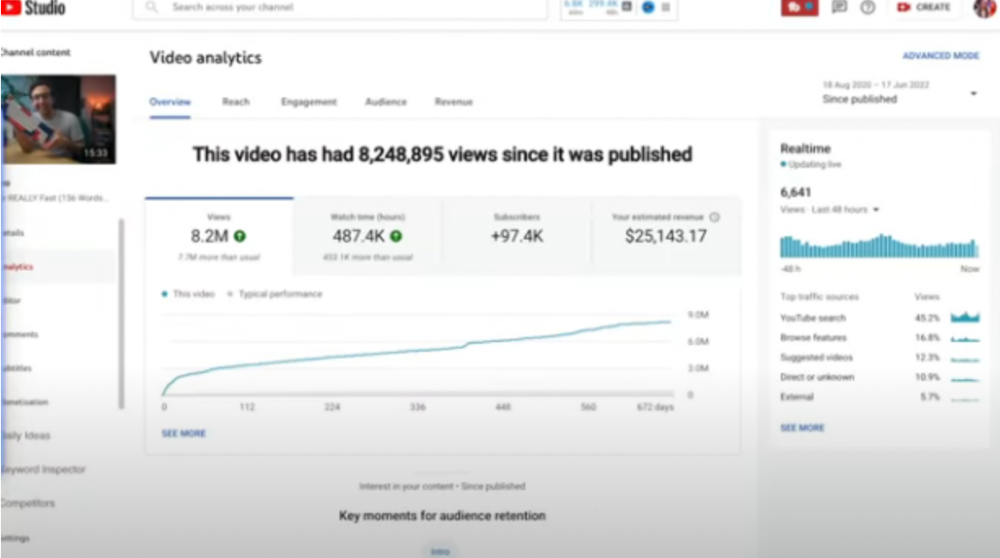
5) How I Type Fast 156 Words Per Minute — 8.2M views: $25,143.17
Ali didn't know this video would perform well; he made it because he can type fast and has been practicing for 10 years. So he made a video with his best advice.
How many views to different wealth levels?
It depends on geography, niche, and other monetization sources. To keep things simple, he would solely utilize AdSense.
How many views to generate money?
To generate money on Youtube, you need 1,000 subscribers and 4,000 hours of view time. How much work do you need to make pocket money?
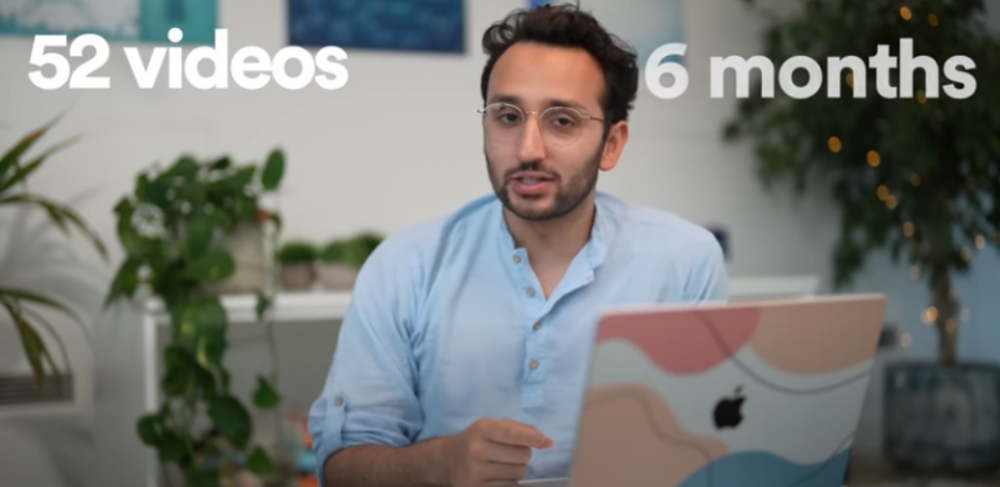
Ali's first 1,000 subscribers took 52 videos and 6 months. The typical channel with 1,000 subscribers contains 152 videos, according to Tubebuddy. It's time-consuming.
After monetizing, you'll need 15,000 views/month to make $5-$10/day.
How many views to go part-time?
Say you make $35,000/year at your day job. If you work 5 days/week, you make $7,000/year each day. If you want to drop down from 5 days to 4 days/week, you need to make an extra $7,000/year from YouTube, or $600/month.
What's the quit-your-job budget?
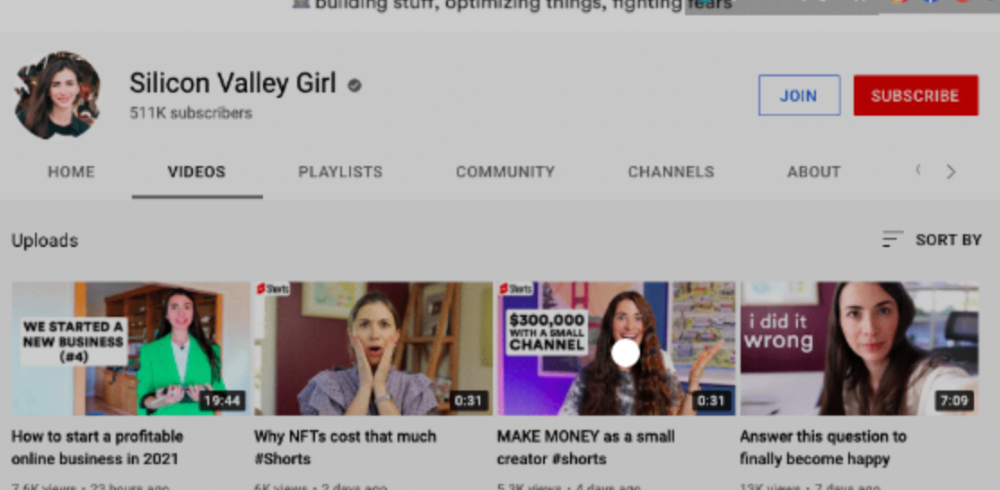
Silicon Valley Girl is in a highly successful niche targeting tech-focused folks in the west. When her channel had 500k views/month, she made roughly $3,000/month or $47,000/year, enough to quit your work.
Marina has another 1.5m subscriber channel in Russia, which has a lower rpm because fewer corporations advertise there than in the west. 2.3 million views/month is $4,000/month or $50,000/year, enough to quit your employment.
Marina is an intriguing example because she has three YouTube channels with the same skills, but one is 16x more profitable due to the niche she chose.
In Ali's case, he made 100+ videos when his channel was producing enough money to quit his job, roughly $4,000/month.
How many views make you rich?
Depending on how you define rich. Ali felt prosperous with over $100,000/year and 3–5m views/month.
Conclusion
YouTubers and artists don't treat their work like a company, which is a mistake. Businesses have been attempting to figure this out for decades, if not centuries.
We can learn from the business world how to monetize YouTube, Instagram, and Tiktok and make them into sustainable enterprises where we can hire people and delegate tasks.
Bonus
Watch Ali's video explaining all this:
This post is a summary. Read the full article here

Zuzanna Sieja
3 years ago
In 2022, each data scientist needs to read these 11 books.

Non-technical talents can benefit data scientists in addition to statistics and programming.
As our article 5 Most In-Demand Skills for Data Scientists shows, being business-minded is useful. How can you get such a diverse skill set? We've compiled a list of helpful resources.
Data science, data analysis, programming, and business are covered. Even a few of these books will make you a better data scientist.
Ready? Let’s dive in.
Best books for data scientists
1. The Black Swan
Author: Nassim Taleb
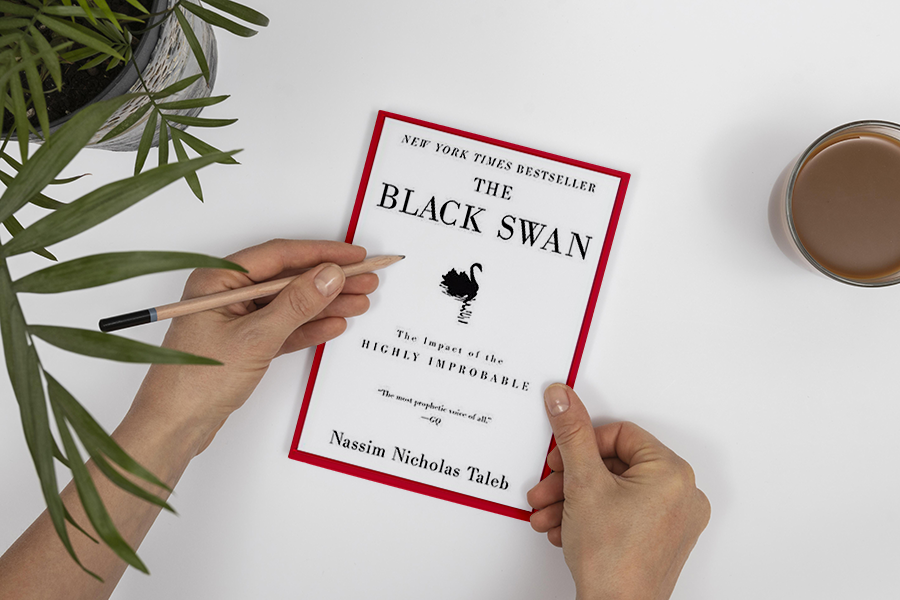
First, a less obvious title. Nassim Nicholas Taleb's seminal series examines uncertainty, probability, risk, and decision-making.
Three characteristics define a black swan event:
It is erratic.
It has a significant impact.
Many times, people try to come up with an explanation that makes it seem more predictable than it actually was.
People formerly believed all swans were white because they'd never seen otherwise. A black swan in Australia shattered their belief.
Taleb uses this incident to illustrate how human thinking mistakes affect decision-making. The book teaches readers to be aware of unpredictability in the ever-changing IT business.
Try multiple tactics and models because you may find the answer.
2. High Output Management
Author: Andrew Grove
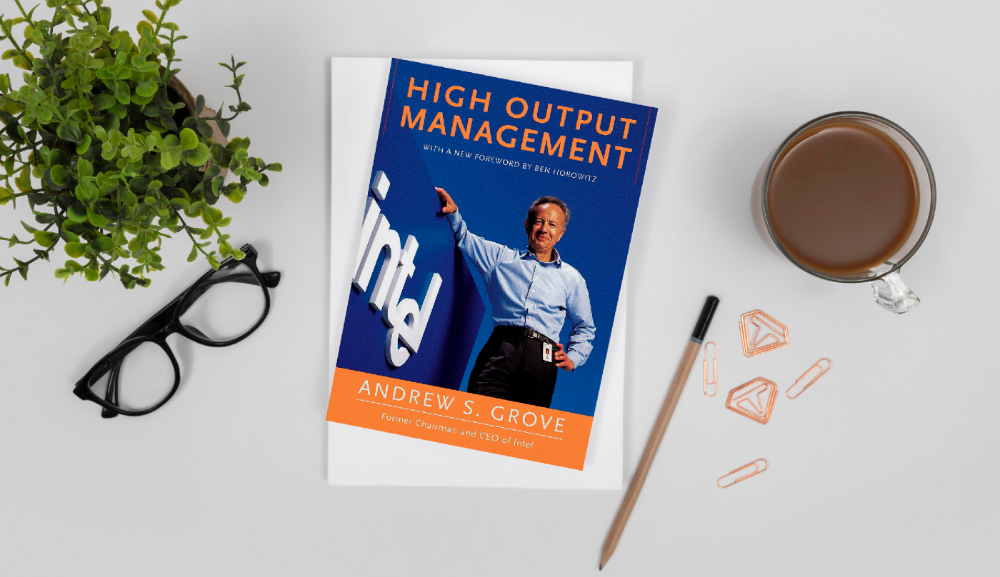
Intel's former chairman and CEO provides his insights on developing a global firm in this business book. We think Grove would choose “management” to describe the talent needed to start and run a business.
That's a skill for CEOs, techies, and data scientists. Grove writes on developing productive teams, motivation, real-life business scenarios, and revolutionizing work.
Five lessons:
Every action is a procedure.
Meetings are a medium of work
Manage short-term goals in accordance with long-term strategies.
Mission-oriented teams accelerate while functional teams increase leverage.
Utilize performance evaluations to enhance output.
So — if the above captures your imagination, it’s well worth getting stuck in.
3. The Hard Thing About Hard Things: Building a Business When There Are No Easy Answers
Author: Ben Horowitz
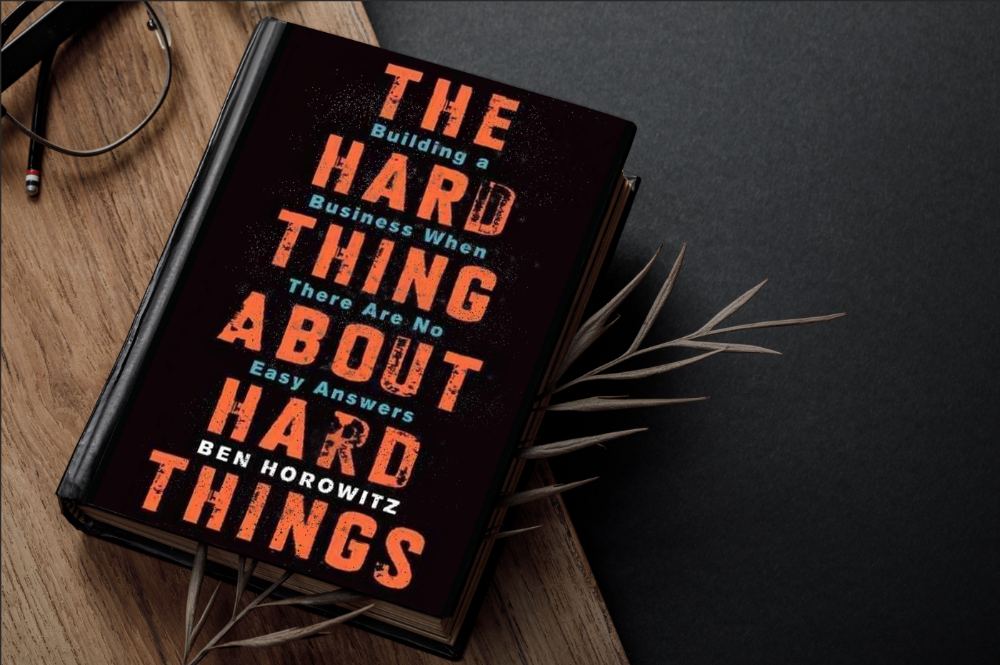
Few realize how difficult it is to run a business, even though many see it as a tremendous opportunity.
Business schools don't teach managers how to handle the toughest difficulties; they're usually on their own. So Ben Horowitz wrote this book.
It gives tips on creating and maintaining a new firm and analyzes the hurdles CEOs face.
Find suggestions on:
create software
Run a business.
Promote a product
Obtain resources
Smart investment
oversee daily operations
This book will help you cope with tough times.
4. Obviously Awesome: How to Nail Product Positioning
Author: April Dunford
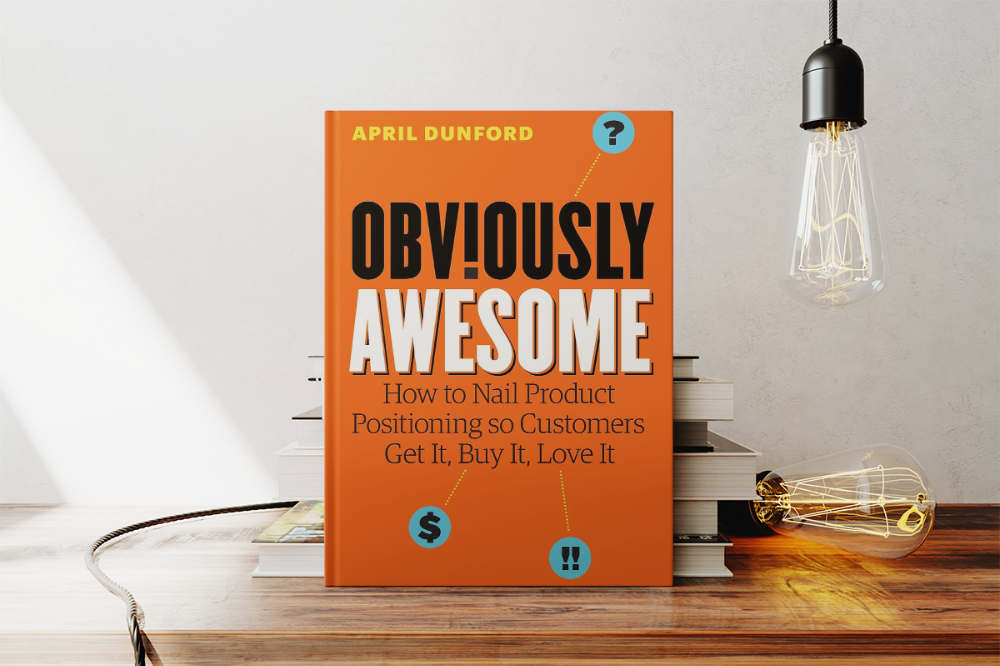
Your job as a data scientist is a product. You should be able to sell what you do to clients. Even if your product is great, you must convince them.
How to? April Dunford's advice: Her book explains how to connect with customers by making your offering seem like a secret sauce.
You'll learn:
Select the ideal market for your products.
Connect an audience to the value of your goods right away.
Take use of three positioning philosophies.
Utilize market trends to aid purchasers
5. The Mom test
Author: Rob Fitzpatrick

The Mom Test improves communication. Client conversations are rarely predictable. The book emphasizes one of the most important communication rules: enquire about specific prior behaviors.
Both ways work. If a client has suggestions or demands, listen carefully and ensure everyone understands. The book is packed with client-speaking tips.
6. Introduction to Machine Learning with Python: A Guide for Data Scientists
Authors: Andreas C. Müller, Sarah Guido
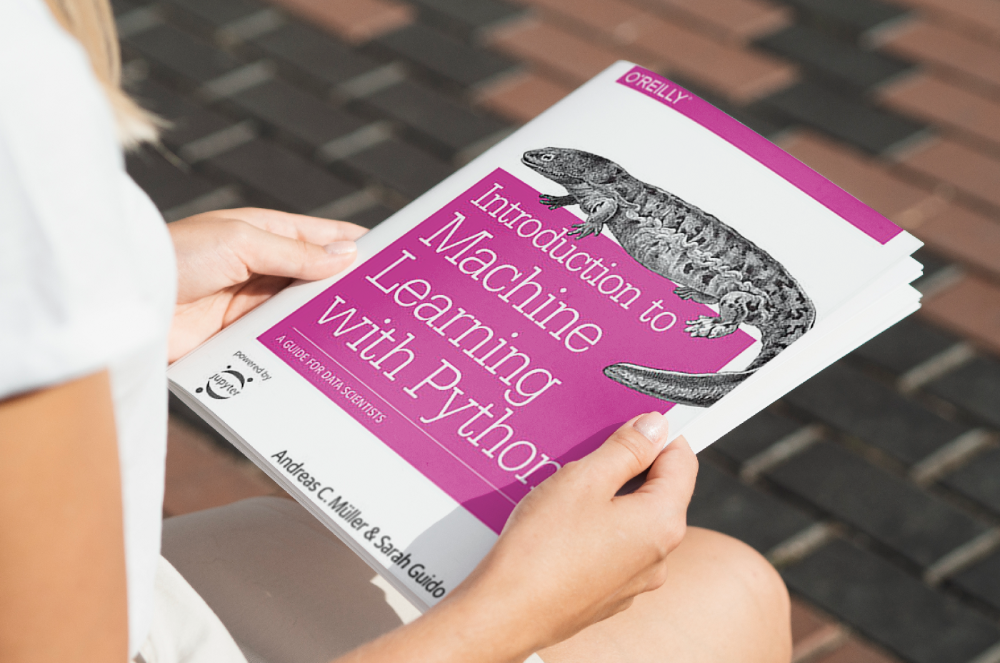
Now, technical documents.
This book is for Python-savvy data scientists who wish to learn machine learning. Authors explain how to use algorithms instead of math theory.
Their technique is ideal for developers who wish to study machine learning basics and use cases. Sci-kit-learn, NumPy, SciPy, pandas, and Jupyter Notebook are covered beyond Python.
If you know machine learning or artificial neural networks, skip this.
7. Python Data Science Handbook: Essential Tools for Working with Data
Author: Jake VanderPlas
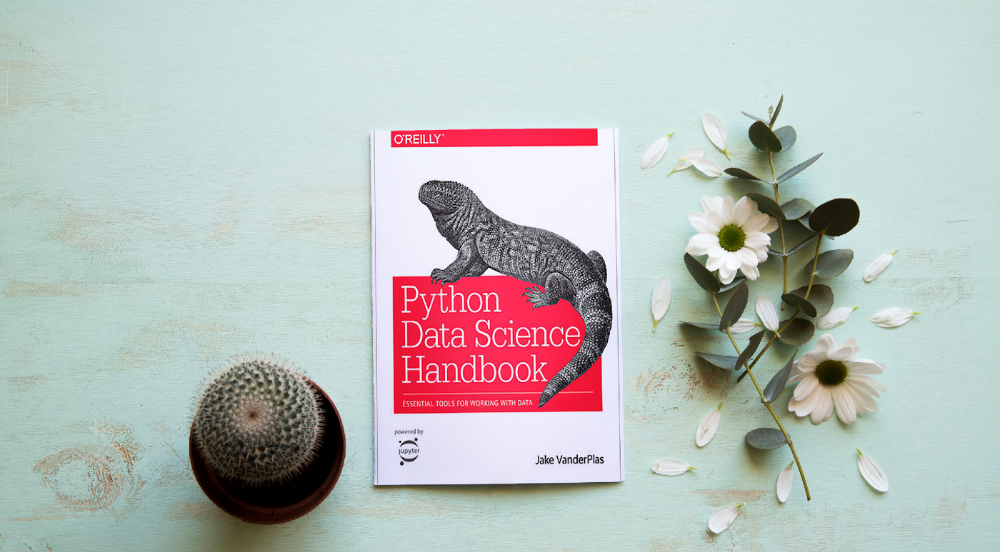
Data work isn't easy. Data manipulation, transformation, cleansing, and visualization must be exact.
Python is a popular tool. The Python Data Science Handbook explains everything. The book describes how to utilize Pandas, Numpy, Matplotlib, Scikit-Learn, and Jupyter for beginners.
The only thing missing is a way to apply your learnings.
8. Python for Data Analysis: Data Wrangling with Pandas, NumPy, and IPython
Author: Wes McKinney
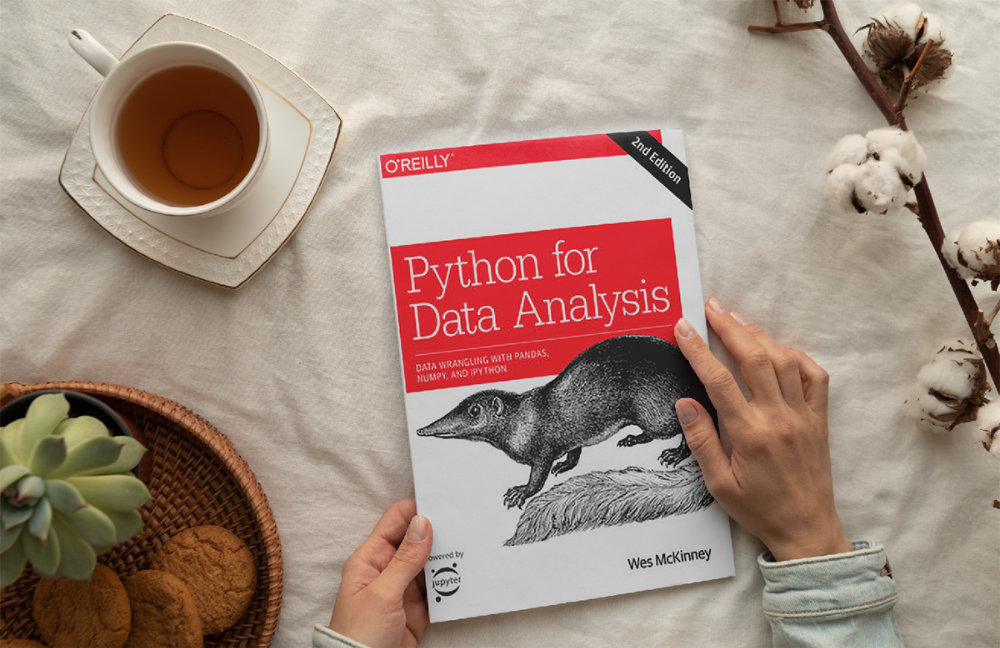
The author leads you through manipulating, processing, cleaning, and analyzing Python datasets using NumPy, Pandas, and IPython.
The book's realistic case studies make it a great resource for Python or scientific computing beginners. Once accomplished, you'll uncover online analytics, finance, social science, and economics solutions.
9. Data Science from Scratch
Author: Joel Grus
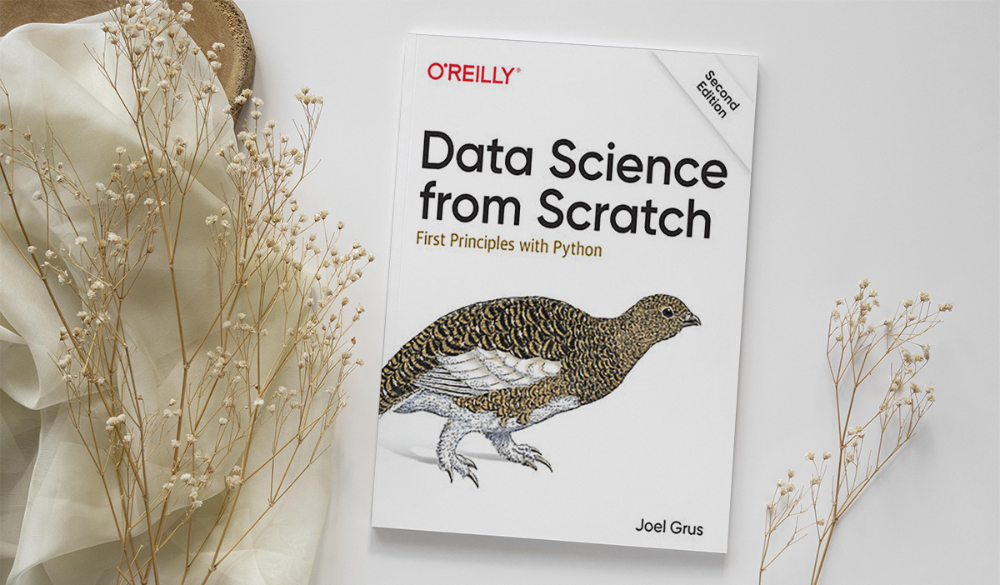
Here's a title for data scientists with Python, stats, maths, and algebra skills (alongside a grasp of algorithms and machine learning). You'll learn data science's essential libraries, frameworks, modules, and toolkits.
The author works through all the key principles, providing you with the practical abilities to develop simple code. The book is appropriate for intermediate programmers interested in data science and machine learning.
Not that prior knowledge is required. The writing style matches all experience levels, but understanding will help you absorb more.
10. Machine Learning Yearning
Author: Andrew Ng
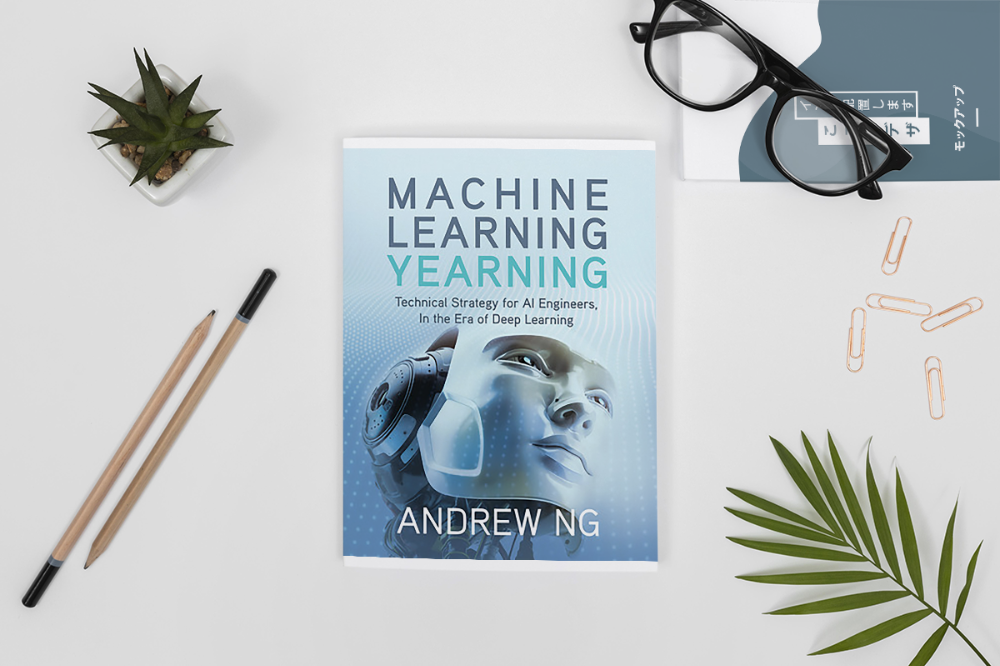
Andrew Ng is a machine learning expert. Co-founded and teaches at Stanford. This free book shows you how to structure an ML project, including recognizing mistakes and building in complex contexts.
The book delivers knowledge and teaches how to apply it, so you'll know how to:
Determine the optimal course of action for your ML project.
Create software that is more effective than people.
Recognize when to use end-to-end, transfer, and multi-task learning, and how to do so.
Identifying machine learning system flaws
Ng writes easy-to-read books. No rigorous math theory; just a terrific approach to understanding how to make technical machine learning decisions.
11. Deep Learning with PyTorch Step-by-Step
Author: Daniel Voigt Godoy
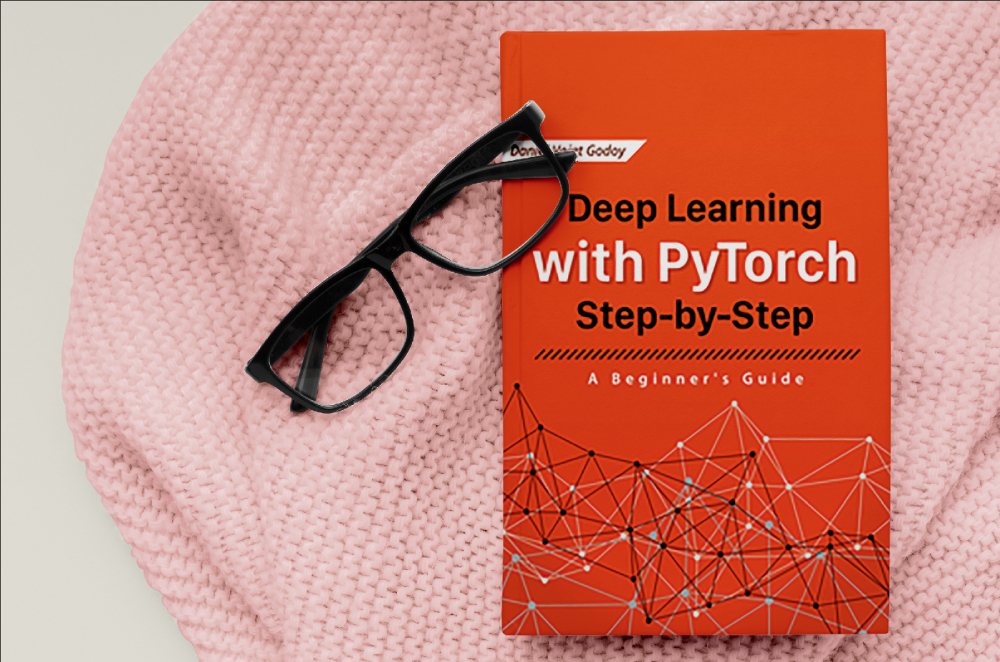
The last title is also the most recent. The book was revised on 23 January 2022 to discuss Deep Learning and PyTorch, a Python coding tool.
It comprises four parts:
Fundamentals (gradient descent, training linear and logistic regressions in PyTorch)
Machine Learning (deeper models and activation functions, convolutions, transfer learning, initialization schemes)
Sequences (RNN, GRU, LSTM, seq2seq models, attention, self-attention, transformers)
Automatic Language Recognition (tokenization, embeddings, contextual word embeddings, ELMo, BERT, GPT-2)
We admire the book's readability. The author avoids difficult mathematical concepts, making the material feel like a conversation.
Is every data scientist a humanist?
Even as a technological professional, you can't escape human interaction, especially with clients.
We hope these books will help you develop interpersonal skills.