


More on Entrepreneurship/Creators

Raad Ahmed
4 years ago
How We Just Raised $6M At An $80M Valuation From 100+ Investors Using A Link (Without Pitching)
Lawtrades nearly failed three years ago.
We couldn't raise Series A or enthusiasm from VCs.
We raised $6M (at a $80M valuation) from 100 customers and investors using a link and no pitching.
Step-by-step:
We refocused our business first.
Lawtrades raised $3.7M while Atrium raised $75M. By comparison, we seemed unimportant.
We had to close the company or try something new.
As I've written previously, a pivot saved us. Our initial focus on SMBs attracted many unprofitable customers. SMBs needed one-off legal services, meaning low fees and high turnover.
Tech startups were different. Their General Councels (GCs) needed near-daily support, resulting in higher fees and lower churn than SMBs.
We stopped unprofitable customers and focused on power users. To avoid dilution, we borrowed against receivables. We scaled our revenue 10x, from $70k/mo to $700k/mo.
Then, we reconsidered fundraising (and do it differently)
This time was different. Lawtrades was cash flow positive for most of last year, so we could dictate our own terms. VCs were still wary of legaltech after Atrium's shutdown (though they were thinking about the space).
We neither wanted to rely on VCs nor dilute more than 10% equity. So we didn't compete for in-person pitch meetings.
AngelList Roll-Up Vehicle (RUV). Up to 250 accredited investors can invest in a single RUV. First, we emailed customers the RUV. Why? Because I wanted to help the platform's users.
Imagine if Uber or Airbnb let all drivers or Superhosts invest in an RUV. Humans make the platform, theirs and ours. Giving people a chance to invest increases their loyalty.
We expanded after initial interest.
We created a Journey link, containing everything that would normally go in an investor pitch:
- Slides
- Trailer (from me)
- Testimonials
- Product demo
- Financials
We could also link to our AngelList RUV and send the pitch to an unlimited number of people. Instead of 1:1, we had 1:10,000 pitches-to-investors.
We posted Journey's link in RUV Alliance Discord. 600 accredited investors noticed it immediately. Within days, we raised $250,000 from customers-turned-investors.
Stonks, which live-streamed our pitch to thousands of viewers, was interested in our grassroots enthusiasm. We got $1.4M from people I've never met.
These updates on Pump generated more interest. Facebook, Uber, Netflix, and Robinhood executives all wanted to invest. Sahil Lavingia, who had rejected us, gave us $100k.
We closed the round with public support.
Without a single pitch meeting, we'd raised $2.3M. It was a result of natural enthusiasm: taking care of the people who made us who we are, letting them move first, and leveraging their enthusiasm with VCs, who were interested.
We used network effects to raise $3.7M from a founder-turned-VC, bringing the total to $6M at a $80M valuation (which, by the way, I set myself).
What flipping the fundraising script allowed us to do:
We started with private investors instead of 2–3 VCs to show VCs what we were worth. This gave Lawtrades the ability to:
- Without meetings, share our vision. Many people saw our Journey link. I ended up taking meetings with people who planned to contribute $50k+, but still, the ratio of views-to-meetings was outrageously good for us.
- Leverage ourselves. Instead of us selling ourselves to VCs, they did. Some people with large checks or late arrivals were turned away.
- Maintain voting power. No board seats were lost.
- Utilize viral network effects. People-powered.
- Preemptively halt churn by turning our users into owners. People are more loyal and respectful to things they own. Our users make us who we are — no matter how good our tech is, we need human beings to use it. They deserve to be owners.
I don't blame founders for being hesitant about this approach. Pump and RUVs are new and scary. But it won’t be that way for long. Our approach redistributed some of the power that normally lies entirely with VCs, putting it into our hands and our network’s hands.
This is the future — another way power is shifting from centralized to decentralized.

Sanjay Priyadarshi
3 years ago
A 19-year-old dropped out of college to build a $2,300,000,000 company in 2 years.
His success was unforeseeable.
2014 saw Facebook's $2.3 billion purchase of Oculus VR.
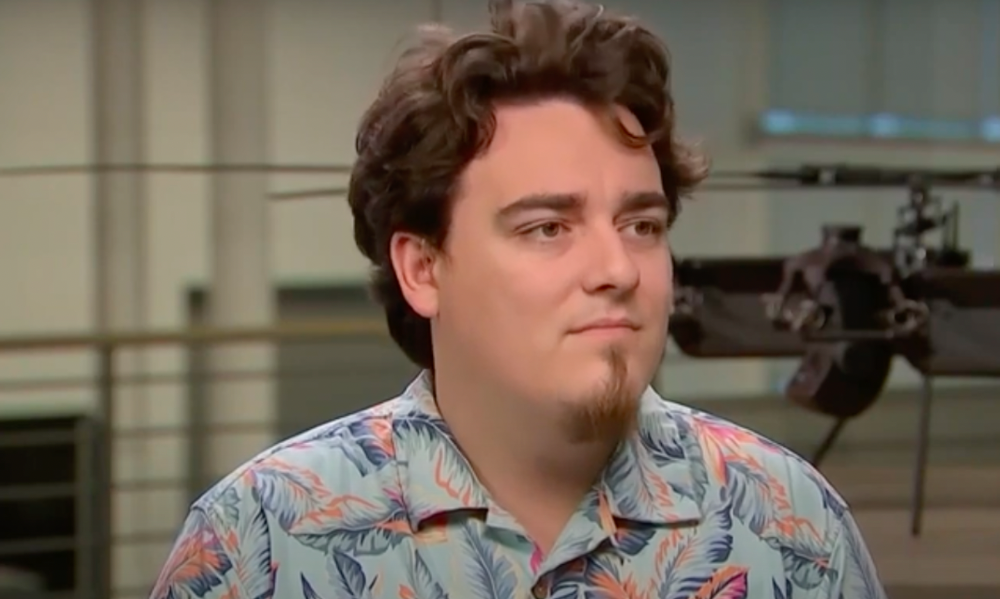
19-year-old Palmer Luckey founded Oculus. He quit journalism school. His parents worried about his college dropout.
Facebook bought Oculus VR in less than 2 years.
Palmer Luckey started Anduril Industries. Palmer has raised $385 million with Anduril.
The Oculus journey began in a trailer
Palmer Luckey, 19, owned the trailer.
Luckey had his trailer customized. The trailer had all six of Luckey's screens. In the trailer's remaining area, Luckey conducted hardware tests.
At 16, he became obsessed with virtual reality. Virtual reality was rare at the time.
Luckey didn't know about VR when he started.
Previously, he liked "portabilizing" mods. Hacking ancient game consoles into handhelds.
In his city, fewer portabilizers actively traded.
Luckey started "ModRetro" for other portabilizers. Luckey was exposed to VR headsets online.
Luckey:
“Man, ModRetro days were the best.”
Palmer Luckey used VR headsets for three years. His design had 50 prototypes.
Luckey used to work at the Long Beach Sailing Center for minimum salary, servicing diesel engines and cleaning boats.
Luckey worked in a USC Institute for Creative Technologies mixed reality lab in July 2011. (ICT).
Luckey cleaned the lab, did reports, and helped other students with VR projects.
Luckey's lab job was dull.
Luckey chose to work in the lab because he wanted to engage with like-minded folks.
By 2012, Luckey had a prototype he hoped to share globally. He made cheaper headsets than others.
Luckey wanted to sell an easy-to-assemble virtual reality kit on Kickstarter.
He realized he needed a corporation to do these sales legally. He started looking for names. "Virtuality," "virtual," and "VR" are all taken.
Hence, Oculus.
If Luckey sold a hundred prototypes, he would be thrilled since it would boost his future possibilities.
John Carmack, legendary game designer
Carmack has liked sci-fi and fantasy since infancy.
Carmack loved imagining intricate gaming worlds.
His interest in programming and computer science grew with age.
He liked graphics. He liked how mismatching 0 and 1 might create new colors and visuals.
Carmack played computer games as a teen. He created Shadowforge in high school.
He founded Id software in 1991. When Carmack created id software, console games were the best-sellers.
Old computer games have weak graphics. John Carmack and id software developed "adaptive tile refresh."
This technique smoothed PC game scrolling. id software launched 3-D, Quake, and Doom using "adaptive tile refresh."
These games made John Carmack a gaming star. Later, he sold Id software to ZeniMax Media.
How Palmer Luckey met Carmack
In 2011, Carmack was thinking a lot about 3-D space and virtual reality.
He was underwhelmed by the greatest HMD on the market. Because of their flimsiness and latency.
His disappointment was partly due to the view (FOV). Best HMD had 40-degree field of view.
Poor. The best VR headset is useless with a 40-degree FOV.
Carmack intended to show the press Doom 3 in VR. He explored VR headsets and internet groups for this reason.
Carmack identified a VR enthusiast in the comments section of "LEEP on the Cheap." "PalmerTech" was the name.
Carmack approached PalmerTech about his prototype. He told Luckey about his VR demos, so he wanted to see his prototype.
Carmack got a Rift prototype. Here's his May 17 tweet.
John Carmack tweeted an evaluation of the Luckey prototype.
Dan Newell, a Valve engineer, and Mick Hocking, a Sony senior director, pre-ordered Oculus Rift prototypes with Carmack's help.
Everyone praised Luckey after Carmack demoed Rift.
Palmer Luckey received a job offer from Sony.
It was a full-time position at Sony Computer Europe.
He would run Sony’s R&D lab.
The salary would be $70k.
Who is Brendan Iribe?
Brendan Iribe started early with Startups. In 2004, he and Mike Antonov founded Scaleform.
Scaleform created high-performance middleware. This package allows 3D Flash games.
In 2011, Iribe sold Scaleform to Autodesk for $36 million.
How Brendan Iribe discovered Palmer Luckey.
Brendan Iribe's friend Laurent Scallie.
Laurent told Iribe about a potential opportunity.
Laurent promised Iribe VR will work this time. Laurent introduced Iribe to Luckey.
Iribe was doubtful after hearing Laurent's statements. He doubted Laurent's VR claims.
But since Laurent took the name John Carmack, Iribe thought he should look at Luckey Innovation. Iribe was hooked on virtual reality after reading Palmer Luckey stories.
He asked Scallie about Palmer Luckey.
Iribe convinced Luckey to start Oculus with him
First meeting between Palmer Luckey and Iribe.
The Iribe team wanted Luckey to feel comfortable.
Iribe sought to convince Luckey that launching a company was easy. Iribe told Luckey anyone could start a business.
Luckey told Iribe's staff he was homeschooled from childhood. Luckey took self-study courses.
Luckey had planned to launch a Kickstarter campaign and sell kits for his prototype. Many companies offered him jobs, nevertheless.
He's considering Sony's offer.
Iribe advised Luckey to stay independent and not join a firm. Iribe asked Luckey how he could raise his child better. No one sees your baby like you do?
Iribe's team pushed Luckey to stay independent and establish a software ecosystem around his device.
After conversing with Iribe, Luckey rejected every job offer and merger option.
Iribe convinced Luckey to provide an SDK for Oculus developers.
After a few months. Brendan Iribe co-founded Oculus with Palmer Luckey. Luckey trusted Iribe and his crew, so he started a corporation with him.
Crowdfunding
Brendan Iribe and Palmer Luckey launched a Kickstarter.
Gabe Newell endorsed Palmer's Kickstarter video.
Gabe Newell wants folks to trust Palmer Luckey since he's doing something fascinating and answering tough questions.
Mark Bolas and David Helgason backed Palmer Luckey's VR Kickstarter video.
Luckey introduced Oculus Rift during the Kickstarter campaign. He introduced virtual reality during press conferences.
Oculus' Kickstarter effort was a success. Palmer Luckey felt he could raise $250,000.
Oculus raised $2.4 million through Kickstarter. Palmer Luckey's virtual reality vision was well-received.
Mark Zuckerberg's Oculus discovery
Brendan Iribe and Palmer Luckey hired the right personnel after a successful Kickstarter campaign.
Oculus needs a lot of money for engineers and hardware. They needed investors' money.
Series A raised $16M.
Next, Andreessen Horowitz partner Brain Cho approached Iribe.
Cho told Iribe that Andreessen Horowitz could invest in Oculus Series B if the company solved motion sickness.
Mark Andreessen was Iribe's dream client.
Marc Andreessen and his partners gave Oculus $75 million.
Andreessen introduced Iribe to Zukerberg. Iribe and Zukerberg discussed the future of games and virtual reality by phone.
Facebook's Oculus demo
Iribe showed Zuckerberg Oculus.
Mark was hooked after using Oculus. The headset impressed him.
The whole Facebook crew who saw the demo said only one thing.
“Holy Crap!”
This surprised them all.
Mark Zuckerberg was impressed by the team's response. Mark Zuckerberg met the Oculus team five days after the demo.
First meeting Palmer Luckey.
Palmer Luckey is one of Mark's biggest supporters and loves Facebook.
Oculus Acquisition
Zuckerberg wanted Oculus.
Brendan Iribe had requested for $4 billion, but Mark wasn't interested.
Facebook bought Oculus for $2.3 billion after months of drama.
After selling his company, how does Palmer view money?
Palmer loves the freedom money gives him. Money frees him from small worries.
Money has allowed him to pursue things he wouldn't have otherwise.
“If I didn’t have money I wouldn’t have a collection of vintage military vehicles…You can have nice hobbies that keep you relaxed when you have money.”
He didn't start Oculus to generate money. His virtual reality passion spanned years.
He didn't have to lie about how virtual reality will transform everything until he needed funding.
The company's success was an unexpected bonus. He was merely passionate about a good cause.
After Oculus' $2.3 billion exit, what changed?
Palmer didn't mind being rich. He did similar things.
After Facebook bought Oculus, he moved to Silicon Valley and lived in a 12-person shared house due to high rents.
Palmer might have afforded a big mansion, but he prefers stability and doing things because he wants to, not because he has to.
“Taco Bell is never tasted so good as when you know you could afford to never eat taco bell again.”
Palmer's leadership shifted.
Palmer changed his leadership after selling Oculus.
When he launched his second company, he couldn't work on his passions.
“When you start a tech company you do it because you want to work on a technology, that is why you are interested in that space in the first place. As the company has grown, he has realized that if he is still doing optical design in the company it’s because he is being negligent about the hiring process.”
Once his startup grows, the founder's responsibilities shift. He must recruit better firm managers.
Recruiting talented people becomes the top priority. The founder must convince others of their influence.
A book that helped me write this:
The History of the Future: Oculus, Facebook, and the Revolution That Swept Virtual Reality — Blake Harris
*This post is a summary. Read the full article here.

Andy Raskin
3 years ago
I've Never Seen a Sales Deck This Good

It’s Zuora’s, and it’s brilliant. Here’s why.
My friend Tim got a sales position at a Series-C software company that garnered $60 million from A-list investors. He's one of the best salespeople I know, yet he emailed me after starting to struggle.
Tim has a few modest clients. “Big companies ignore my pitch”. Tim said.
I love helping teams write the strategic story that drives sales, marketing, and fundraising. Tim and I had lunch at Amber India on Market Street to evaluate his deck.
After a feast, I asked Tim when prospects tune out.
He said, “several slides in”.
Intent on maximizing dining ROI, Tim went back to the buffet for seconds. When he returned, I pulled out my laptop and launched into a Powerpoint presentation.
“What’s this?” Tim asked.
“This,” I said, “is the greatest sales deck I have ever seen.”
Five Essentials of a Great Sales Narrative
I showed Tim a sales slide from IPO-bound Zuora, which sells a SaaS platform for subscription billing. Zuora supports recurring payments (e.g. enterprise software).
Ex-Zuora salesman gave me the deck, saying it helped him close his largest business. (I don't know anyone who works at Zuora.) After reading this, a few Zuora employees contacted me.)
Tim abandoned his naan in a pool of goat curry and took notes while we discussed the Zuora deck.
We remarked how well the deck led prospects through five elements:
(The ex-Zuora salesperson begged me not to release the Zuora deck publicly.) All of the images below originate from Zuora's website and SlideShare channel.)
#1. Name a Significant Change in the World
Don't start a sales presentation with mentioning your product, headquarters, investors, clients, or yourself.
Name the world shift that raises enormous stakes and urgency for your prospect.
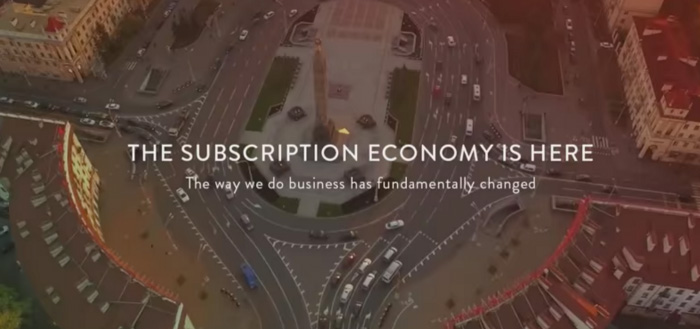
Every Zuora sales deck begins with this slide:
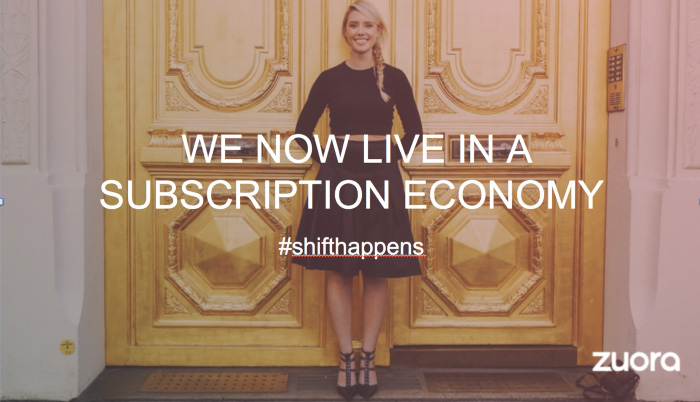
Zuora coined the term subscription economy to describe a new market where purchasers prefer regular service payments over outright purchases. Zuora then shows a slide with the change's history.
Most pitch recommendation advises starting with the problem. When you claim a problem, you put prospects on the defensive. They may be unaware of or uncomfortable admitting the situation.
When you highlight a global trend, prospects open up about how it affects them, worries them, and where they see opportunity. You capture their interest. Robert McKee says:
…what attracts human attention is change. …if the temperature around you changes, if the phone rings — that gets your attention. The way in which a story begins is a starting event that creates a moment of change.
#2. Show There’ll Be Winners and Losers
Loss aversion affects all prospects. They avoid a loss by sticking with the status quo rather than risking a gain by changing.
To fight loss aversion, show how the change will create winners and losers. You must show both
that if the prospect can adjust to the modification you mentioned, the outcome will probably be quite favorable; and
That failing to do so is likely to have an unacceptable negative impact on the prospect's future
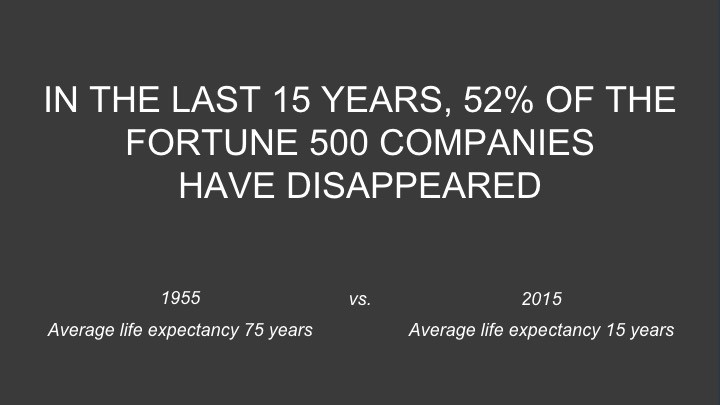
Zuora shows a mass extinction among Fortune 500 firms.
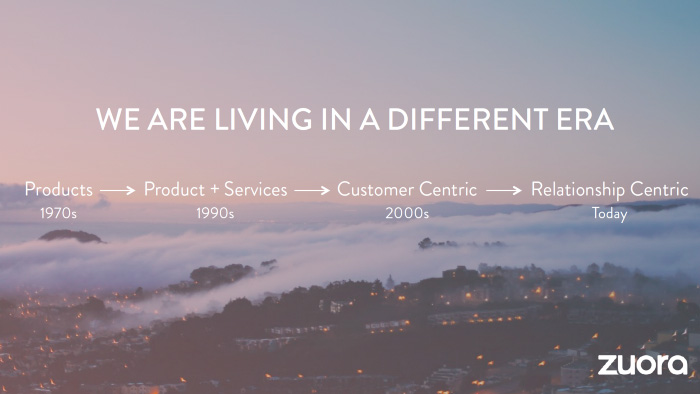
…and then showing how the “winners” have shifted from product ownership to subscription services. Those include upstarts…
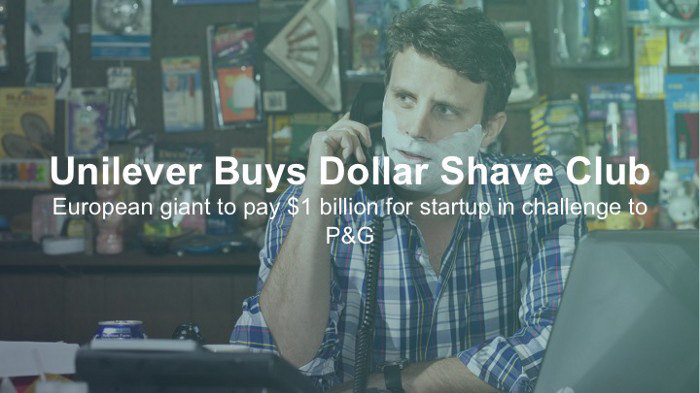
…as well as rejuvenated incumbents:
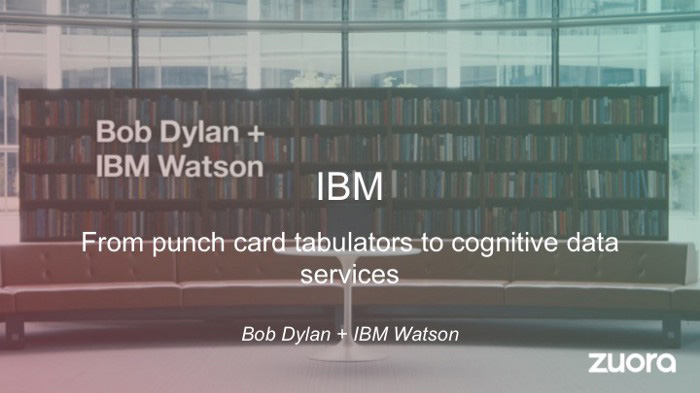
To illustrate, Zuora asks:

Winners utilize Zuora's subscription service models.
#3. Tease the Promised Land
It's tempting to get into product or service details now. Resist that urge.
Prospects won't understand why product/service details are crucial if you introduce them too soon, therefore they'll tune out.
Instead, providing a teaser image of the happily-ever-after your product/service will assist the prospect reach.
Your Promised Land should be appealing and hard to achieve without support. Otherwise, why does your company exist?
Zuora shows this Promised Land slide after explaining that the subscription economy will have winners and losers.
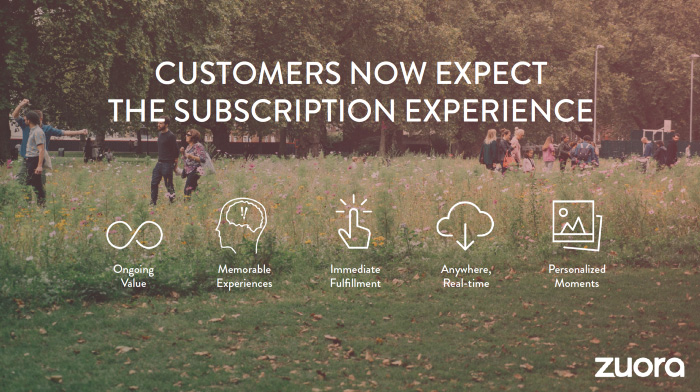
Not your product or service, but a new future state.
(I asked my friend Tim to describe his Promised Land, and he answered, "You’ll have the most innovative platform for ____." Nope: the Promised Land isn't possessing your technology, but living with it.)
Your Promised Land helps prospects market your solution to coworkers after your sales meeting. Your coworkers will wonder what you do without you. Your prospects are more likely to provide a persuasive answer with a captivating Promised Land.
#4. Present Features as “Mystic Gifts” for Overcoming Difficulties on the Road to the Promised Land
Successful sales decks follow the same format as epic films and fairy tales. Obi Wan gives Luke a lightsaber to help him destroy the Empire. You're Gandalf, helping Frodo destroy the ring. Your prospect is Cinderella, and you're her fairy godmother.
Position your product or service's skills as mystical gifts to aid your main character (prospect) achieve the Promised Land.
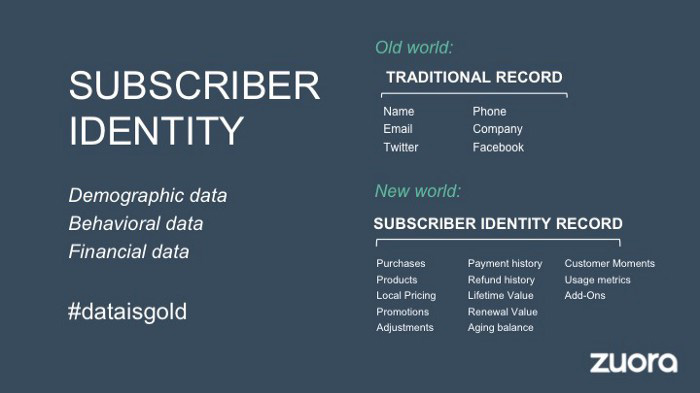
Zuora's client record slide is shown above. Without context, even the most technical prospect would be bored.
Positioned in the context of shifting from an “old” to a “new world”, it's the foundation for a compelling conversation with prospects—technical and otherwise—about why traditional solutions can't reach the Promised Land.
#5. Show Proof That You Can Make the Story True.
In this sense, you're promising possibilities that if they follow you, they'll reach the Promised Land.
The journey to the Promised Land is by definition rocky, so prospects are right to be cautious. The final part of the pitch is proof that you can make the story come true.
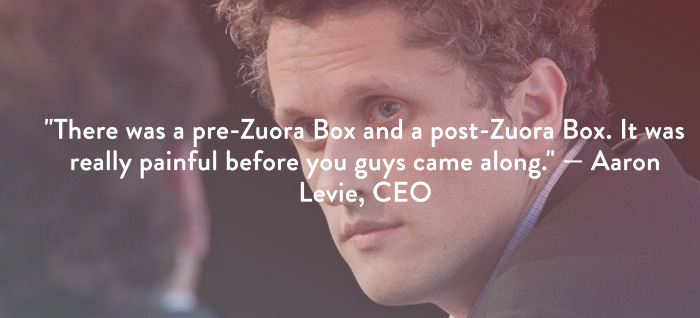
The most convincing proof is a success story about how you assisted someone comparable to the prospect. Zuora's sales people use a deck of customer success stories, but this one gets the essence.
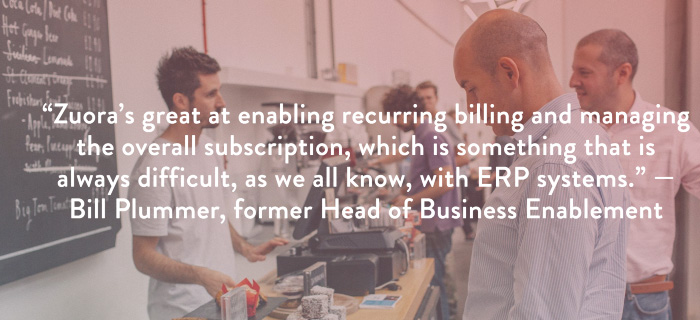
I particularly appreciate this one from an NCR exec (a Zuora customer), which relates more strongly to Zuora's Promised Land:
Not enough successful customers? Product demos are the next best evidence, but features should always be presented in the context of helping a prospect achieve the Promised Land.
The best sales narrative is one that is told by everyone.
Success rarely comes from a fantastic deck alone. To be effective, salespeople need an organization-wide story about change, Promised Land, and Magic Gifts.
Zuora exemplifies this. If you hear a Zuora executive, including CEO Tien Tzuo, talk, you'll likely hear about the subscription economy and its winners and losers. This is the theme of the company's marketing communications, campaigns, and vision statement.
According to the ex-Zuora salesperson, company-wide story alignment made him successful.
The Zuora marketing folks ran campaigns and branding around this shift to the subscription economy, and [CEO] Tien [Tzuo] talked it up all the time. All of that was like air cover for my in-person sales ground attack. By the time I arrived, prospects were already convinced they had to act. It was the closest thing I’ve ever experienced to sales nirvana.
The largest deal ever
Tim contacted me three weeks after our lunch to tell me that prospects at large organizations were responding well to his new deck, which we modeled on Zuora's framework. First, prospects revealed their obstacles more quickly. The new pitch engages CFOs and other top gatekeepers better, he said.
A week later, Tim emailed that he'd signed his company's biggest agreement.
Next week, we’re headed back to Amber India to celebrate.
You might also like

Isaiah McCall
3 years ago
There is a new global currency emerging, but it is not bitcoin.
America should avoid BRICS

Vladimir Putin has watched videos of Muammar Gaddafi's CIA-backed demise.
Gaddafi...
Thief.
Did you know Gaddafi wanted a gold-backed dinar for Africa? Because he considered our global financial system was a Ponzi scheme, he wanted to discontinue trading oil in US dollars.
Or, Gaddafi's Libya enjoyed Africa's highest quality of living before becoming freed. Pictured:

Vladimir Putin is a nasty guy, but he had his reasons for not mentioning NATO assisting Ukraine in resisting US imperialism. Nobody tells you. Sure.
The US dollar's corruption post-2008, debasement by quantitative easing, and lack of value are key factors. BRICS will replace the dollar.
BRICS aren't bricks.
Economy-related.
Brazil, Russia, India, China, and South Africa have cooperated for 14 years to fight U.S. hegemony with a new international currency: BRICS.
BRICS is mostly comical. Now. Saudi Arabia, the second-largest oil hegemon, wants to join.
So what?
The New World Currency is BRICS
Russia was kicked out of G8 for its aggressiveness in Crimea in 2014.
It's now G7.
No biggie, said Putin, he said, and I quote, “Bon appetite.”
He was prepared. China, India, and Brazil lead the New World Order.
Together, they constitute 40% of the world's population and, according to the IMF, 50% of the world's GDP by 2030.
Here’s what the BRICS president Marcos Prado Troyjo had to say earlier this year about no longer needing the US dollar: “We have implemented the mechanism of mutual settlements in rubles and rupees, and there is no need for our countries to use the dollar in mutual settlements. And today a similar mechanism of mutual settlements in rubles and yuan is being developed by China.”
Ick. That's D.C. and NYC warmongers licking their chops for WW3 nasty.
Here's a lovely picture of BRICS to relax you:
If Saudi Arabia joins BRICS, as President Mohammed Bin Salman has expressed interest, a majority of the Middle East will have joined forces to construct a new world order not based on the US currency.
I'm not sure of the new acronym.
SBRICSS? CIRBSS? CRIBSS?
The Reason America Is Harvesting What It Sowed
BRICS began 14 years ago.
14 years ago, what occurred? Concentrate. It involved CDOs, bad subprime mortgages, and Wall Street quants crunching numbers.
2008 recession
When two nations trade, they do so in US dollars, not Euros or gold.
What happened when 2008, an avoidable crisis caused by US banks' cupidity and ignorance, what happened?
Everyone WORLDWIDE felt the pain.
Mostly due to corporate America's avarice.
This should have been a warning that China and Russia had enough of our bs. Like when France sent a battleship to America after Nixon scrapped the gold standard. The US was warned to shape up or be dethroned (or at least try).

Nixon improved in 1971. Kinda. Invented PetroDollar.
Another BS system that unfairly favors America and possibly pushed Russia, China, and Saudi Arabia into BRICS.
The PetroDollar forces oil-exporting nations to trade in US dollars and invest in US Treasury bonds. Brilliant. Genius evil.
Our misdeeds are:
In conflicts that are not its concern, the USA uses the global reserve currency as a weapon.
Targeted nations abandon the dollar, and rightfully so, as do nations that depend on them for trade in vital resources.
The dollar's position as the world's reserve currency is in jeopardy, which could have disastrous economic effects.
Although we have actually sown our own doom, we appear astonished. According to the Bible, whomever sows to appease his sinful nature will reap destruction from that nature whereas whoever sows to appease the Spirit will reap eternal life from the Spirit.
Americans, even our leaders, lack caution and delayed pleasure. When our unsustainable systems fail, we double down. Bailouts of the banks in 2008 were myopic, puerile, and another nail in America's hegemony.
America has screwed everyone.
We're unpopular.
The BRICS's future
It's happened before.
Saddam Hussein sold oil in Euros in 2000, and the US invaded Iraq a month later. The media has devalued the word conspiracy. The Iraq conspiracy.
There were no WMDs, but NYT journalists like Judy Miller drove Americans into a warmongering frenzy because Saddam would ruin the PetroDollar. Does anyone recall that this war spawned ISIS?
I think America has done good for the world. You can make a convincing case that we're many people's villain.
Learn more in Confessions of an Economic Hitman, The Devil's Chessboard, or Tyranny of the Federal Reserve. Or ignore it. That's easier.
We, America, should extend an olive branch, ask for forgiveness, and learn from our faults, as the Tao Te Ching advises. Unlikely. Our population is apathetic and stupid, and our government is corrupt.
Argentina, Iran, Egypt, and Turkey have also indicated interest in joining BRICS. They're also considering making it gold-backed, making it a new world reserve currency.
You should pay attention.
Thanks for reading!

William Anderson
4 years ago
When My Remote Leadership Skills Took Off
4 Ways To Manage Remote Teams & Employees
The wheels hit the ground as I landed in Rochester.
Our six-person satellite office was now part of my team.
Their manager only reported to me the day before, but I had my ticket booked ahead of time.
I had managed remote employees before but this was different. Engineers dialed into headquarters for every meeting.
So when I learned about the org chart change, I knew a strong first impression would set the tone for everything else.
I was either their boss, or their boss's boss, and I needed them to know I was committed.
Managing a fleet of satellite freelancers or multiple offices requires treating others as more than just a face behind a screen.
You must comprehend each remote team member's perspective and daily interactions.
The good news is that you can start using these techniques right now to better understand and elevate virtual team members.
1. Make Visits To Other Offices
If budgeted, visit and work from offices where teams and employees report to you. Only by living alongside them can one truly comprehend their problems with communication and other aspects of modern life.
2. Have Others Come to You
• Having remote, distributed, or satellite employees and teams visit headquarters every quarter or semi-quarterly allows the main office culture to rub off on them.
When remote team members visit, more people get to meet them, which builds empathy.
If you can't afford to fly everyone, at least bring remote managers or leaders. Hopefully they can resurrect some culture.
3. Weekly Work From Home
No home office policy?
Make one.
WFH is a team-building, problem-solving, and office-viewing opportunity.
For dial-in meetings, I started working from home on occasion.
It also taught me which teams “forget” or “skip” calls.
As a remote team member, you experience all the issues first hand.
This isn't as accurate for understanding teams in other offices, but it can be done at any time.
4. Increase Contact Even If It’s Just To Chat
Don't underestimate office banter.
Sometimes it's about bonding and trust, other times it's about business.
If you get all this information in real-time, please forward it.
Even if nothing critical is happening, call remote team members to check in and chat.
I guarantee that building relationships and rapport will increase both their job satisfaction and yours.

Datt Panchal
3 years ago
The Learning Habit
The Habit of Learning implies constantly learning something new. One daily habit will make you successful. Learning will help you succeed.
Most successful people continually learn. Success requires this behavior. Daily learning.
Success loves books. Books offer expert advice. Everything is online today. Most books are online, so you can skip the library. You must download it and study for 15-30 minutes daily. This habit changes your thinking.

Typical Successful People
Warren Buffett reads 500 pages of corporate reports and five newspapers for five to six hours each day.
Each year, Bill Gates reads 50 books.
Every two weeks, Mark Zuckerberg reads at least one book.
According to his brother, Elon Musk studied two books a day as a child and taught himself engineering and rocket design.
Learning & Making Money Online
No worries if you can't afford books. Everything is online. YouTube, free online courses, etc.
How can you create this behavior in yourself?
1) Consider what you want to know
Before learning, know what's most important. So, move together.
Set a goal and schedule learning.
After deciding what you want to study, create a goal and plan learning time.
3) GATHER RESOURCES
Get the most out of your learning resources. Online or offline.