


More on Technology

Jussi Luukkonen, MBA
3 years ago
Is Apple Secretly Building A Disruptive Tsunami?
A TECHNICAL THOUGHT
The IT giant is seeding the digital Great Renaissance.

Recently, technology has been dull.
We're still fascinated by processing speeds. Wearables are no longer an engineer's dream.
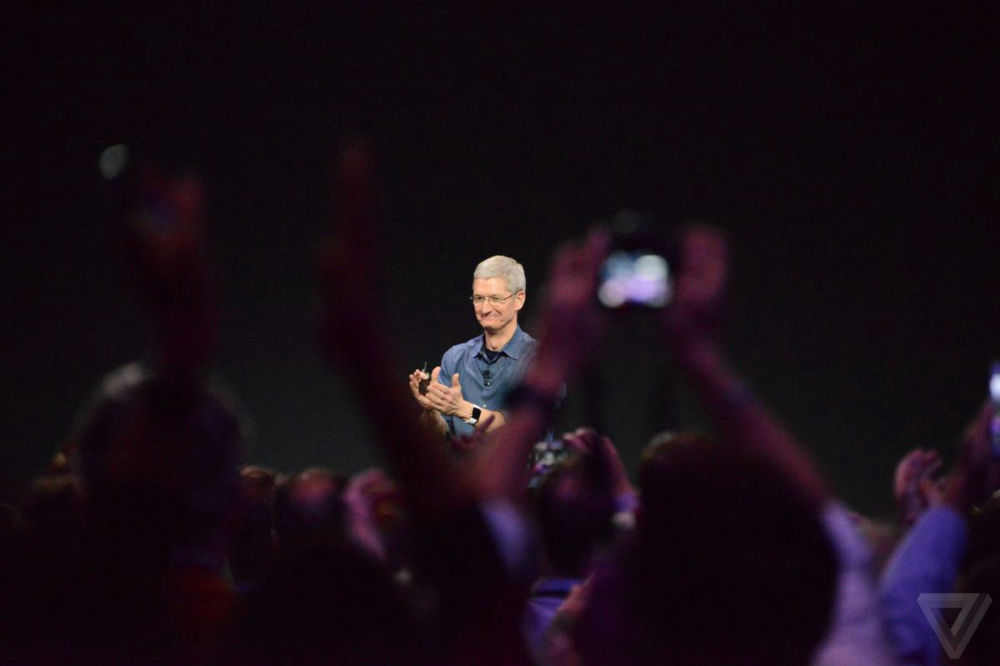
Apple has been quiet and avoided huge announcements. Slowness speaks something. Everything in the spaceship HQ seems to be turning slowly, unlike competitors around buzzwords.
Is this a sign of the impending storm?
Metas stock has fallen while Google milks dumb people. Microsoft steals money from corporations and annexes platforms like Linkedin.
Just surface bubbles?
Is Apple, one of the technology continents, pushing against all others to create a paradigm shift?
The fundamental human right to privacy
Apple's unusual remarks emphasize privacy. They incorporate it into their business models and judgments.
Apple believes privacy is a human right. There are no compromises.
This makes it hard for other participants to gain Apple's ecosystem's efficiencies.
Other players without hardware platforms lose.
Apple delivers new kidneys without rejection, unlike other software vendors. Nothing compromises your privacy.
Corporate citizenship will become more popular.
Apples have full coffers. They've started using that flow to better communities, which is great.
Apple's $2.5B home investment is one example. Google and Facebook are building or proposing to build workforce housing.
Apple's funding helps marginalized populations in more than 25 California counties, not just Apple employees.
Is this a trend, and does Apple keep giving back? Hope so.
I'm not cynical enough to suspect these investments have malicious motives.
The last frontier is the environment.
Climate change is a battle-to-win.
Long-term winners will be companies that protect the environment, turning climate change dystopia into sustainable growth.
Apple has been quietly changing its supply chain to be carbon-neutral by 2030.
“Apple is dedicated to protecting the planet we all share with solutions that are supporting the communities where we work.” Lisa Jackson, Apple’s vice president of environment.
Apple's $4.7 billion Green Bond investment will produce 1.2 gigawatts of green energy for the corporation and US communities. Apple invests $2.2 billion in Europe's green energy. In the Philippines, Thailand, Nigeria, Vietnam, Colombia, Israel, and South Africa, solar installations are helping communities obtain sustainable energy.
Apple is already carbon neutral today for its global corporate operations, and this new commitment means that by 2030, every Apple device sold will have net zero climate impact. -Apple.
Apple invests in green energy and forests to reduce its paper footprint in China and the US. Apple and the Conservation Fund are safeguarding 36,000 acres of US working forest, according to GreenBiz.
Apple's packaging paper is recycled or from sustainably managed forests.
What matters is the scale.
$1 billion is a rounding error for Apple.
These small investments originate from a tree with deep, spreading roots.
Apple's genes are anchored in building the finest products possible to improve consumers' lives.
I felt it when I switched to my iPhone while waiting for a train and had to pack my Macbook. iOS 16 dictation makes writing more enjoyable. Small change boosts productivity. Smooth transition from laptop to small screen and dictation.
Apples' tiny, well-planned steps have great growth potential for all consumers in everything they do.
There is clearly disruption, but it doesn't have to be violent
Digital channels, methods, and technologies have globalized human consciousness. One person's responsibility affects many.
Apple gives us tools to be privately connected. These technologies foster creativity, innovation, fulfillment, and safety.
Apple has invented a mountain of technologies, services, and channels to assist us adapt to the good future or combat evil forces who cynically aim to control us and ruin the environment and communities. Apple has quietly disrupted sectors for decades.
Google, Microsoft, and Meta, among others, should ride this wave. It's a tsunami, but it doesn't have to be devastating if we care, share, and cooperate with political decision-makers and community leaders worldwide.
A fresh Renaissance
Renaissance geniuses Michelangelo and Da Vinci. Different but seeing something no one else could yet see. Both were talented in many areas and could discover art in science and science in art.
These geniuses exemplified a period that changed humanity for the better. They created, used, and applied new, valuable things. It lives on.
Apple is a digital genius orchard. Wozniak and Jobs offered us fertile ground for the digital renaissance. We'll build on their legacy.
We may put our seeds there and see them bloom despite corporate greed and political ignorance.
I think the coming tsunami will illuminate our planet like the Renaissance.

Stephen Moore
3 years ago
A Meta-Reversal: Zuckerberg's $71 Billion Loss
The company's epidemic gains are gone.
Mark Zuckerberg was in line behind Jeff Bezos and Bill Gates less than two years ago. His wealth soared to $142 billion. Facebook's shares reached $382 in September 2021.
What comes next is either the start of something truly innovative or the beginning of an epic rise and fall story.
In order to start over (and avoid Facebook's PR issues), he renamed the firm Meta. Along with the new logo, he announced a turn into unexplored territory, the Metaverse, as the next chapter for the internet after mobile. Or, Zuckerberg believed Facebook's death was near, so he decided to build a bigger, better, cooler ship. Then we saw his vision (read: dystopian nightmare) in a polished demo that showed Zuckerberg in a luxury home and on a spaceship with aliens. Initially, it looked entertaining. A problem was obvious, though. He might claim this was the future and show us using the Metaverse for business, play, and more, but when I took off my headset, I'd realize none of it was genuine.
The stock price is almost as low as January 2019, when Facebook was dealing with the aftermath of the Cambridge Analytica crisis.
Irony surrounded the technology's aim. Zuckerberg says the Metaverse connects people. Despite some potential uses, this is another step away from physical touch with people. Metaverse worlds can cause melancholy, addiction, and mental illness. But forget all the cool stuff you can't afford. (It may be too expensive online, too.)
Metaverse activity slowed for a while. In early February 2022, we got an earnings call update. Not good. Reality Labs lost $10 billion on Oculus and Zuckerberg's Metaverse. Zuckerberg expects losses to rise. Meta's value dropped 20% in 11 minutes after markets closed.
It was a sign of things to come.
The corporation has failed to create interest in Metaverse, and there is evidence the public has lost interest. Meta still relies on Facebook's ad revenue machine, which is also struggling. In July, the company announced a decrease in revenue and missed practically all its forecasts, ending a decade of exceptional growth and relentless revenue. They blamed a dismal advertising demand climate, and Apple's monitoring changes smashed Meta's ad model. Throw in whistleblowers, leaked data revealing the firm knows Instagram negatively affects teens' mental health, the current Capital Hill probe, and the fact TikTok is eating its breakfast, lunch, and dinner, and 2022 might be the corporation's worst year ever.
After a rocky start, tech saw unprecedented growth during the pandemic. It was a tech bubble and then some.
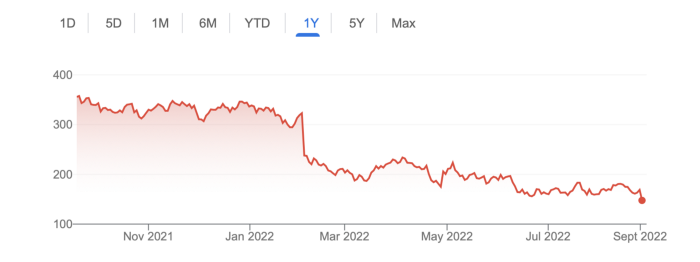
The gains reversed after the dust settled and stock markets adjusted. Meta's year-to-date decline is 60%. Apple Inc is down 14%, Amazon is down 26%, and Alphabet Inc is down 29%. At the time of writing, Facebook's stock price is almost as low as January 2019, when the Cambridge Analytica scandal broke. Zuckerberg owns 350 million Meta shares. This drop costs him $71 billion.
The company's problems are growing, and solutions won't be easy.
Facebook's period of unabated expansion and exorbitant ad revenue is ended, and the company's impact is dwindling as it continues to be the program that only your parents use. Because of the decreased ad spending and stagnant user growth, Zuckerberg will have less time to create his vision for the Metaverse because of the declining stock value and decreasing ad spending.
Instagram is progressively dying in its attempt to resemble TikTok, alienating its user base and further driving users away from Meta-products.
And now that the corporation has shifted its focus to the Metaverse, it is clear that, in its eagerness to improve its image, it fired the launch gun too early. You're fighting a lost battle when you announce an idea and then claim it won't happen for 10-15 years. When the idea is still years away from becoming a reality, the public is already starting to lose interest.
So, as I questioned earlier, is it the beginning of a technological revolution that will take this firm to stratospheric growth and success, or are we witnessing the end of Meta and Zuckerberg himself?

Shawn Mordecai
3 years ago
The Apple iPhone 14 Pill is Easier to Swallow

Is iPhone's Dynamic Island invention or a marketing ploy?
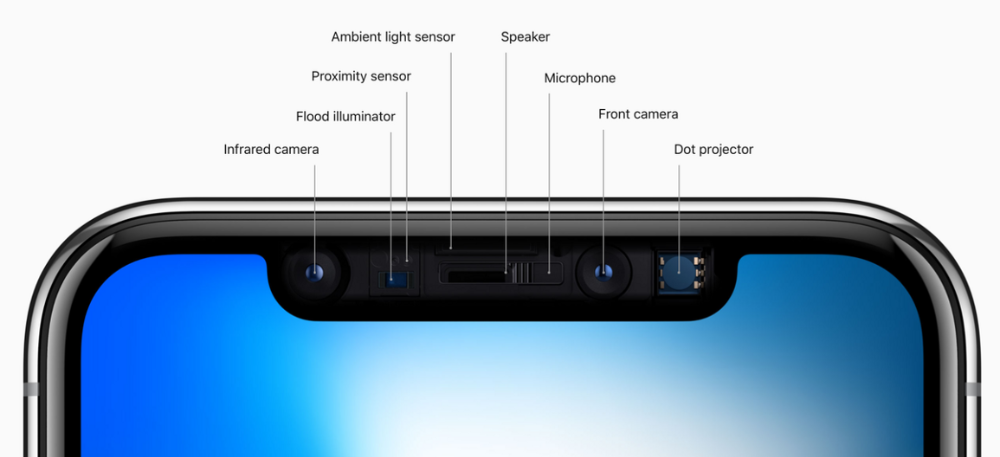
First of all, why the notch?
When Apple debuted the iPhone X with the notch, some were surprised, confused, and amused by the goof. Let the Brits keep the new meaning of top-notch.
Apple removed the bottom home button to enhance screen space. The tides couldn't overtake part of the top. This section contained sensors, a speaker, a microphone, and cameras for facial recognition. A town resisted Apple's new iPhone design.
From iPhone X to 13, the notch has gotten smaller. We expected this as technology and engineering progressed, but we hated the notch. Apple approved. They attached it to their other gadgets.
Apple accepted, owned, and ran with the iPhone notch, it has become iconic (or infamous); and that’s intentional.
The Island Where Apple Is
Apple needs to separate itself, but they know how to do it well. The iPhone 14 Pro finally has us oohing and aahing. Life-changing, not just higher pixel density or longer battery.
Dynamic Island turned a visual differentiation into great usefulness, which may not be life-changing. Apple always welcomes the controversy, whether it's $700 for iMac wheels, no charging block with a new phone, or removing the headphone jack.
Apple knows its customers will be loyal, even if they're irritated. Their odd design choices often cause controversy. It's calculated that people blog, review, and criticize Apple's products. We accept what works for them.
While the competition zigs, Apple zags. Sometimes they zag too hard and smash into a wall, but we talk about it anyways, and that’s great publicity for them.
Getting Dependent on the drug
The notch became a crop. Dynamic Island's design is helpful, intuitive, elegant, and useful. It increases iPhone usability, productivity (slightly), and joy. No longer unsightly.
The medication helps with multitasking. It's a compact version of the iPhone's Live Activities lock screen function. Dynamic Island enhances apps and activities with visual effects and animations whether you engage with it or not. As you use the pill, its usefulness lessens. It lowers user notifications and consolidates them with live and permanent feeds, delivering quick app statuses. It uses the black pixels on the iPhone 14's display, which looked like a poor haircut.

The pill may be a gimmick to entice customers to use more Apple products and services. Apps may promote to their users like a live billboard.
Be prepared to get a huge dose of Dynamic Island’s “pill” like you never had before with the notch. It might become so satisfying and addicting to use, that every interaction with it will become habit-forming, and you’re going to forget that it ever existed.
WARNING: A Few Potential Side Effects
Vision blurred Dynamic Island's proximity to the front-facing camera may leave behind grease that blurs photos. Before taking a selfie, wipe the camera clean.
Strained thumb To fully use Dynamic Island, extend your thumb's reach 6.7 inches beyond your typical, comfortable range.
Happiness, contentment The Dynamic Island may enhance Endorphins and Dopamine. Multitasking, interactions, animations, and haptic feedback make you want to use this function again and again.
Motion-sickness Dynamic Island's motions and effects may make some people dizzy. If you can disable animations, you can avoid motion sickness.
I'm not a doctor, therefore they aren't established adverse effects.
Does Dynamic Island Include Multiple Tasks?
Dynamic Islands is a placebo for multitasking. Apple might have compromised on iPhone multitasking. It won't make you super productive, but it's a step up.
iPhone is primarily for personal use, like watching videos, messaging friends, sending money to friends, calling friends about the money you were supposed to send them, taking 50 photos of the same leaf, investing in crypto, driving for Uber because you lost all your money investing in crypto, listening to music and hailing an Uber from a deserted crop field because while you were driving for Uber your passenger stole your car and left you stranded, so you used Apple’s new SOS satellite feature to message your friend, who still didn’t receive their money, to hail you an Uber; now you owe them more money… karma?
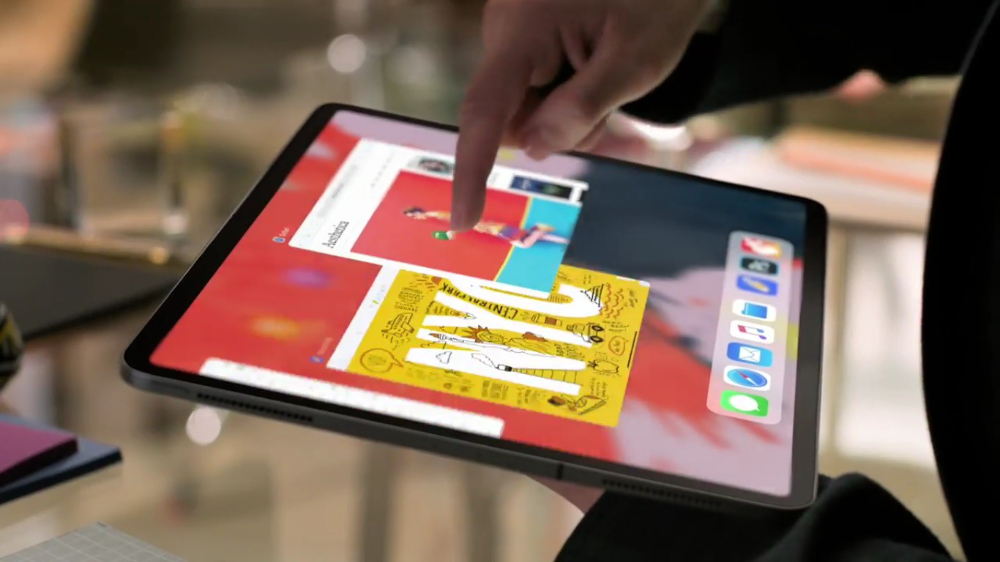
We won't be watching videos on iPhones while perusing 10,000-row spreadsheets anytime soon. True multitasking and productivity aren't priorities for Apple's iPhone. Apple doesn't to preserve the iPhone's experience. Like why there's no iPad calculator. Apple doesn't want iPad users to do math, but isn't essential for productivity?
Digressing.
Apple will block certain functions so you must buy and use their gadgets and services, immersing yourself in their ecosystem and dictating how to use their goods.
Dynamic Island is a poor man’s multi-task for iPhone, and that’s fine it works for most iPhone users. For substantial productivity Apple prefers you to get an iPad or a MacBook. That’s part of the reason for restrictive features on certain Apple devices, but sometimes it’s based on principles to preserve the integrity of the product, according to Apple’s definition.
Is Apple using deception?
Dynamic Island may be distracting you from a design decision. The answer is kind of. Elegant distraction
When you pull down a smartphone webpage to refresh it or minimize an app, you get seamless animations. It's not simply because it appears better; it's due to iPhone and smartphone processing speeds. Such limits reduce the system's response to your activity, slowing the experience. Designers and developers use animations and effects to distract us from the time lag (most of the time) and sometimes because it looks cooler and smoother.
Dynamic Island makes apps more useable and interactive. It shows system states visually. Turn signal audio and visual cues, voice assistance, physical and digital haptic feedbacks, heads-up displays, fuel and battery level gauges, and gear shift indicators helped us overcome vehicle design problems.
Dynamic Island is a wonderfully delightful (and temporary) solution to a design “problem” until Apple or other companies can figure out a way to sink the cameras under the smartphone screen.
Apple Has Returned to Being an Innovative & Exciting Company
Now Apple's products are exciting. Next, bring back real Apple events, not pre-recorded demos.
Dynamic Island integrates hardware and software. What will this new tech do? How would this affect device use? Or is it just hype?
Dynamic Island may be an insignificant improvement to the iPhone, but it sure is promising for the future of bridging the human and computer interaction gap.
You might also like

Enrique Dans
2 years ago
What happens when those without morals enter the economic world?
I apologize if this sounds basic, but throughout my career, I've always been clear that a company's activities are shaped by its founder(s)' morality.
I consider Palantir, owned by PayPal founder Peter Thiel, evil. He got $5 billion tax-free by hacking a statute to help middle-class savings. That may appear clever, but I think it demonstrates a shocking lack of solidarity with society. As a result of this and other things he has said and done, I early on dismissed Peter Thiel as someone who could contribute anything positive to society, and events soon proved me right: we are talking about someone who clearly considers himself above everyone else and who does not hesitate to set up a company, Palantir, to exploit the data of the little people and sell it to the highest bidder, whoever that is and whatever the consequences.
The German courts have confirmed my warnings concerning Palantir. The problem is that politicians love its surveillance tools because they think knowing more about their constituents gives them power. These are ideal for dictatorships who want to snoop on their populace. Hence, Silicon Valley's triumphalist dialectic has seduced many governments at many levels and collected massive volumes of data to hold forever.
Dangerous company. There are many more. My analysis of the moral principles that disclose company management changed my opinion of Facebook, now Meta, and anyone with a modicum of interest might deduce when that happened, a discovery that leaves you dumbfounded. TikTok was easy because its lack of morality was revealed early when I saw the videos it encouraged minors to post and the repercussions of sharing them through its content recommendation algorithm. When you see something like this, nothing can convince you that the firm can change its morals and become good. Nothing. You know the company is awful and will fail. Speak it, announce it, and change it. It's like a fingerprint—unchangeable.
Some of you who read me frequently make its Facebook today jokes when I write about these firms, and that's fine: they're my moral standards, those of an elderly professor with thirty-five years of experience studying corporations and discussing their cases in class, but you don't have to share them. Since I'm writing this and don't have to submit to any editorial review, that's what it is: when you continuously read a person, you have to assume that they have moral standards and that sometimes you'll agree with them and sometimes you won't. Morality accepts hierarchies, nuances, and even obsessions. I know not everyone shares my opinions, but at least I can voice them. One day, one of those firms may sue me (as record companies did some years ago).
Palantir is incredibly harmful. Limit its operations. Like Meta and TikTok, its business strategy is shaped by its founders' immorality. Such a procedure can never be beneficial.

James White
3 years ago
Ray Dalio suggests reading these three books in 2022.
An inspiring reading list
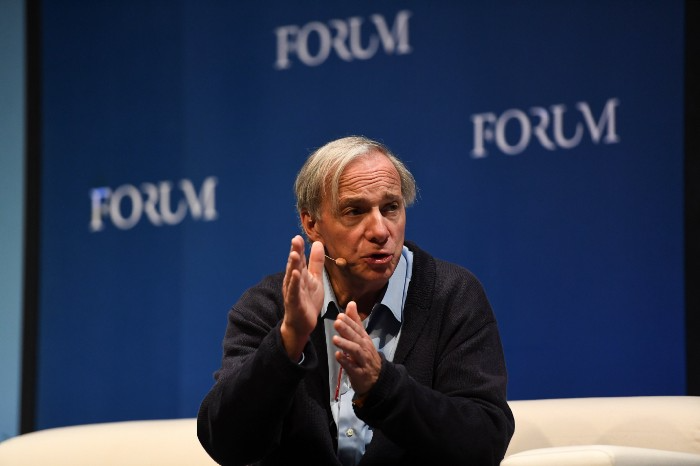
I'm no billionaire or hedge-fund manager. My bank account doesn't have millions. Ray Dalio's love of reading motivates me to think differently.
Here are some books recommended by Ray Dalio. Each influenced me. Hope they'll help you.
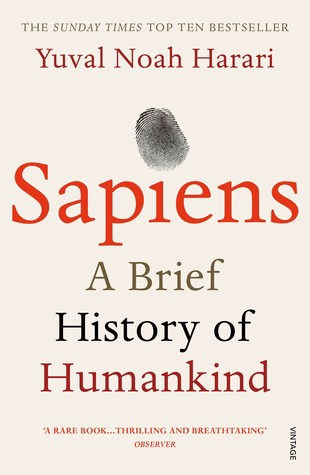
Sapiens by Yuval Noah Harari
Page Count: 512
Rating on Goodreads: 4.39
My favorite nonfiction book.
Sapiens explores human evolution. It explains how Homo Sapiens developed from hunter-gatherers to a dominant species. Amazing!
Sapiens will teach you about human history. Yuval Noah Harari has a follow-up book on human evolution.
My favorite book quotes are:
The tendency for luxuries to turn into necessities and give rise to new obligations is one of history's few unbreakable laws.
Happiness is not dependent on material wealth, physical health, or even community. Instead, it depends on how closely subjective expectations and objective circumstances align.
The romantic comparison between today's industry, which obliterates the environment, and our forefathers, who coexisted well with nature, is unfounded. Homo sapiens held the record among all organisms for eradicating the most plant and animal species even before the Industrial Revolution. The unfortunate distinction of being the most lethal species in the history of life belongs to us.
The Power Of Habit by Charles Duhigg
Page Count: 375
Rating on Goodreads: 4.13
Great book: The Power Of Habit. It illustrates why habits are everything. The book explains how healthier habits can improve your life, career, and society.
The Power of Habit rocks. It's a great book on productivity. Its suggestions helped me build healthier behaviors (and drop bad ones).
Read ASAP!
My favorite book quotes are:
Change may not occur quickly or without difficulty. However, almost any behavior may be changed with enough time and effort.
People who exercise begin to eat better and produce more at work. They are less smokers and are more patient with friends and family. They claim to feel less anxious and use their credit cards less frequently. A fundamental habit that sparks broad change is exercise.
Habits are strong but also delicate. They may develop independently of our awareness or may be purposefully created. They frequently happen without our consent, but they can be altered by changing their constituent pieces. They have a much greater influence on how we live than we realize; in fact, they are so powerful that they cause our brains to adhere to them above all else, including common sense.
Tribe Of Mentors by Tim Ferriss
Page Count: 561
Rating on Goodreads: 4.06
Unusual book structure. It's worth reading if you want to learn from successful people.
The book is Q&A-style. Tim questions everyone. Each chapter features a different person's life-changing advice. In the book, Pressfield, Willink, Grylls, and Ravikant are interviewed.
Amazing!
My favorite book quotes are:
According to one's courage, life can either get smaller or bigger.
Don't engage in actions that you are aware are immoral. The reputation you have with yourself is all that constitutes self-esteem. Always be aware.
People mistakenly believe that focusing means accepting the task at hand. However, that is in no way what it represents. It entails rejecting the numerous other worthwhile suggestions that exist. You must choose wisely. Actually, I'm just as proud of the things we haven't accomplished as I am of what I have. Saying no to 1,000 things is what innovation is.
Olga Kharif
3 years ago
A month after freezing customer withdrawals, Celsius files for bankruptcy.

Alex Mashinsky, CEO of Celsius, speaks at Web Summit 2021 in Lisbon.
Celsius Network filed for Chapter 11 bankruptcy a month after freezing customer withdrawals, joining other crypto casualties.
Celsius took the step to stabilize its business and restructure for all stakeholders. The filing was done in the Southern District of New York.
The company, which amassed more than $20 billion by offering 18% interest on cryptocurrency deposits, paused withdrawals and other functions in mid-June, citing "extreme market conditions."
As the Fed raises interest rates aggressively, it hurts risk sentiment and squeezes funding costs. Voyager Digital Ltd. filed for Chapter 11 bankruptcy this month, and Three Arrows Capital has called in liquidators.
Celsius called the pause "difficult but necessary." Without the halt, "the acceleration of withdrawals would have allowed certain customers to be paid in full while leaving others to wait for Celsius to harvest value from illiquid or longer-term asset deployment activities," it said.
Celsius declined to comment. CEO Alex Mashinsky said the move will strengthen the company's future.
The company wants to keep operating. It's not requesting permission to allow customer withdrawals right now; Chapter 11 will handle customer claims. The filing estimates assets and liabilities between $1 billion and $10 billion.
Celsius is advised by Kirkland & Ellis, Centerview Partners, and Alvarez & Marsal.
Yield-promises
Celsius promised 18% returns on crypto loans. It lent those coins to institutional investors and participated in decentralized-finance apps.
When TerraUSD (UST) and Luna collapsed in May, Celsius pulled its funds from Terra's Anchor Protocol, which offered 20% returns on UST deposits. Recently, another large holding, staked ETH, or stETH, which is tied to Ether, became illiquid and discounted to Ether.
The lender is one of many crypto companies hurt by risky bets in the bear market. Also, Babel halted withdrawals. Voyager Digital filed for bankruptcy, and crypto hedge fund Three Arrows Capital filed for Chapter 15 bankruptcy.
According to blockchain data and tracker Zapper, Celsius repaid all of its debt in Aave, Compound, and MakerDAO last month.
Celsius charged Symbolic Capital Partners Ltd. 2,000 Ether as collateral for a cash loan on June 13. According to company filings, Symbolic was charged 2,545.25 Ether on June 11.
In July 6 filings, it said it reshuffled its board, appointing two new members and firing others.